How to Use a Group Focus in a Bubble.io Repeating Group
In this article, you will learn how to use a Group Focus in a Repeating Group in Bubble.io.

Thomas Couderq
16 Jan 2025


Want to show a dropdown menu or contextual actions inside each row of a Bubble repeating group? You’ve probably realized it's not as straightforward as it sounds. By default, Bubble.io doesn’t allow Group Focus elements to work properly inside a repeating group.
But don’t worry—there’s a simple workaround that lets you place a fully functional Group Focus in a Repeating Group cell. This method works perfectly whether you're building a table, a list, or any repeating UI.
Related tutorials:
→ How to Show a Group Focus on Hover in Bubble.io
→ Bubble.io Group Focus: All You Need to Know
Step 1 – Build Your Repeating Group or Table
If you haven’t already, start by creating your Repeating Group. This will serve as your main layout for displaying rows of data.
In this example, I’m using a pre-built table component from Nocodable Components, but the technique works with any repeating group.
✅ This guide works with both Repeating Groups and Tables built in Bubble.

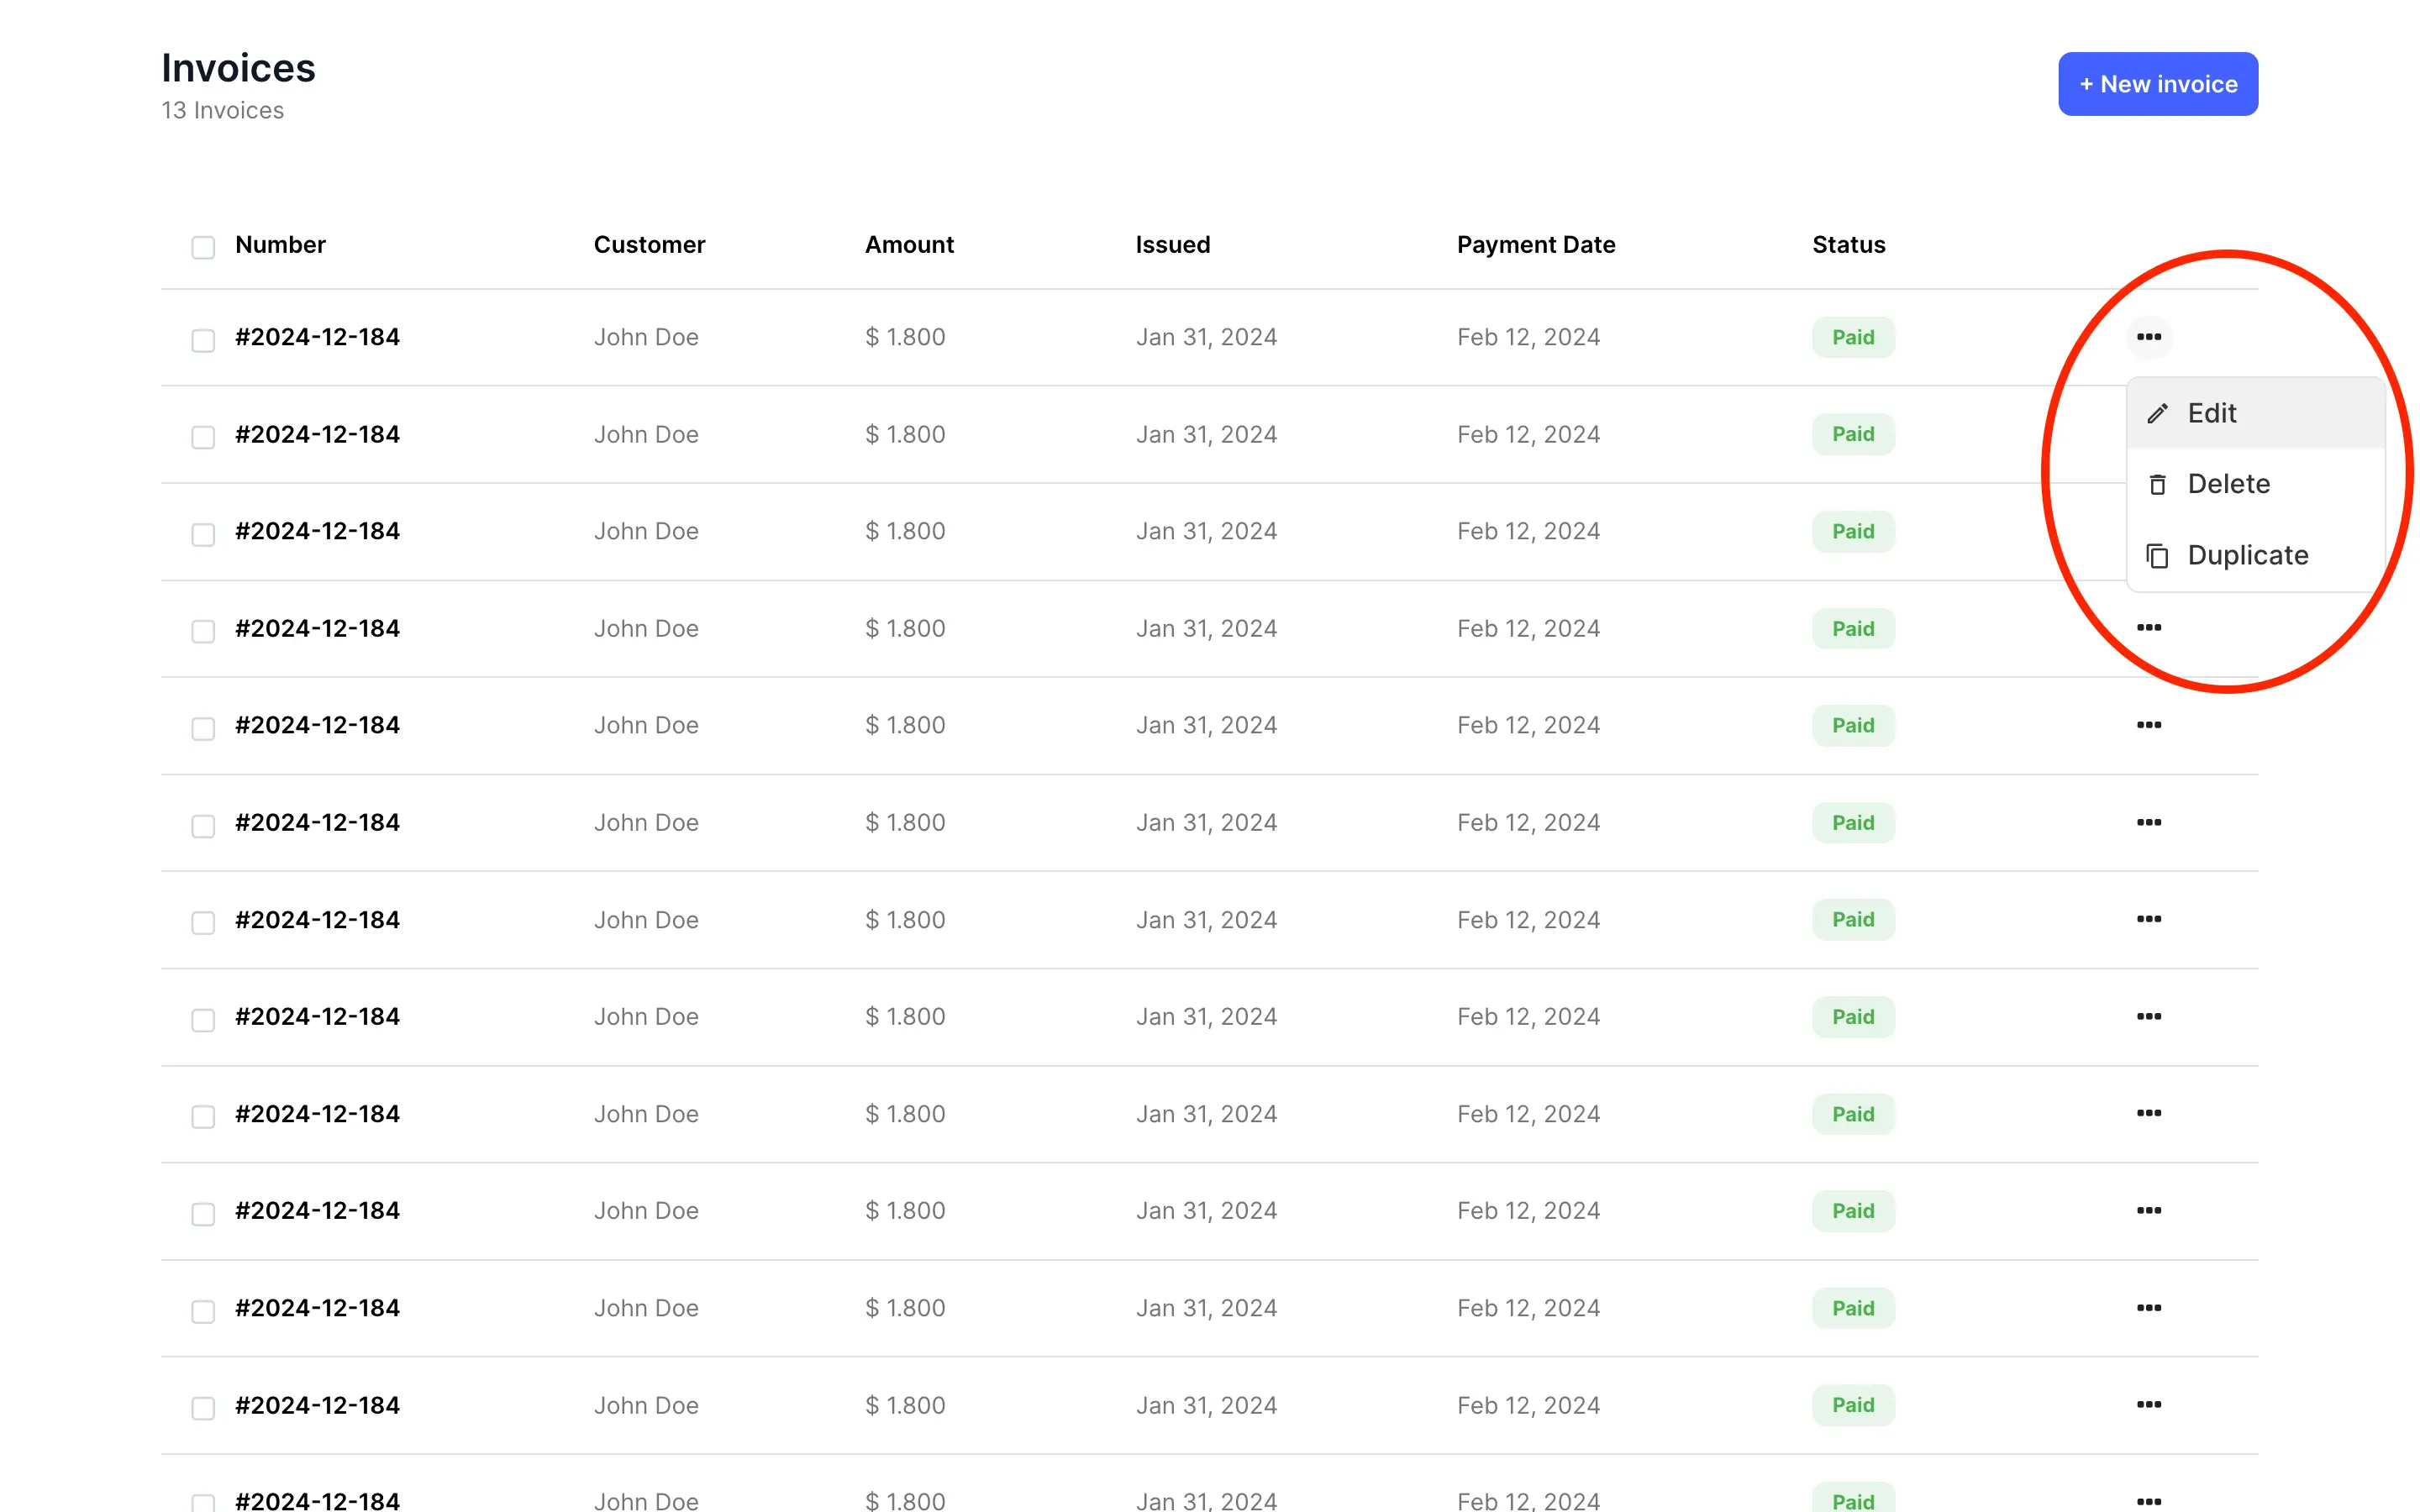
As you can see, this is pretty standard table, nothing too extravagant.
Note that this tutorial will work the exact same way for both Repeating Groups and Tables.
Step 2 – Create a Reusable Group Focus Menu
This is the key step: Bubble doesn't allow toggling a Group Focus from within a repeating group cell directly. The workaround is to build your Group Focus inside a Reusable Element.
Here’s how:
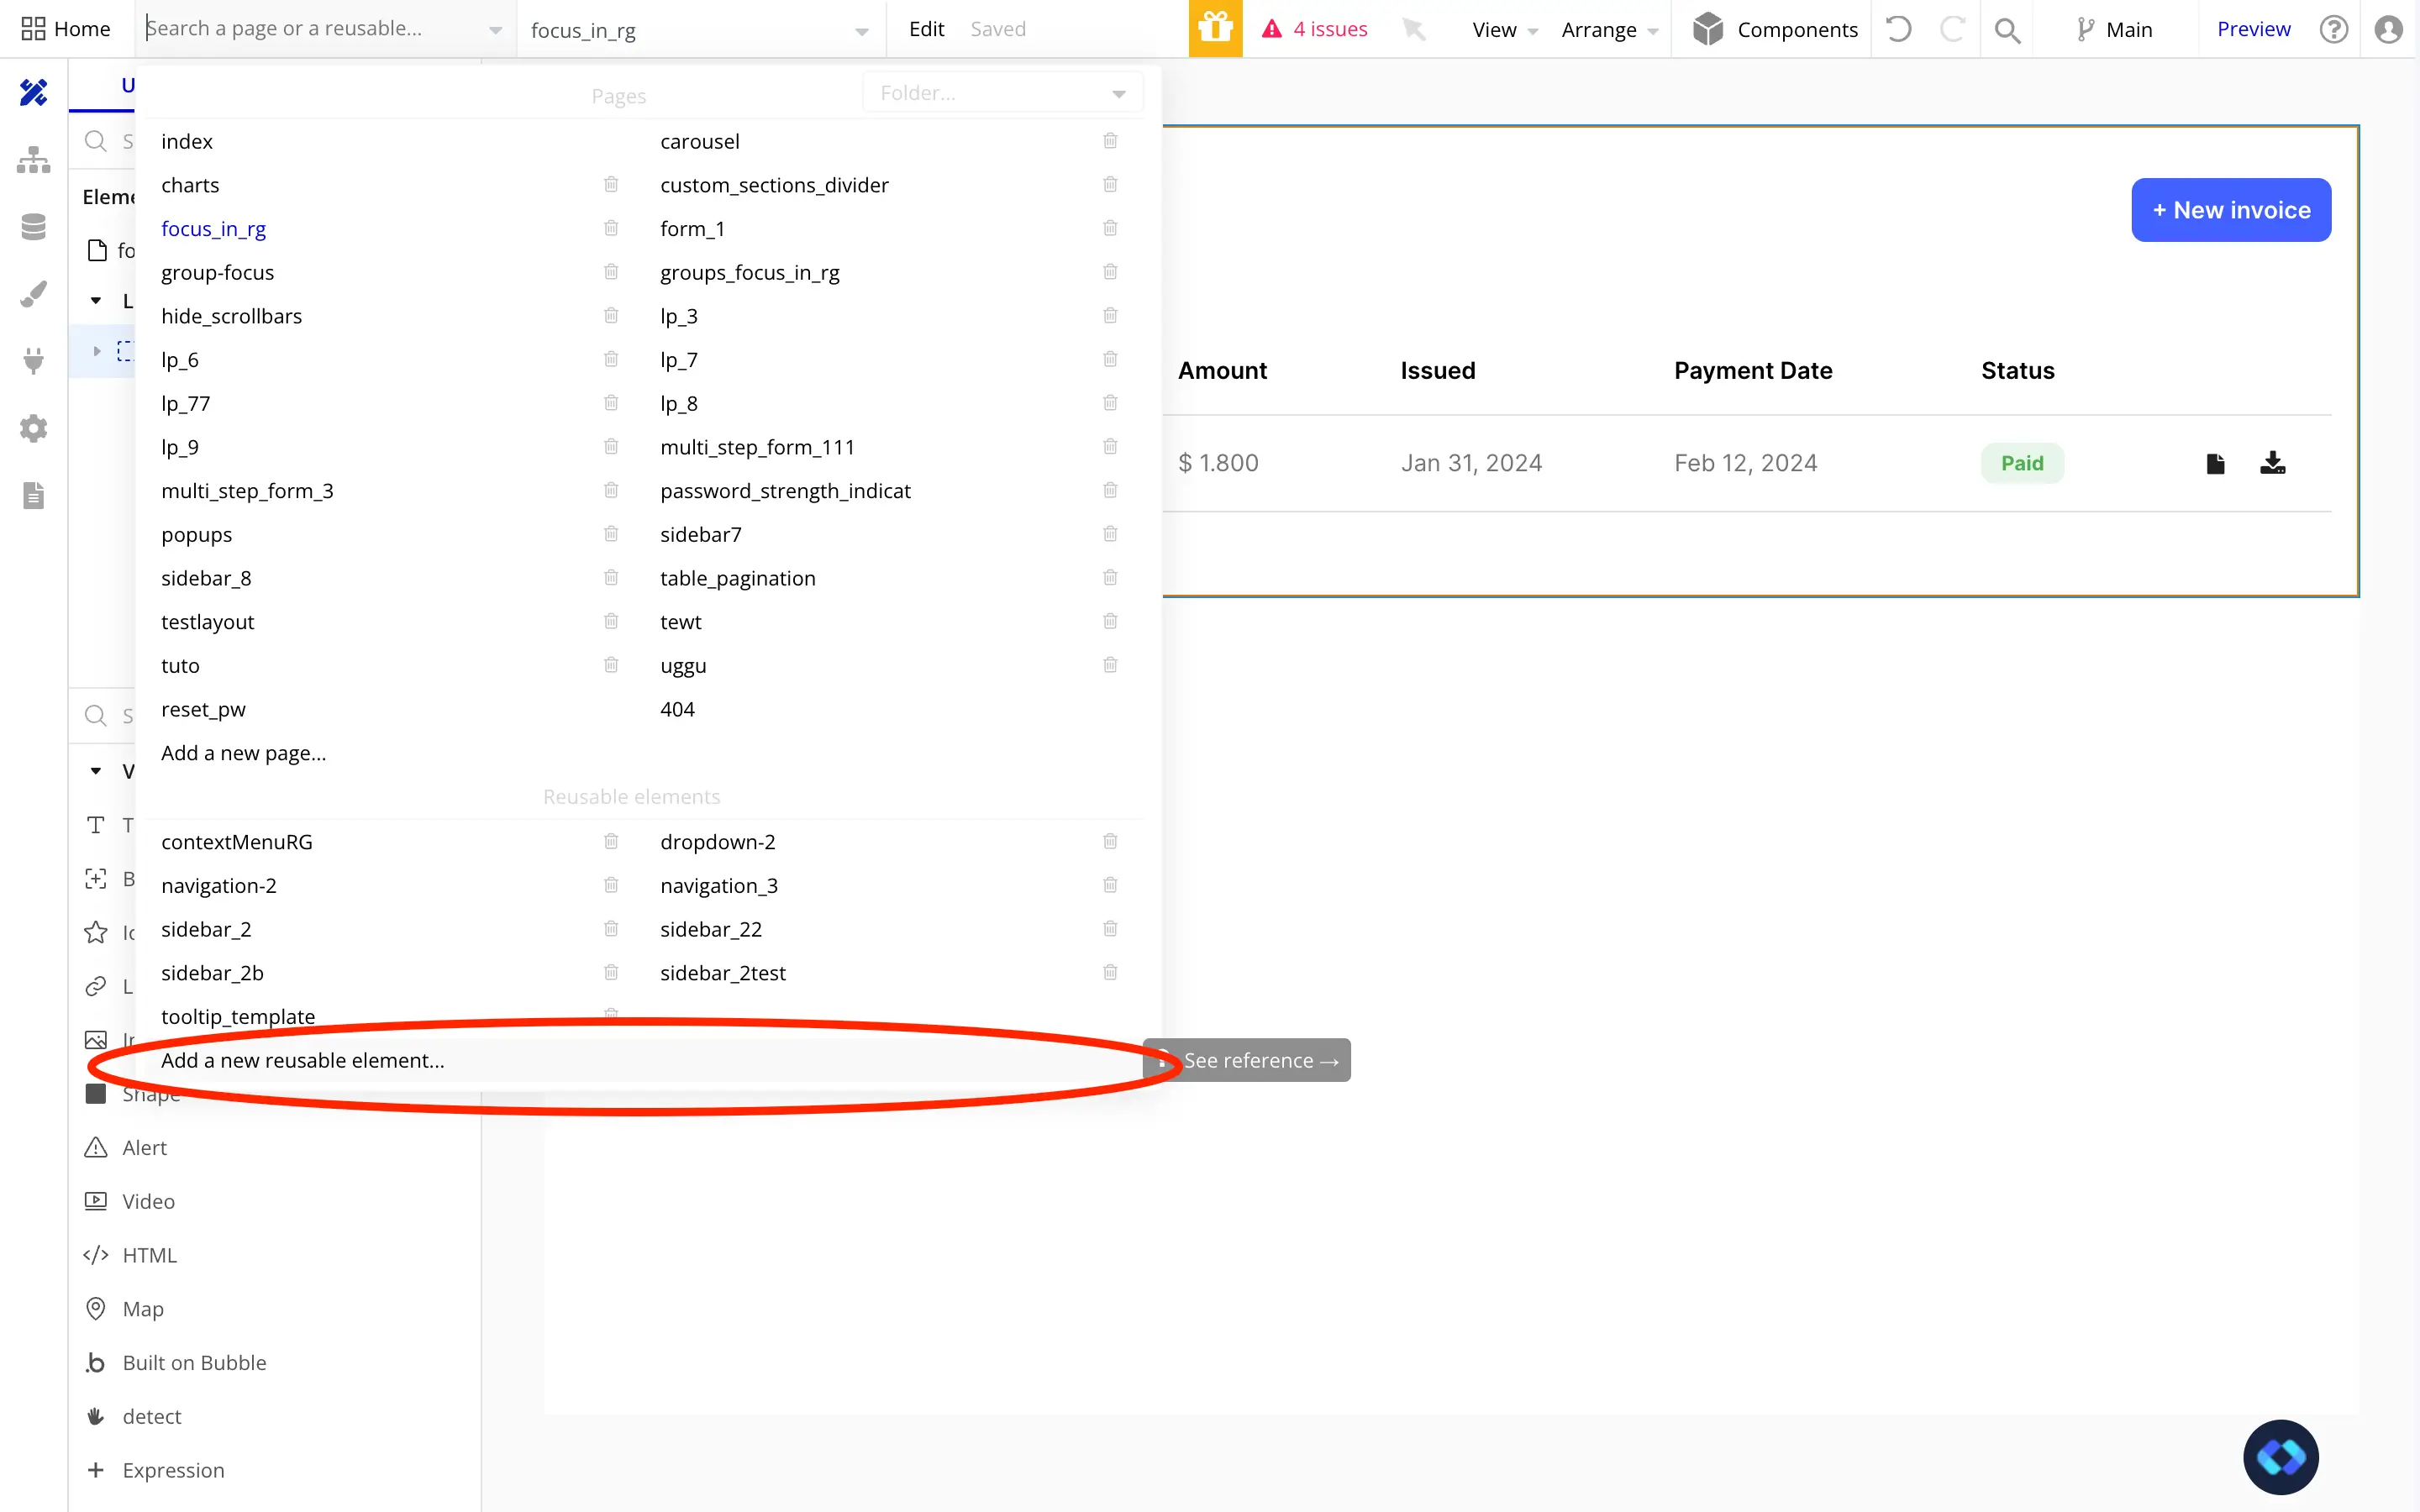
Create a new Reusable Element.
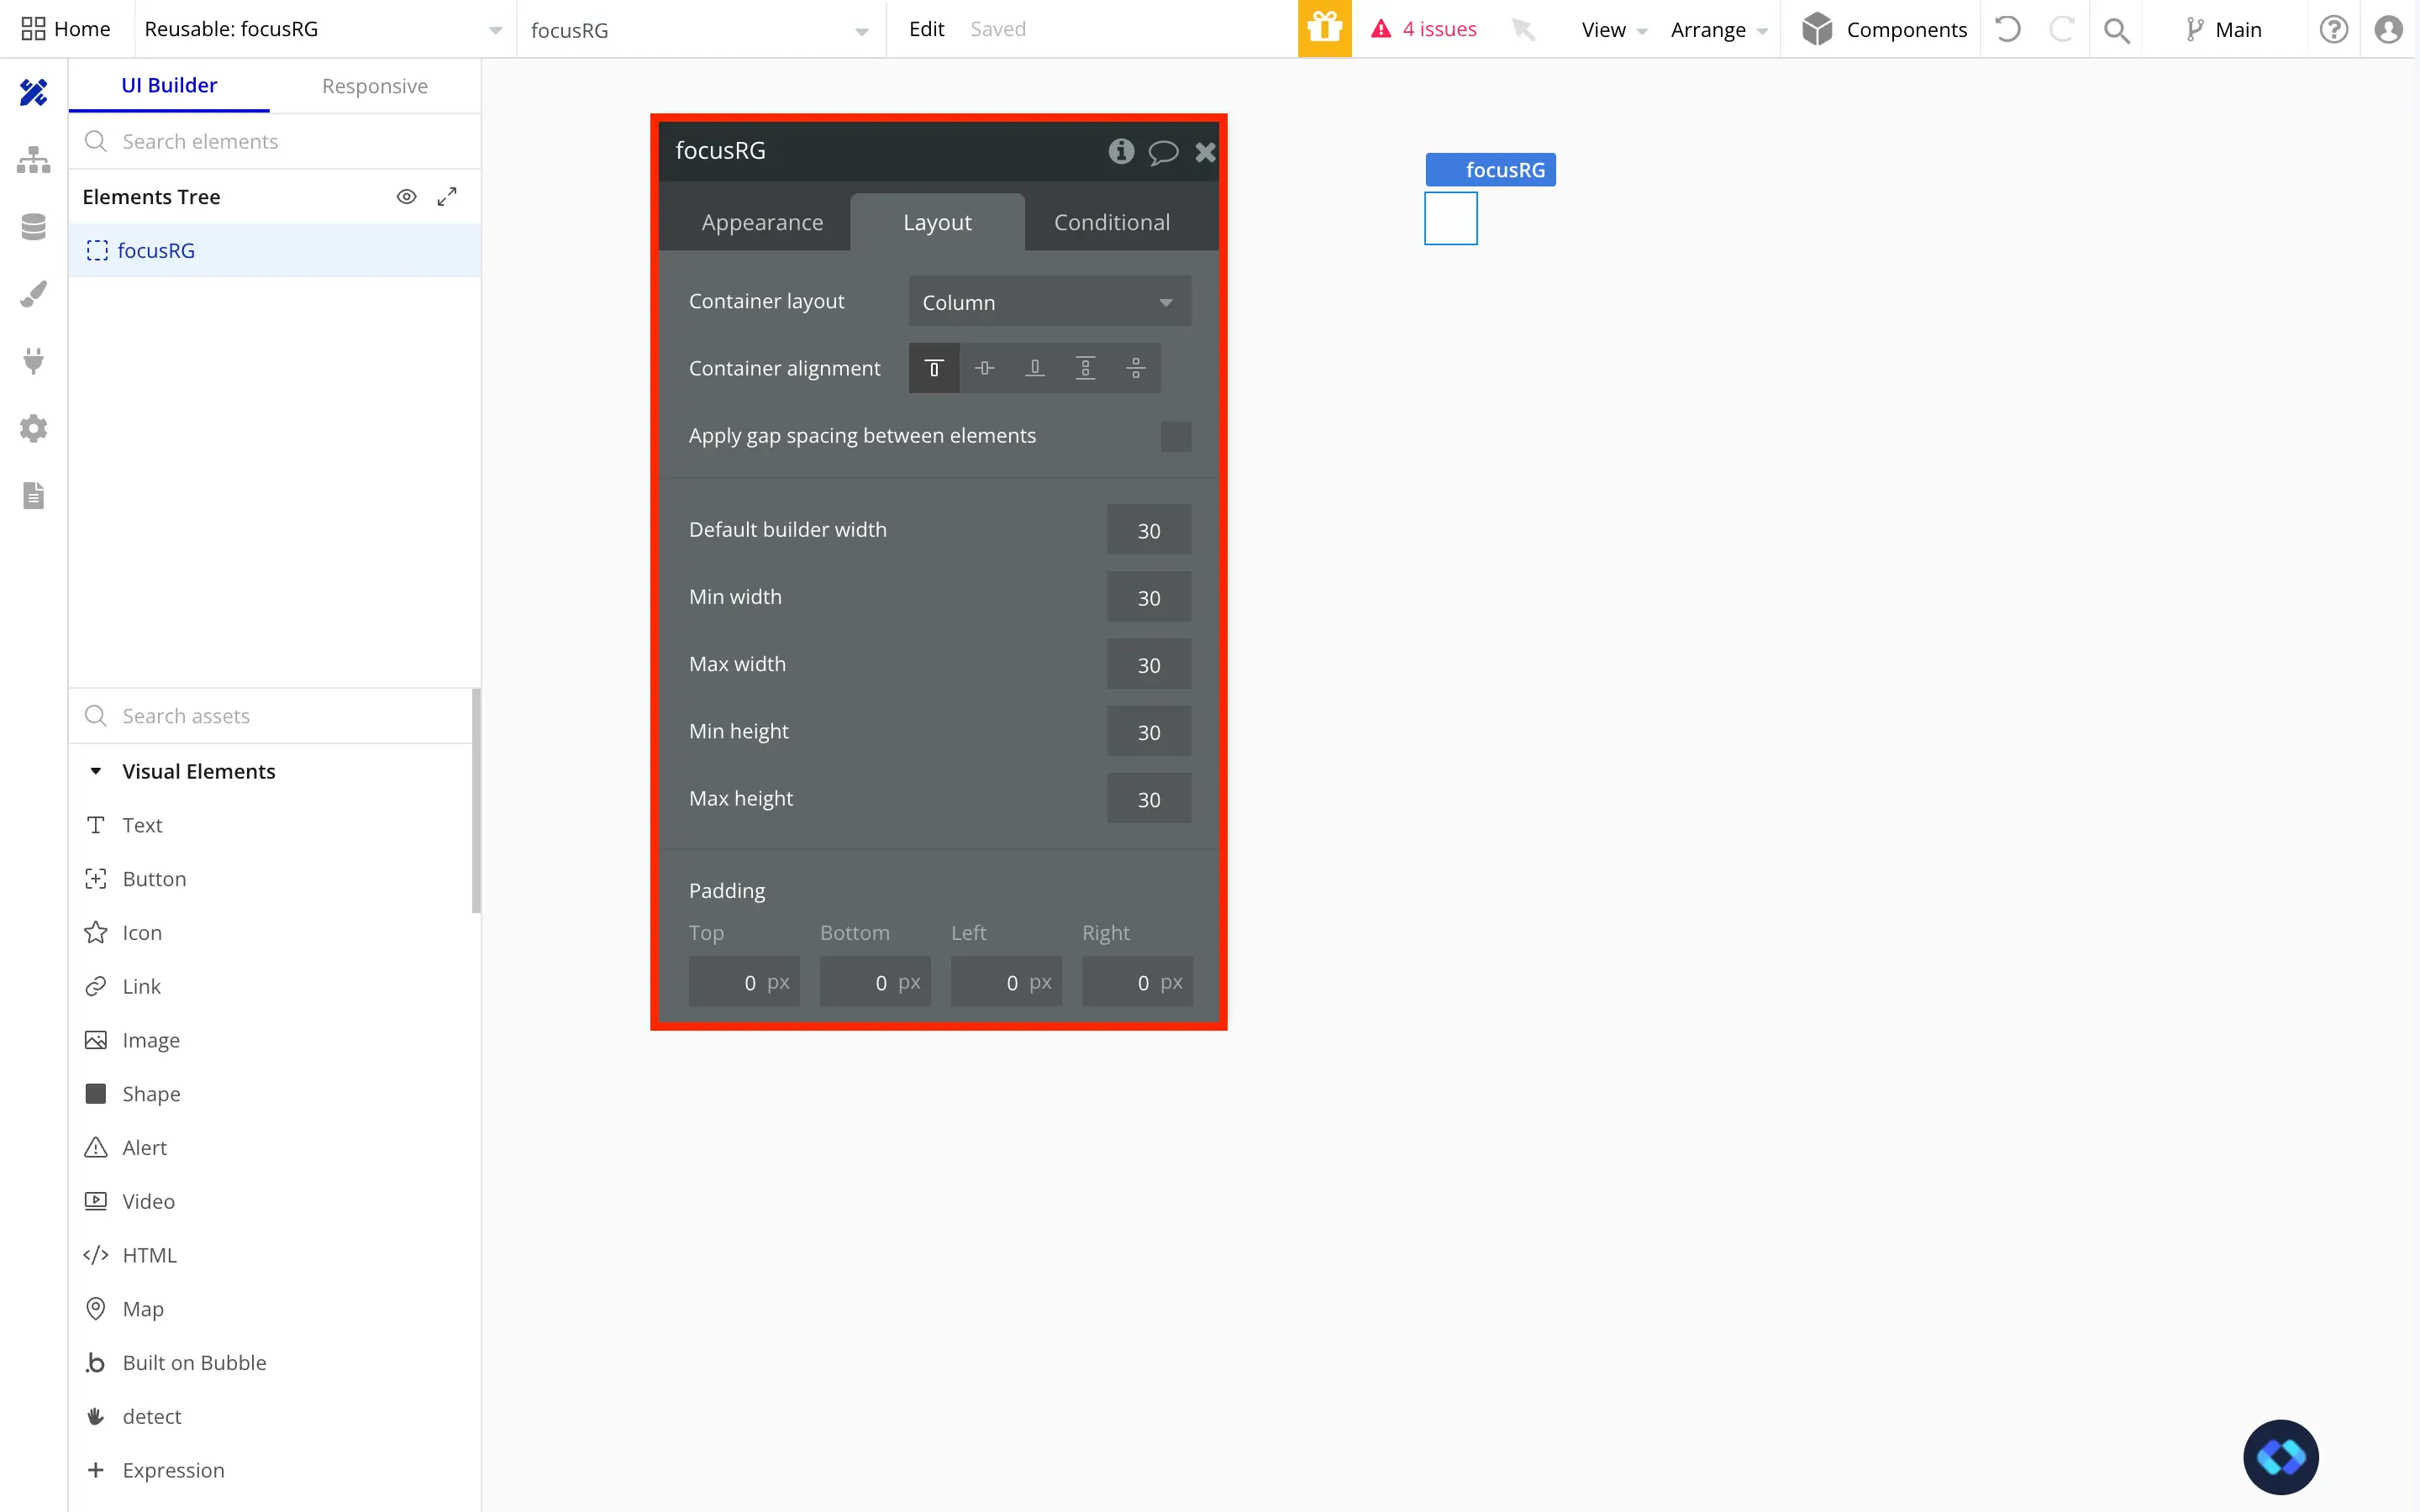
Set its layout to Column, and give it a fixed size (e.g. 30x30 pixels).
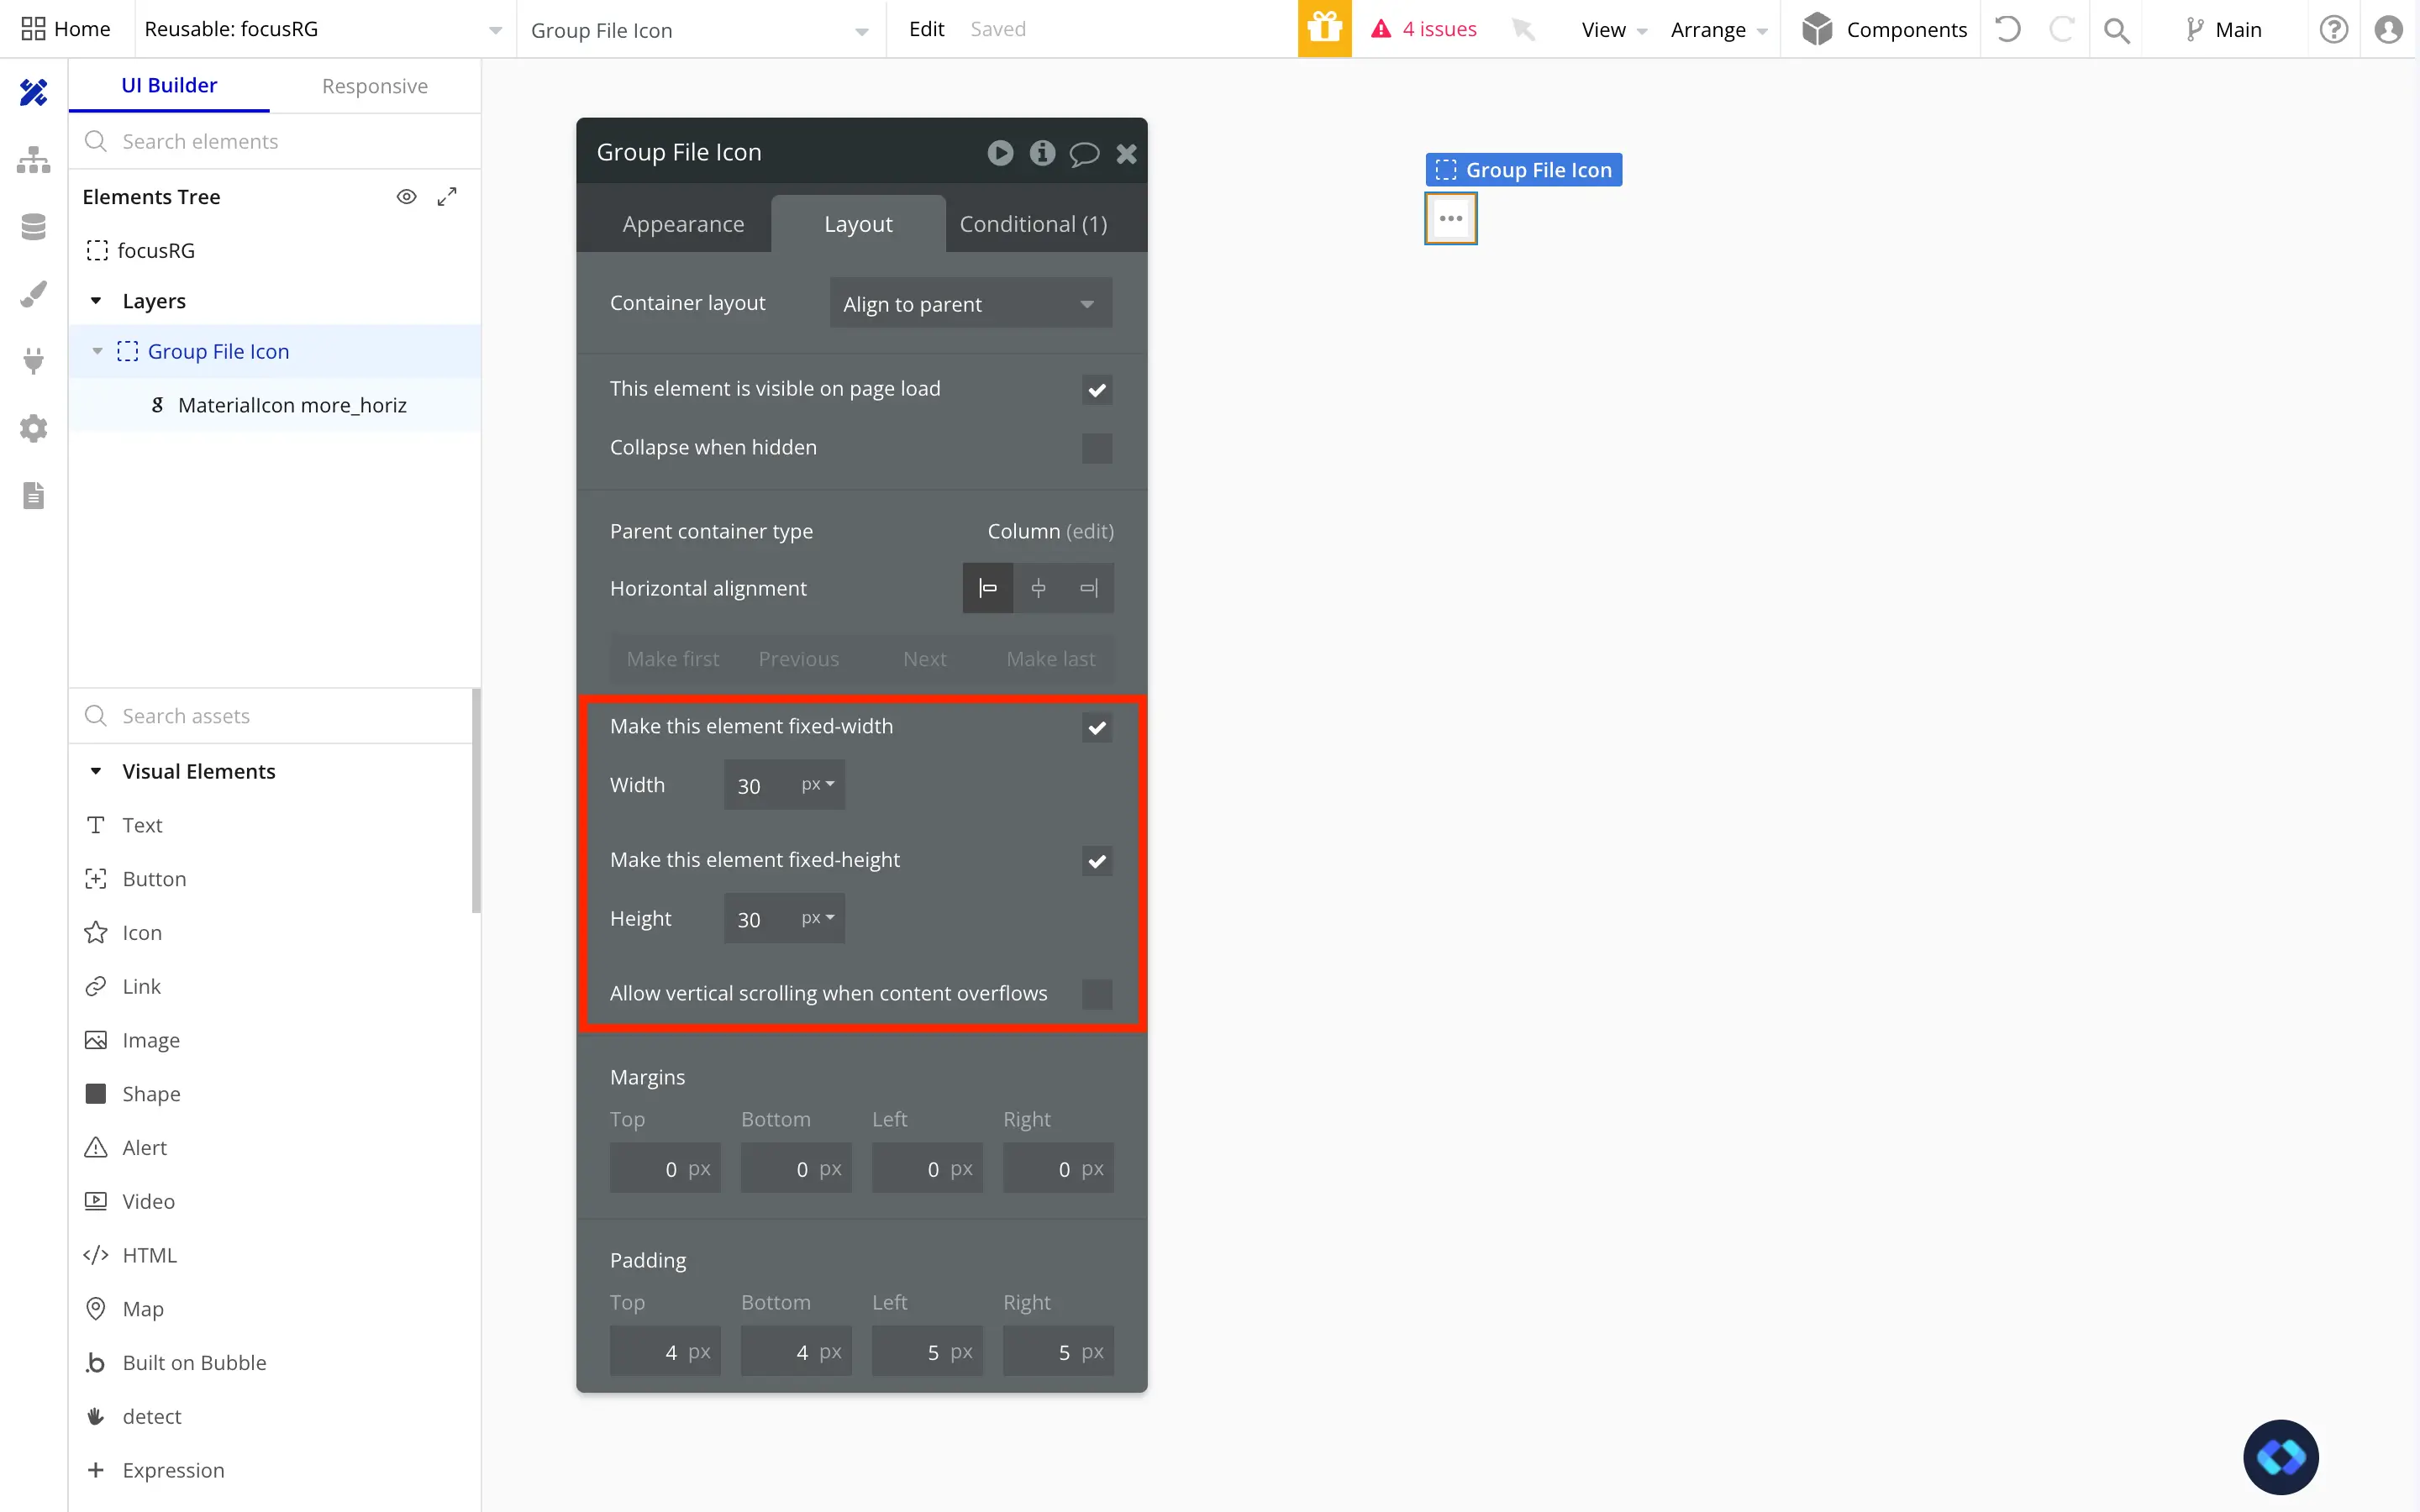
Add an icon or button that will trigger your contextual menu.
Inside the reusable, add your Group Focus element. Set the Reference Element to the group containing the icon, with a slight vertical offset (like 10px).
This reusable structure isolates the Group Focus behavior and bypasses the limitation.
So let's go ahead and create a new reusable element :
Now that it's done, we'll start by giving it some basic settings like setting it's type of layout to "column" and it's width and height.
Since this will be a small icon in our table, we can go ahead a give it a fixed width and height (30px by 30px will do the job).
Now we have a our Reusable Element setup, we can go ahead and add our contextual menu Icon (which will be the icon that will show our group focus when clicked).
All we need now is to create our Group Focus and add it to our Reusable Element.
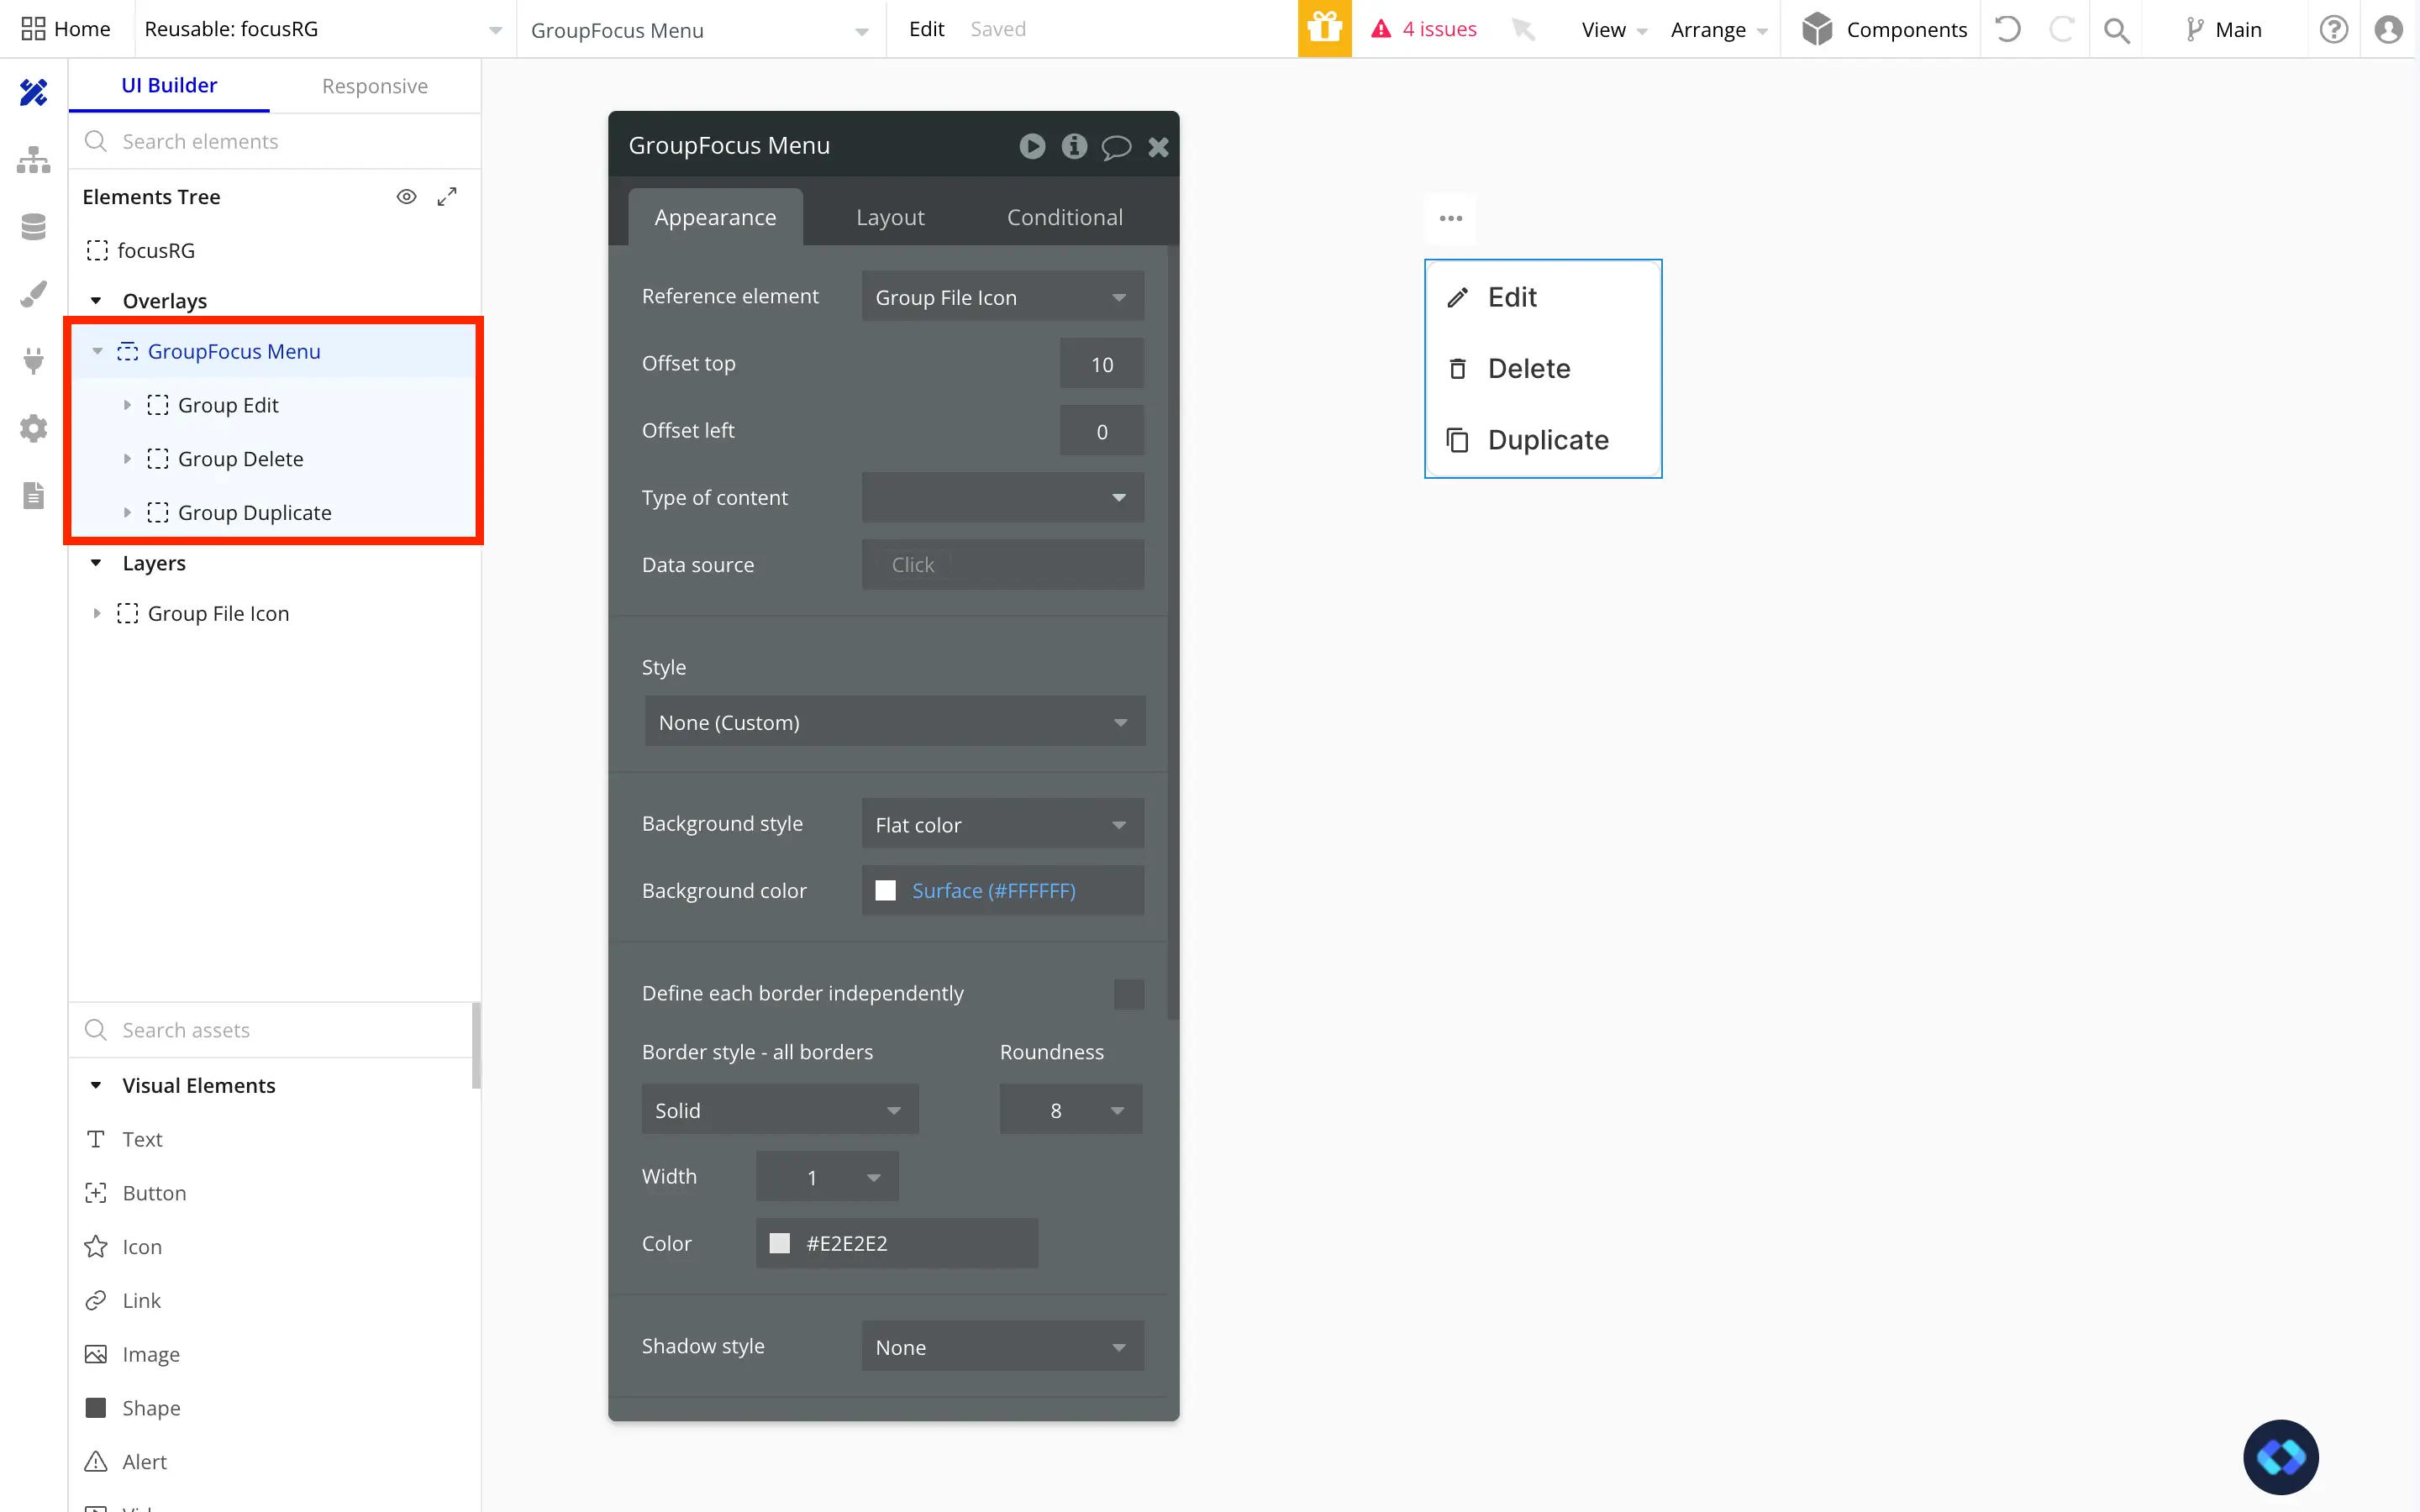
As you can see, I've set my Group Focus' reference element to the Group containing my Icon, and set a small vertical offset of 10px.
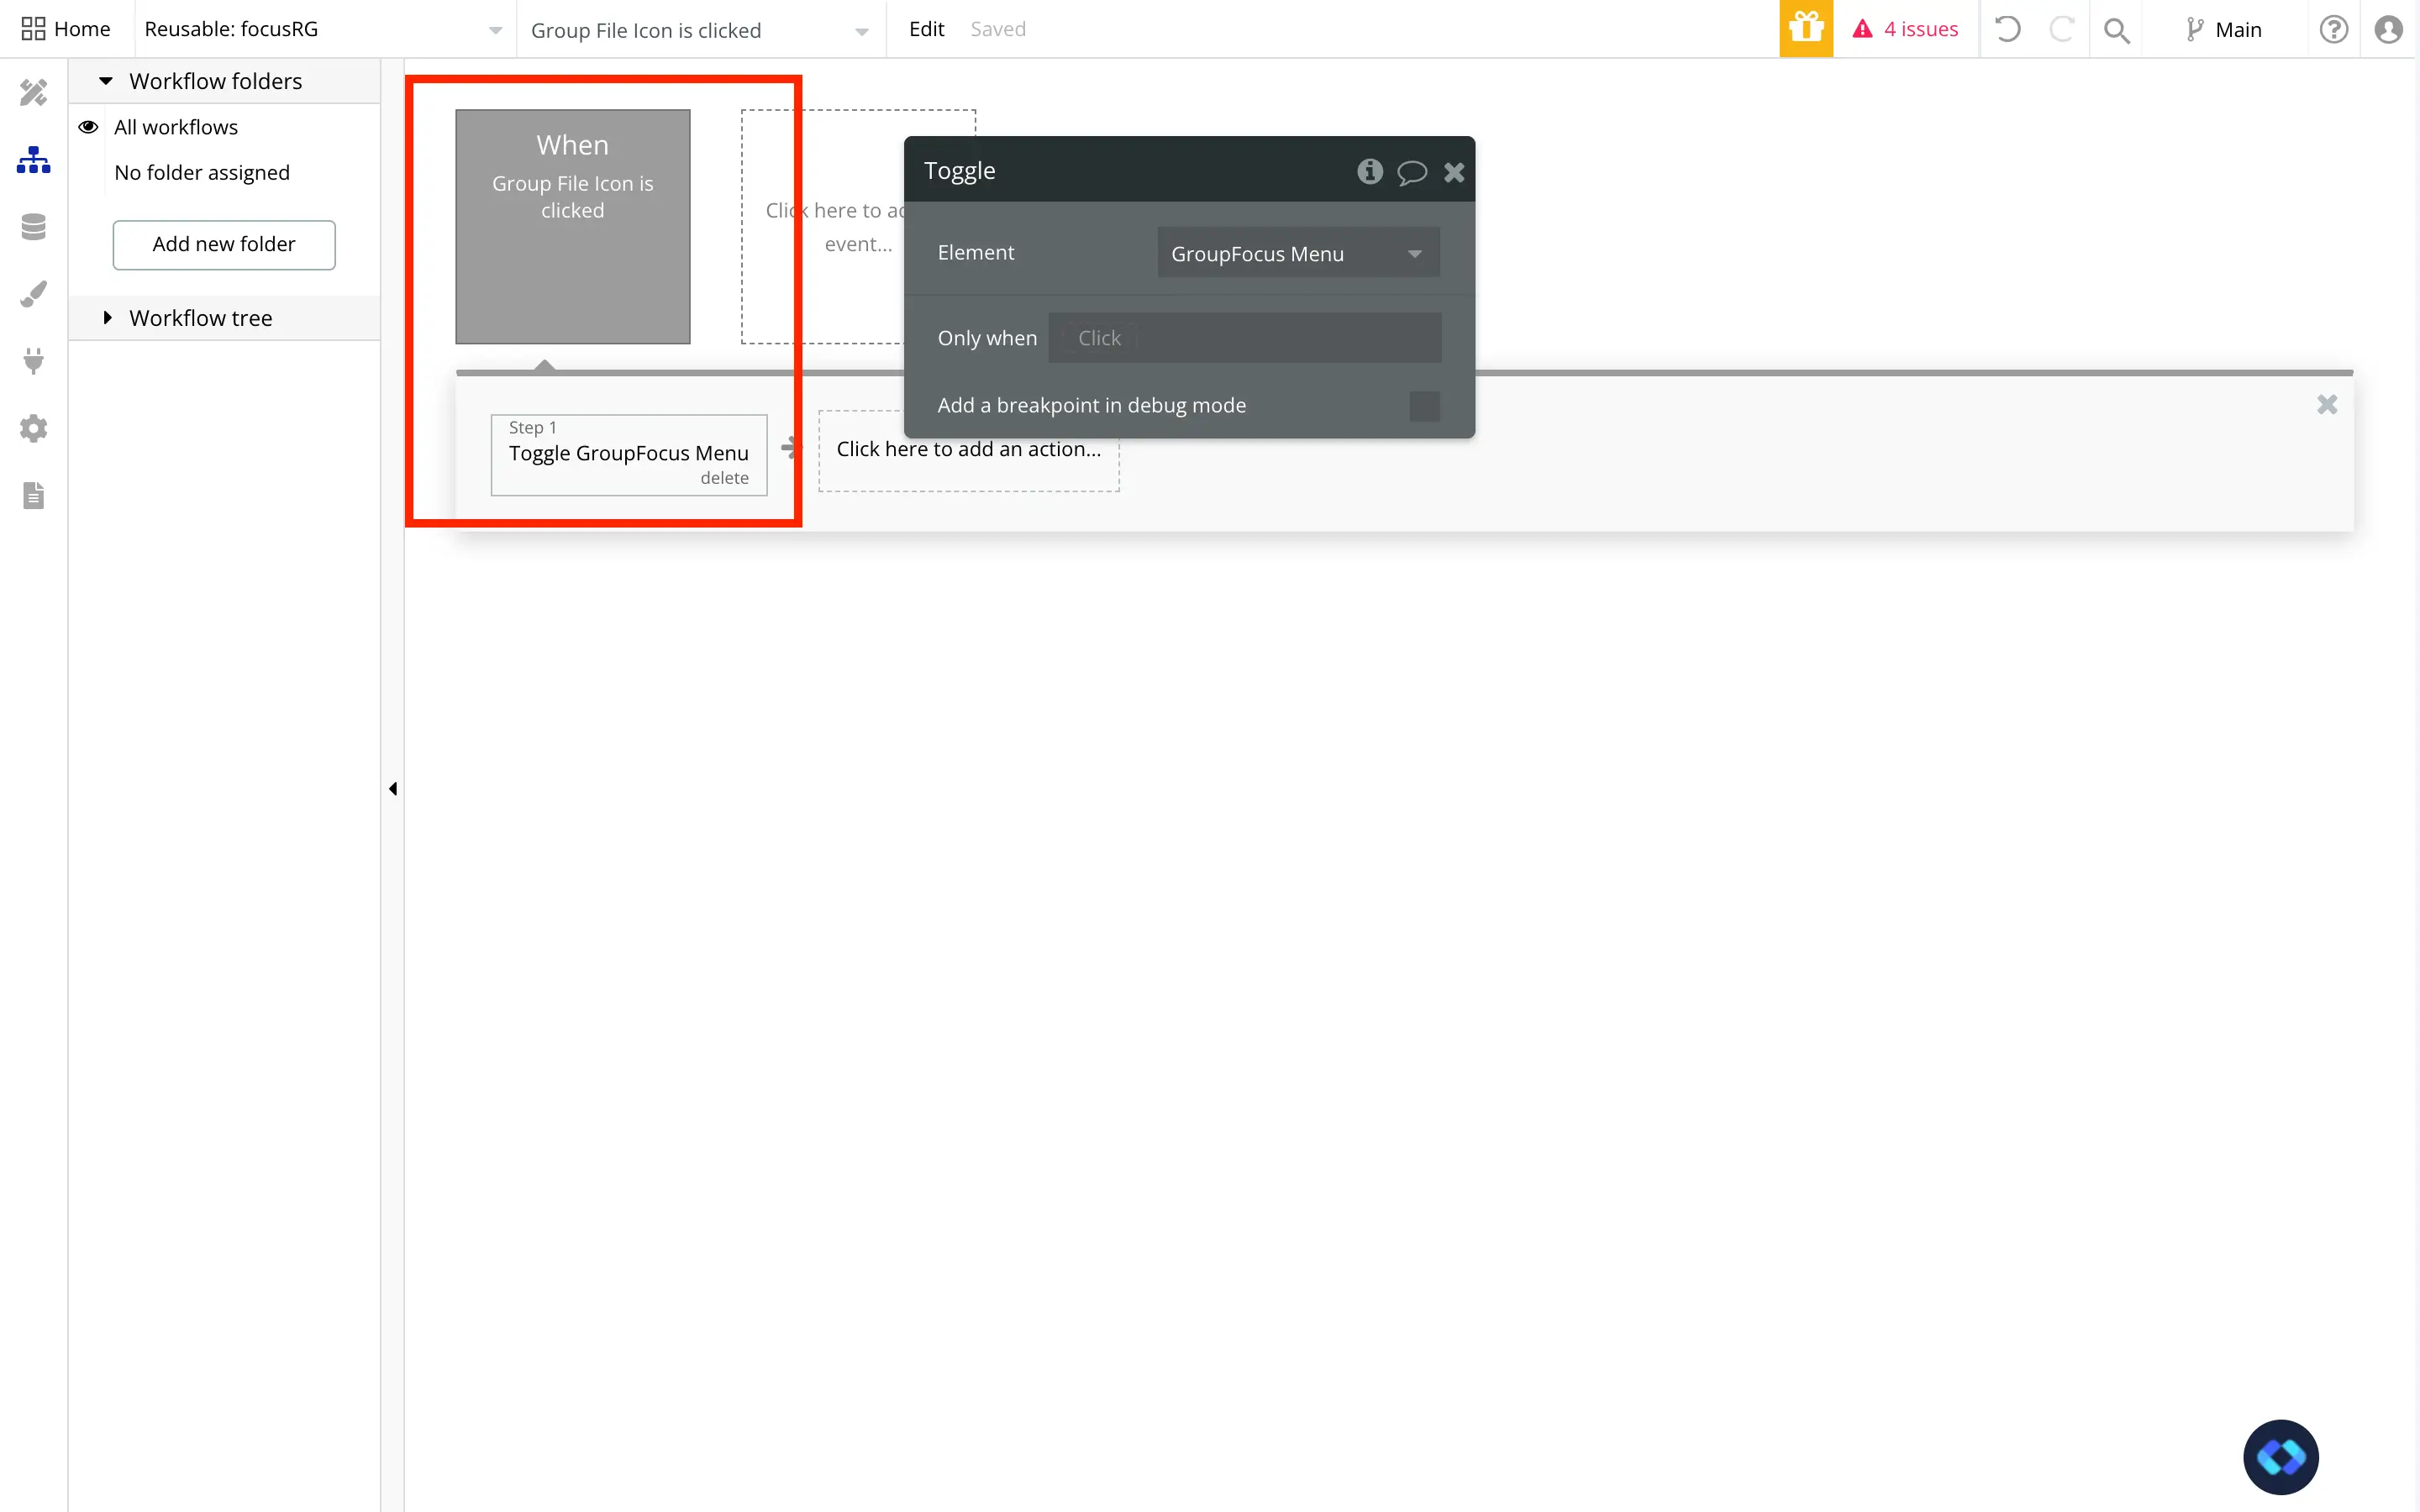
Step 3 – Add the Workflow to Toggle the Group Focus
Still inside the Reusable Element:
Create a workflow triggered when the icon is clicked.
Use the action "Toggle" to show or hide the Group Focus.
This makes your Group Focus behave like a dropdown, directly inside each repeating group row.
Step 4 – Insert the Reusable Into Your Repeating Group
Now drag and drop the reusable menu into a cell of your Repeating Group or Table.
Preview your app — you should see the Group Focus menu appear inside each row when clicking the icon. It behaves exactly as expected, no hacks needed.
And there you go ! If you make a preview, you'll see your new Contextual Menu running perfectly fine !
Now, depending on your Use Case, you may need to do an additional step to pass data through the reusable element to be able to make operations with it.
Step 5 – Pass Data From the Repeating Group to the Group Focus
If your contextual menu has actions like Edit, Delete, or Duplicate, you’ll want to pass data to your reusable so the right record is affected.
Here's how:
Set a Type of Content for the reusable (e.g., Invoices, Tasks, Users).
In the Repeating Group, when referencing the reusable, send the current cell’s data as input.
Inside the reusable, you can now access this data in your workflows.
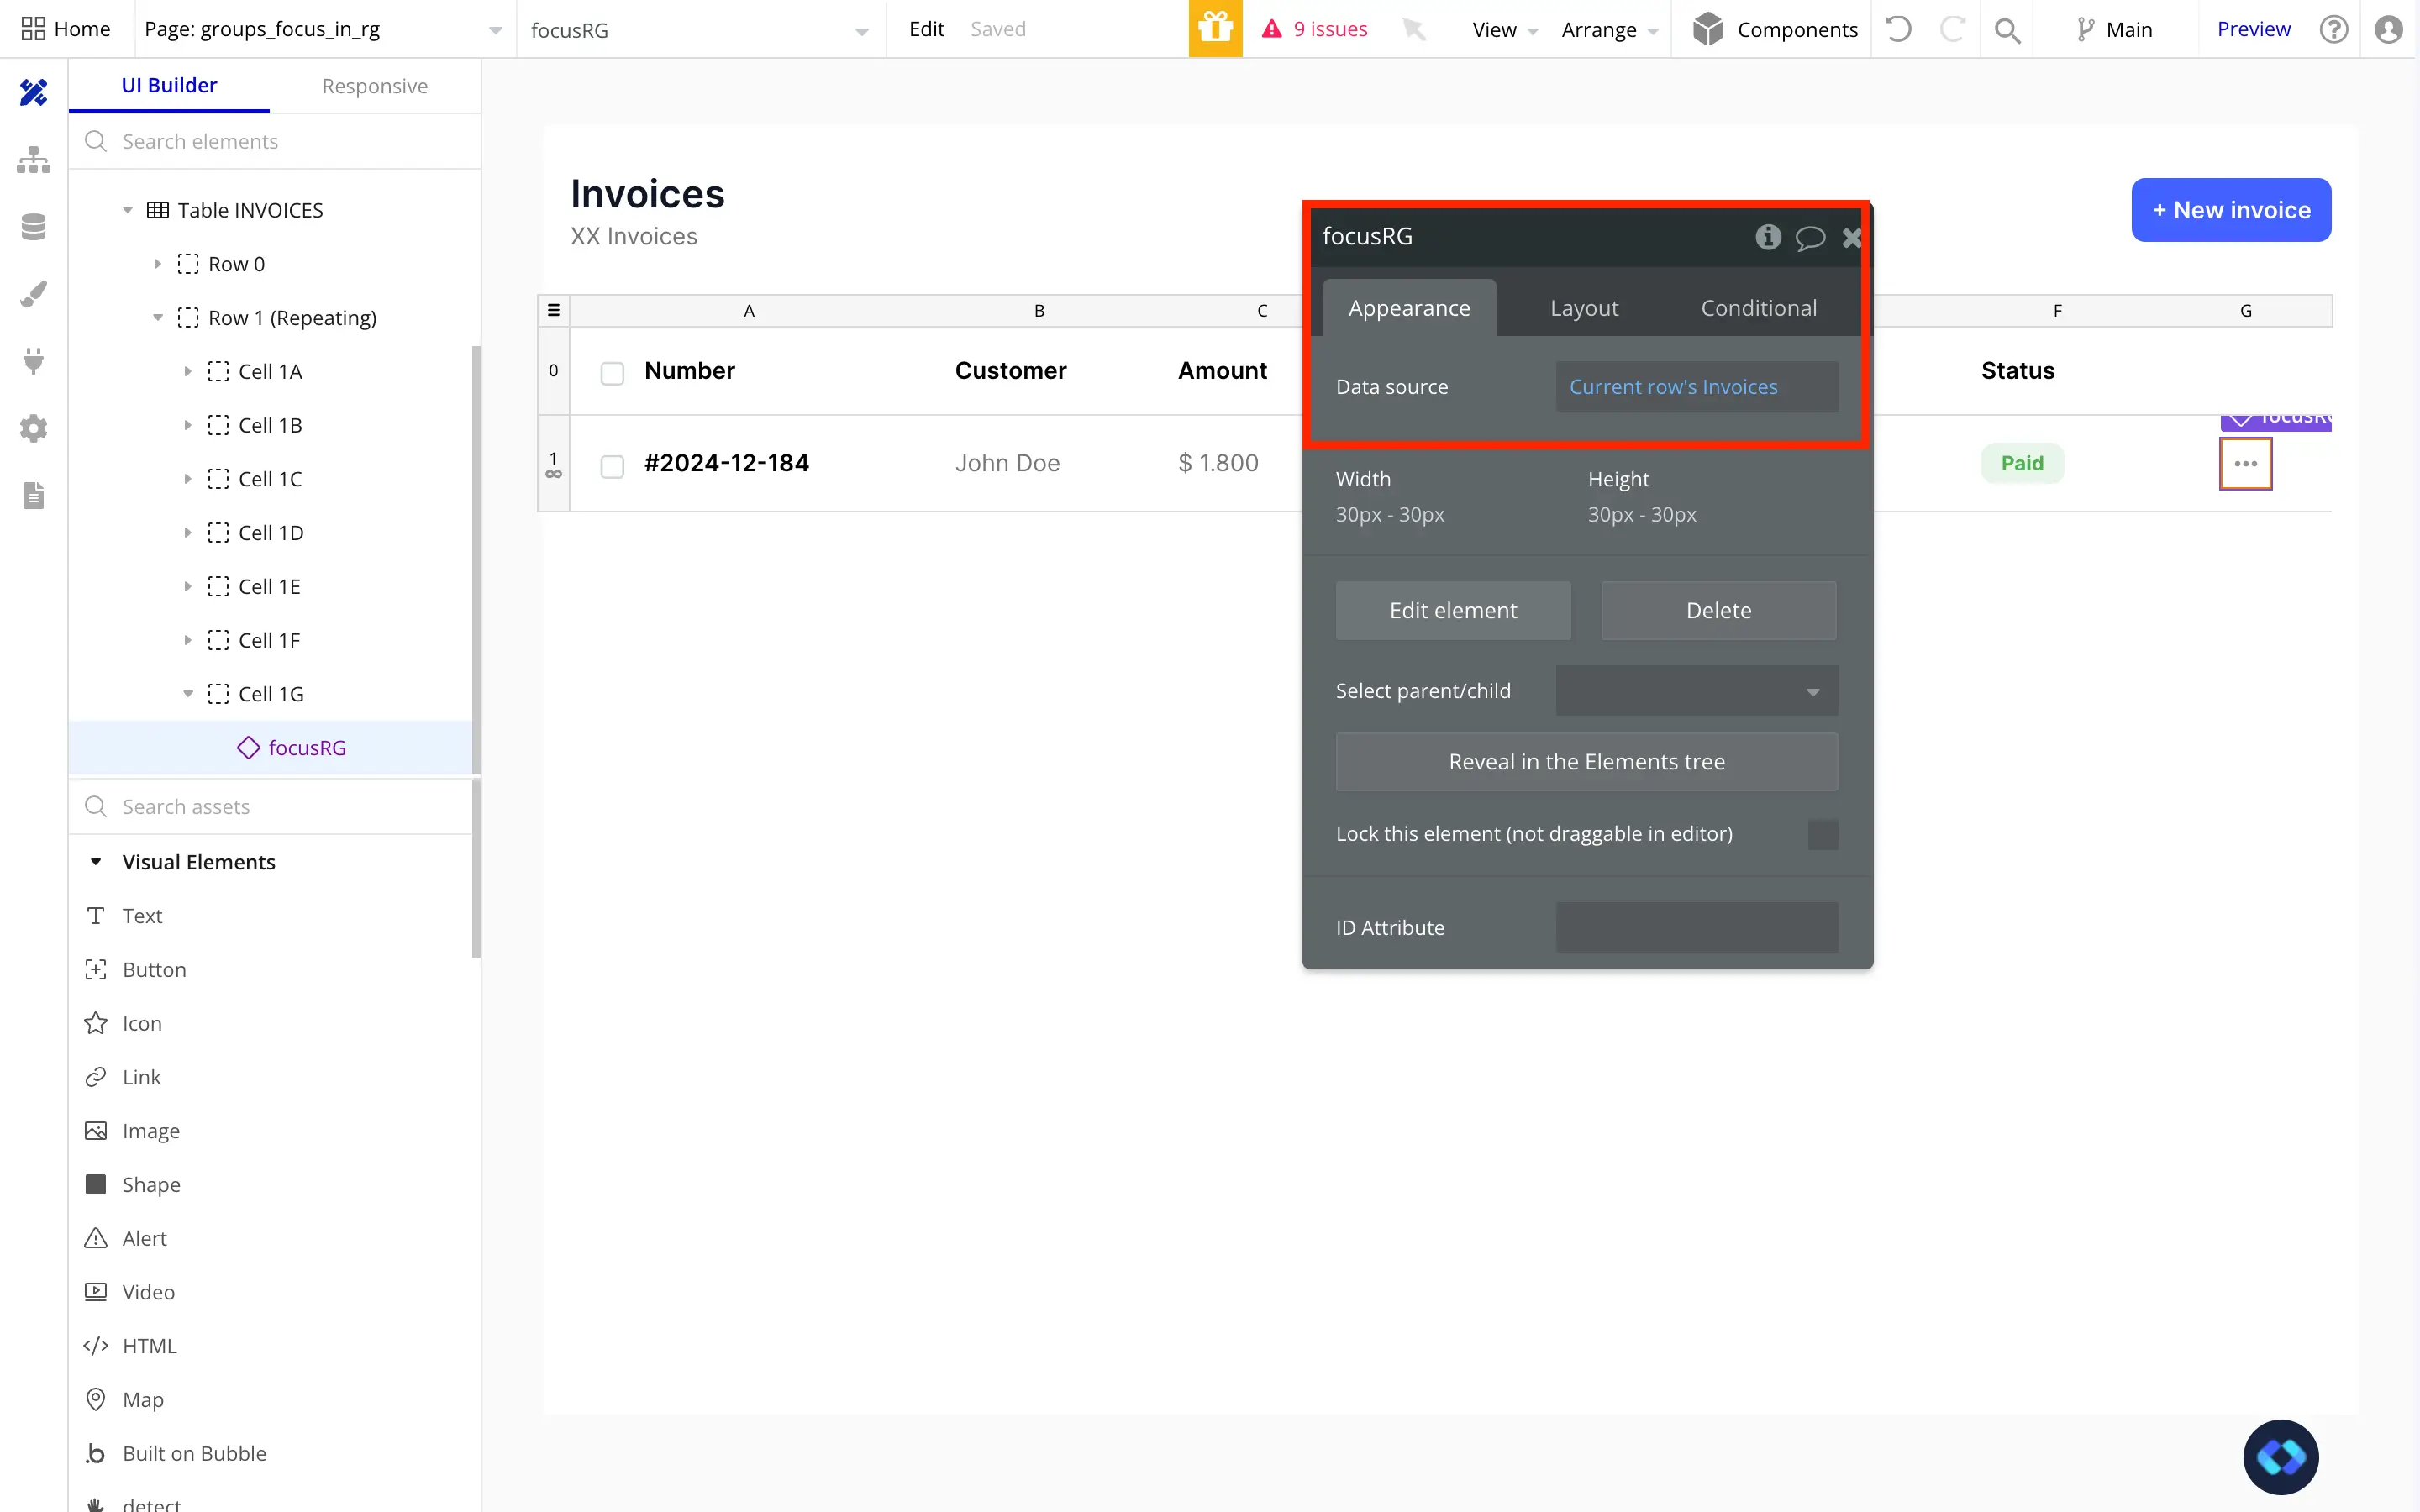
Example: Set the Reusable Element’s type to
Invoice.
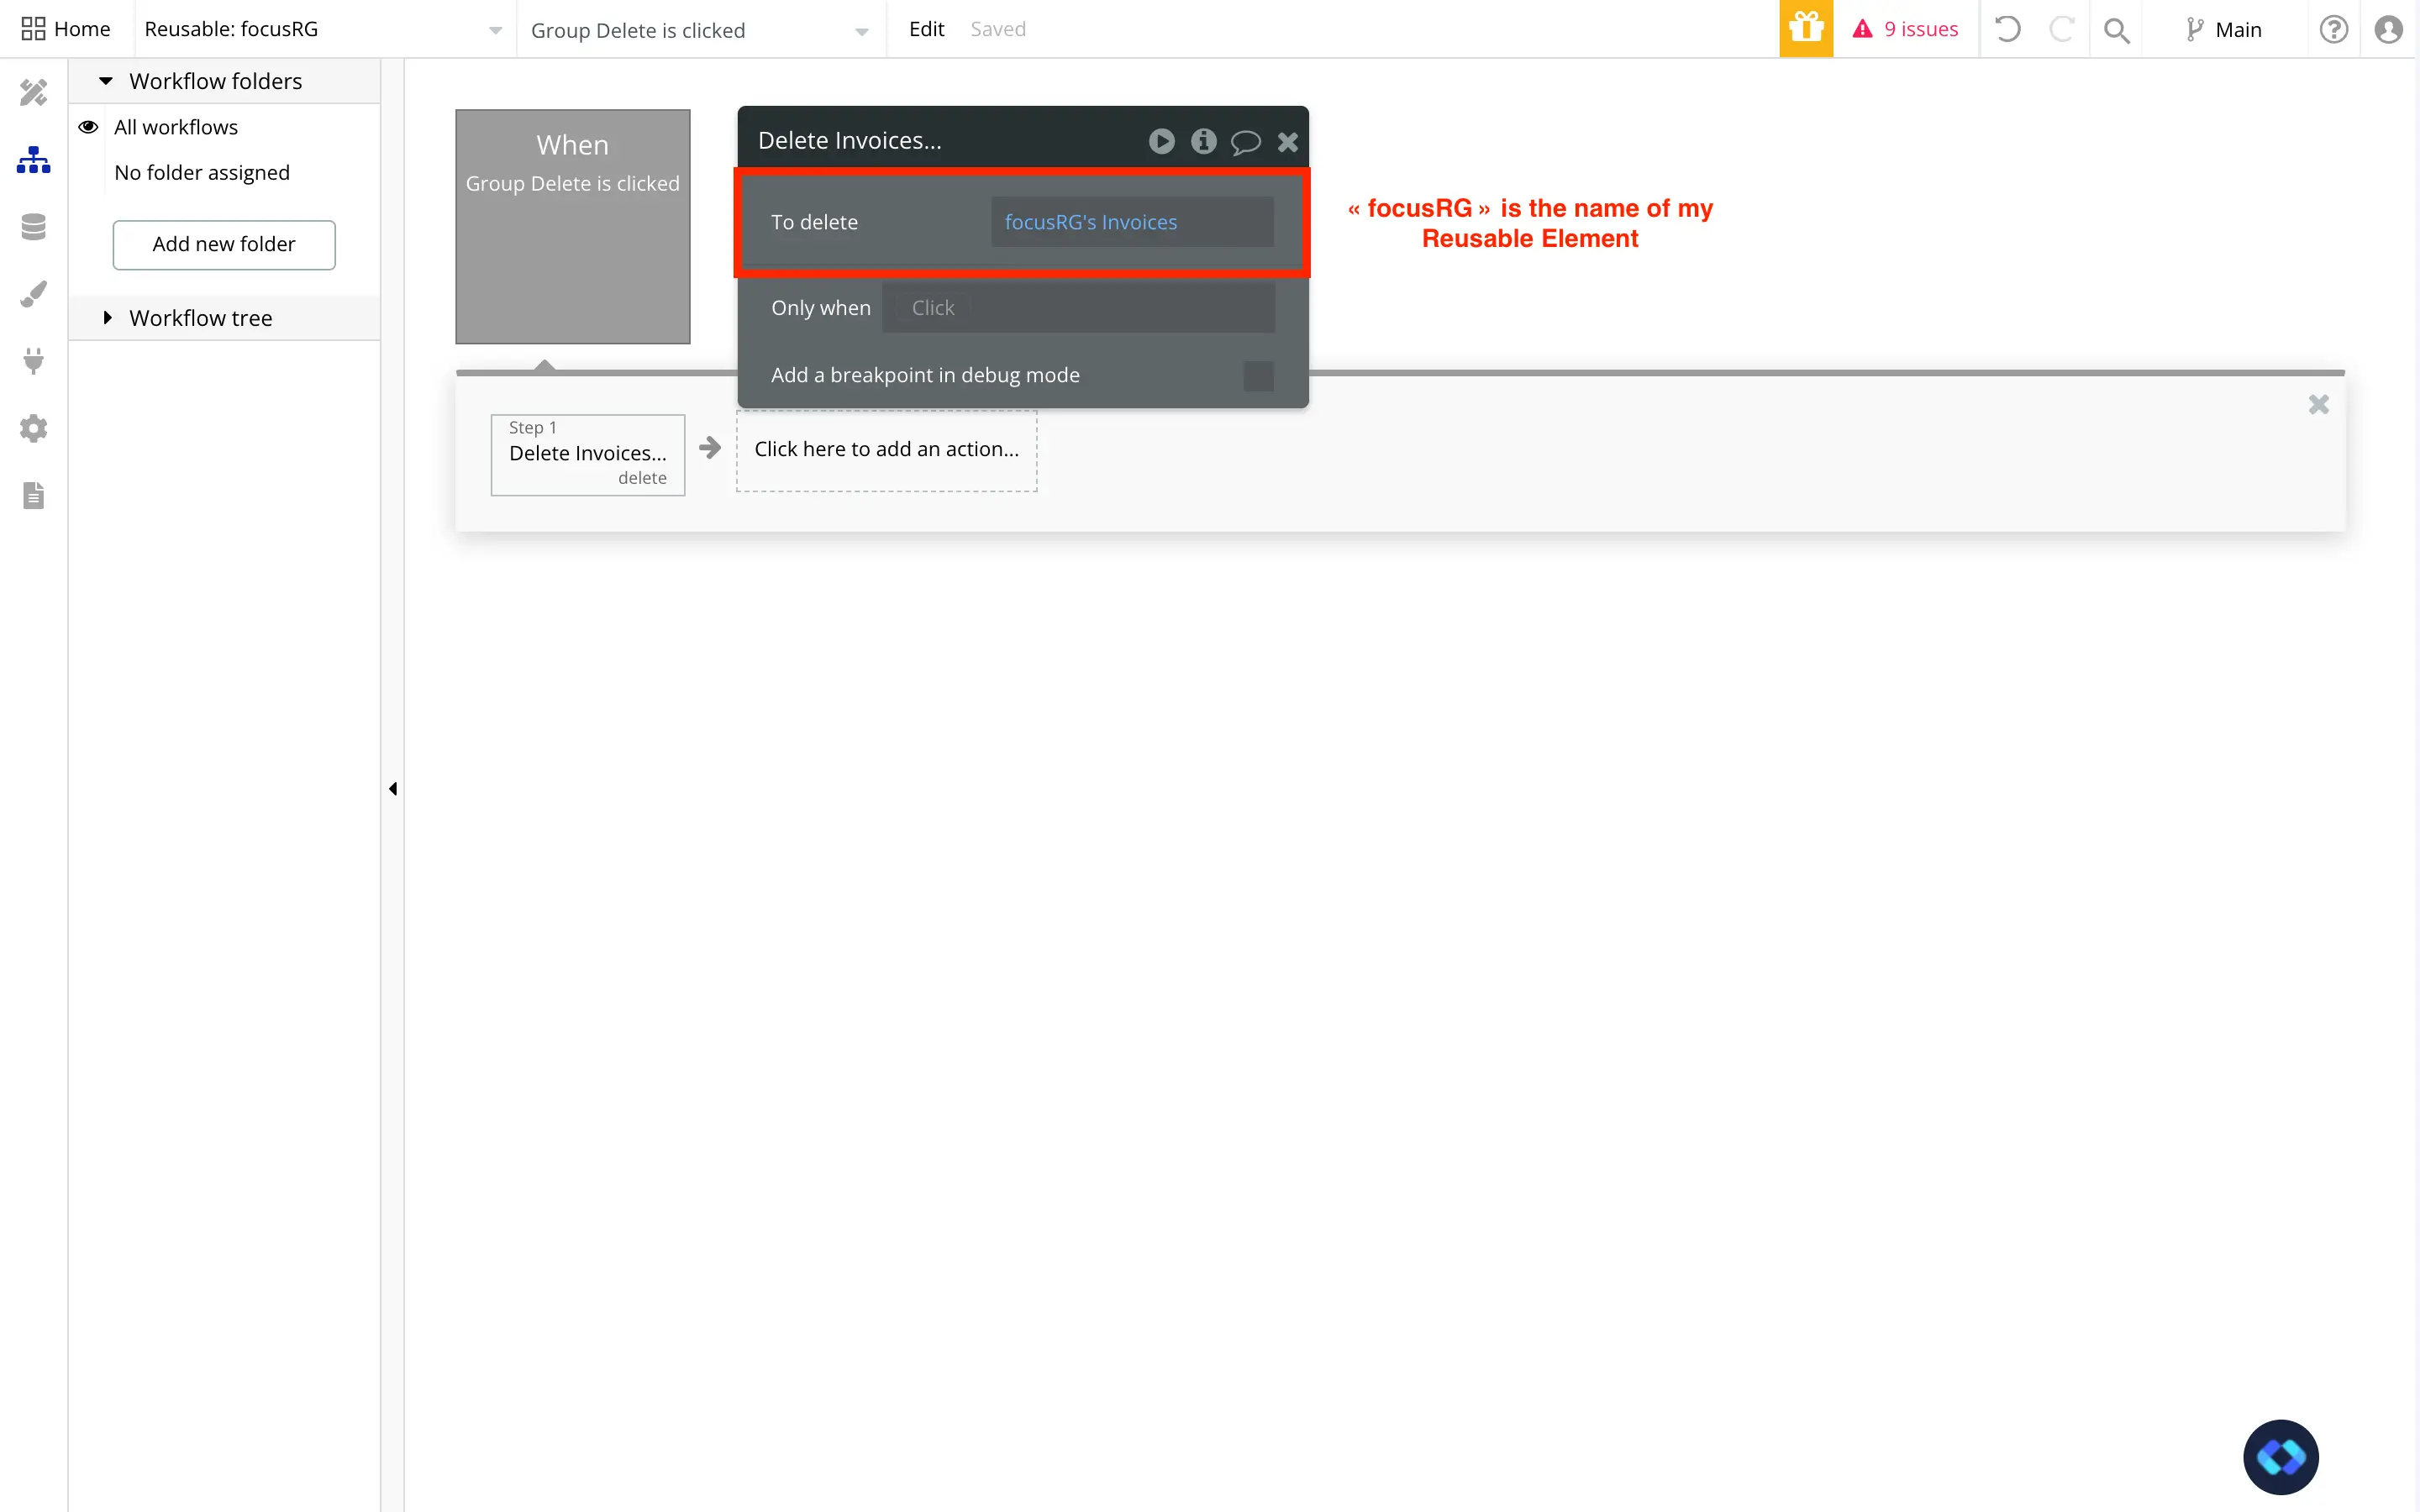
When clicking the icon inside a row, sendCurrent cell's Invoice.
This lets you trigger workflows like "Delete This Invoice" or "Open Edit Popup for This Row" — all powered by the reusable Group Focus.
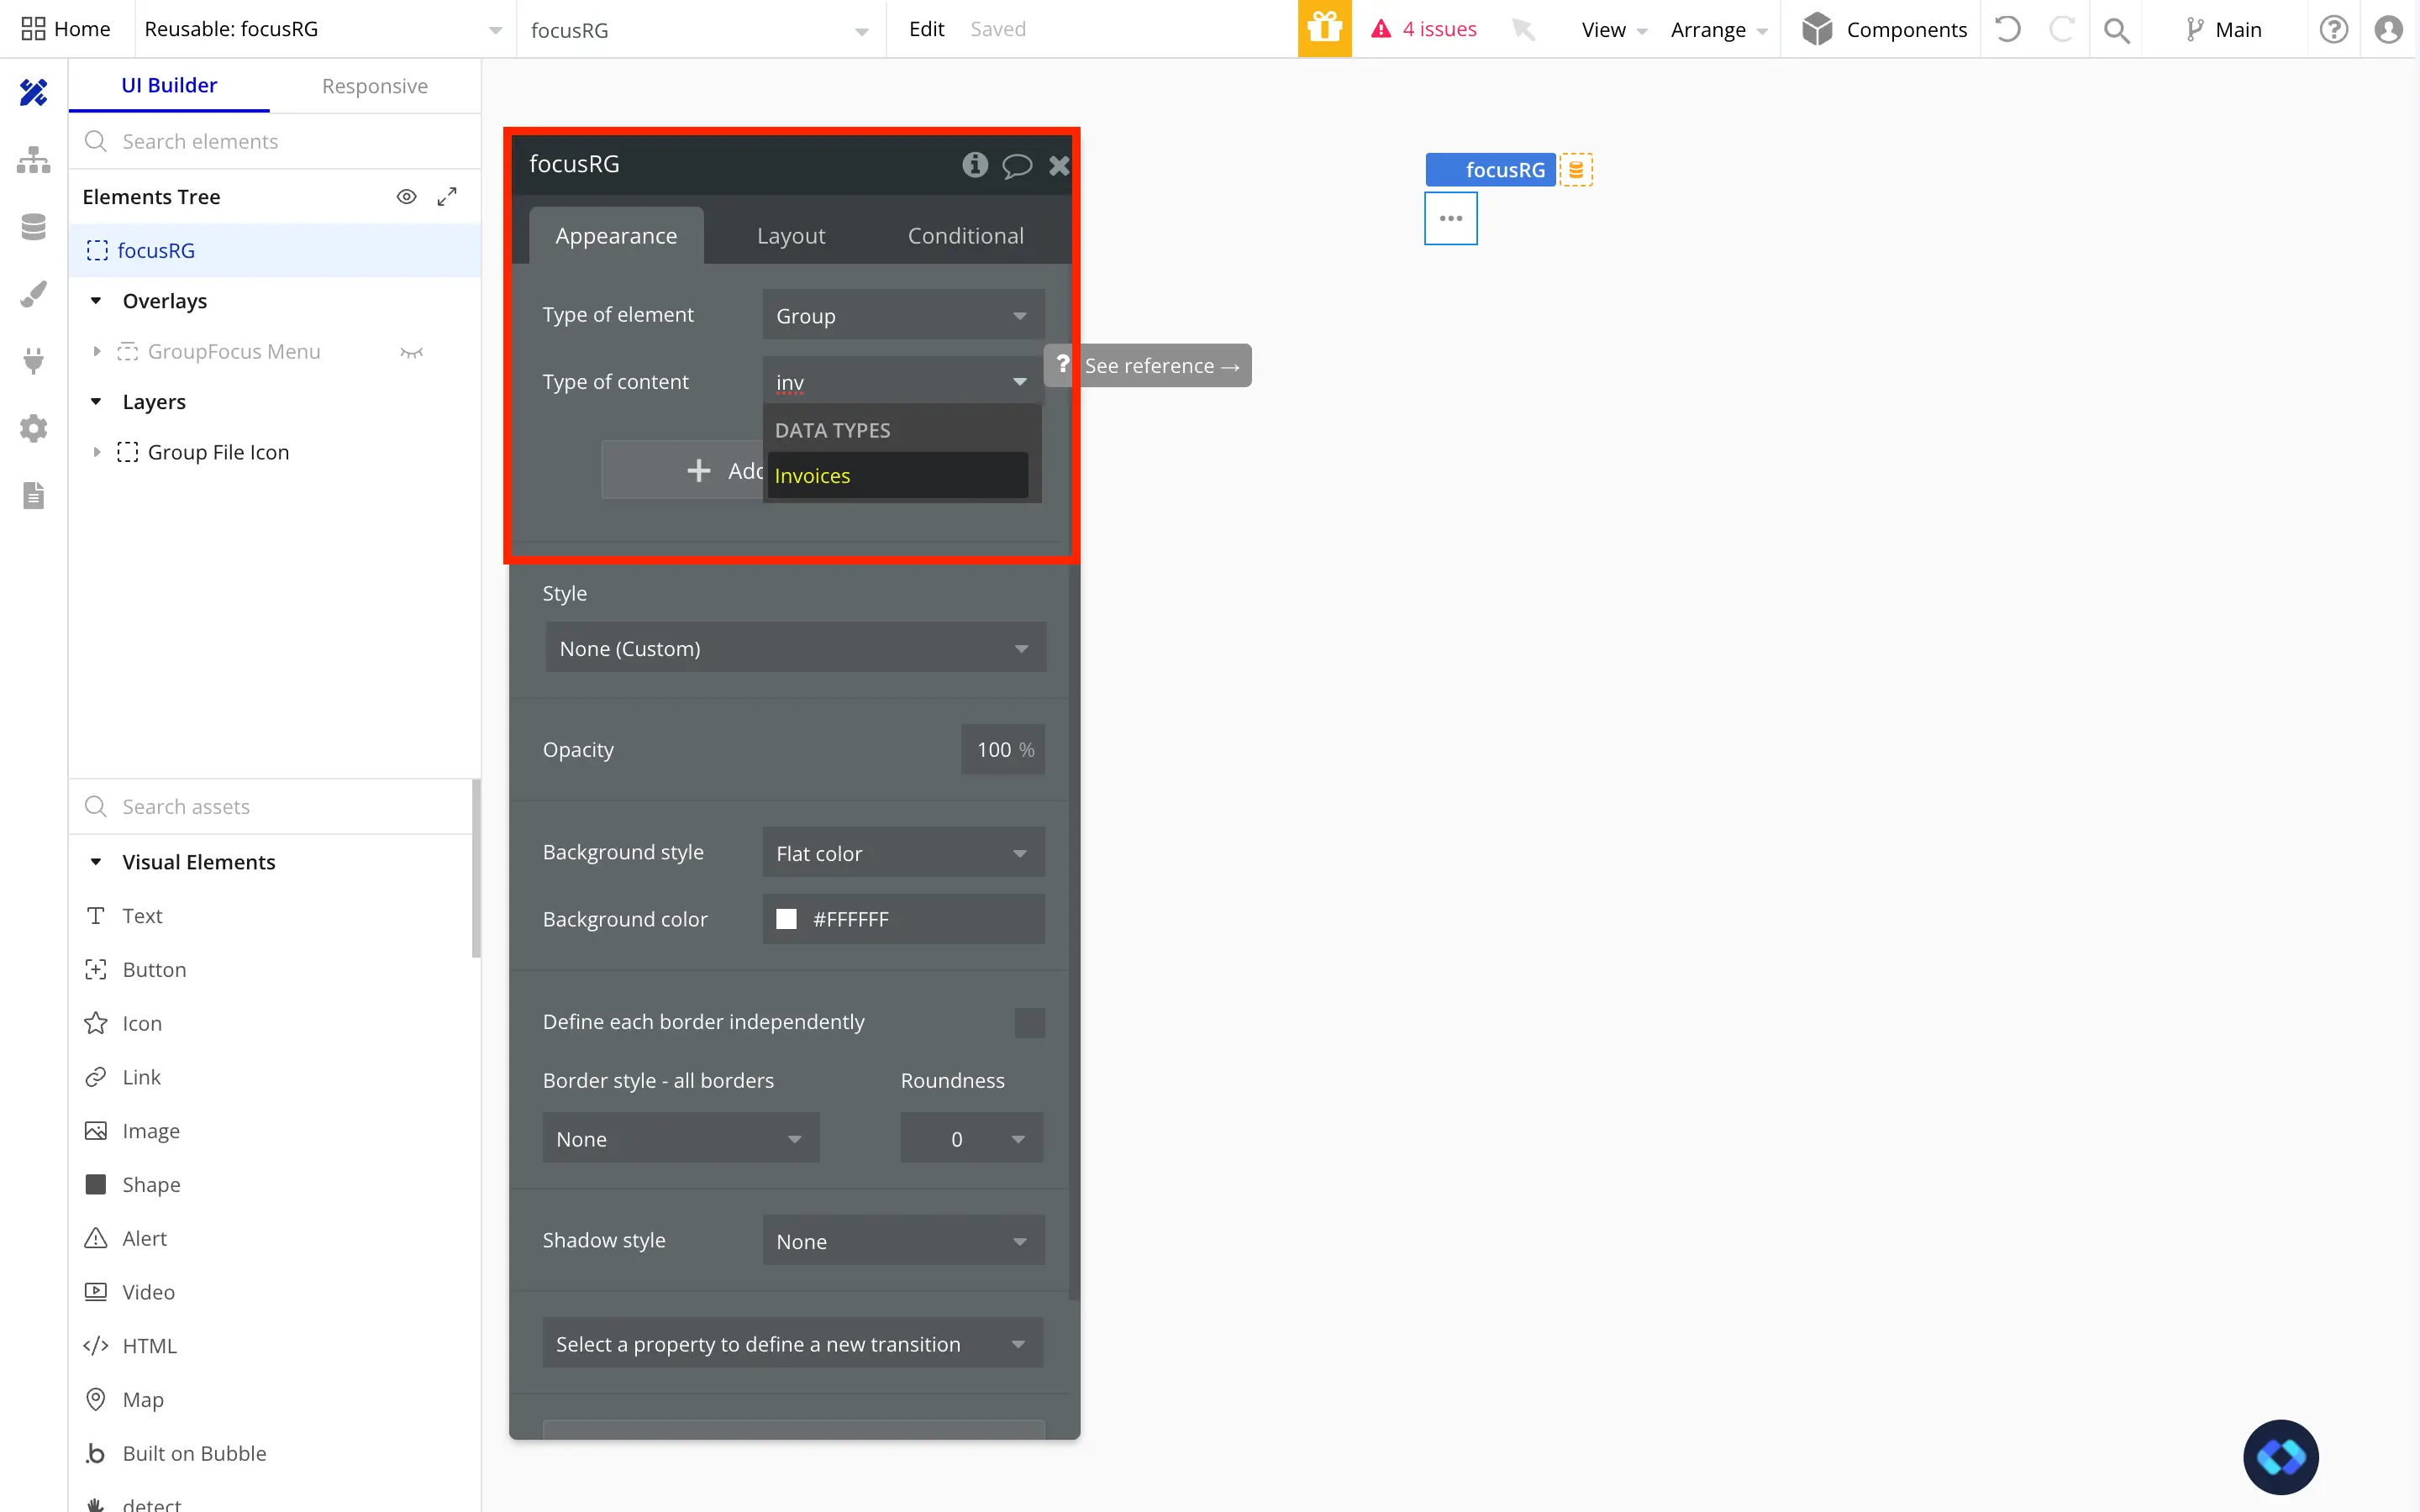
As you can see, I set my content type to "Invoices", which is a Data Type I have in my app, but you can set it to anything you need.
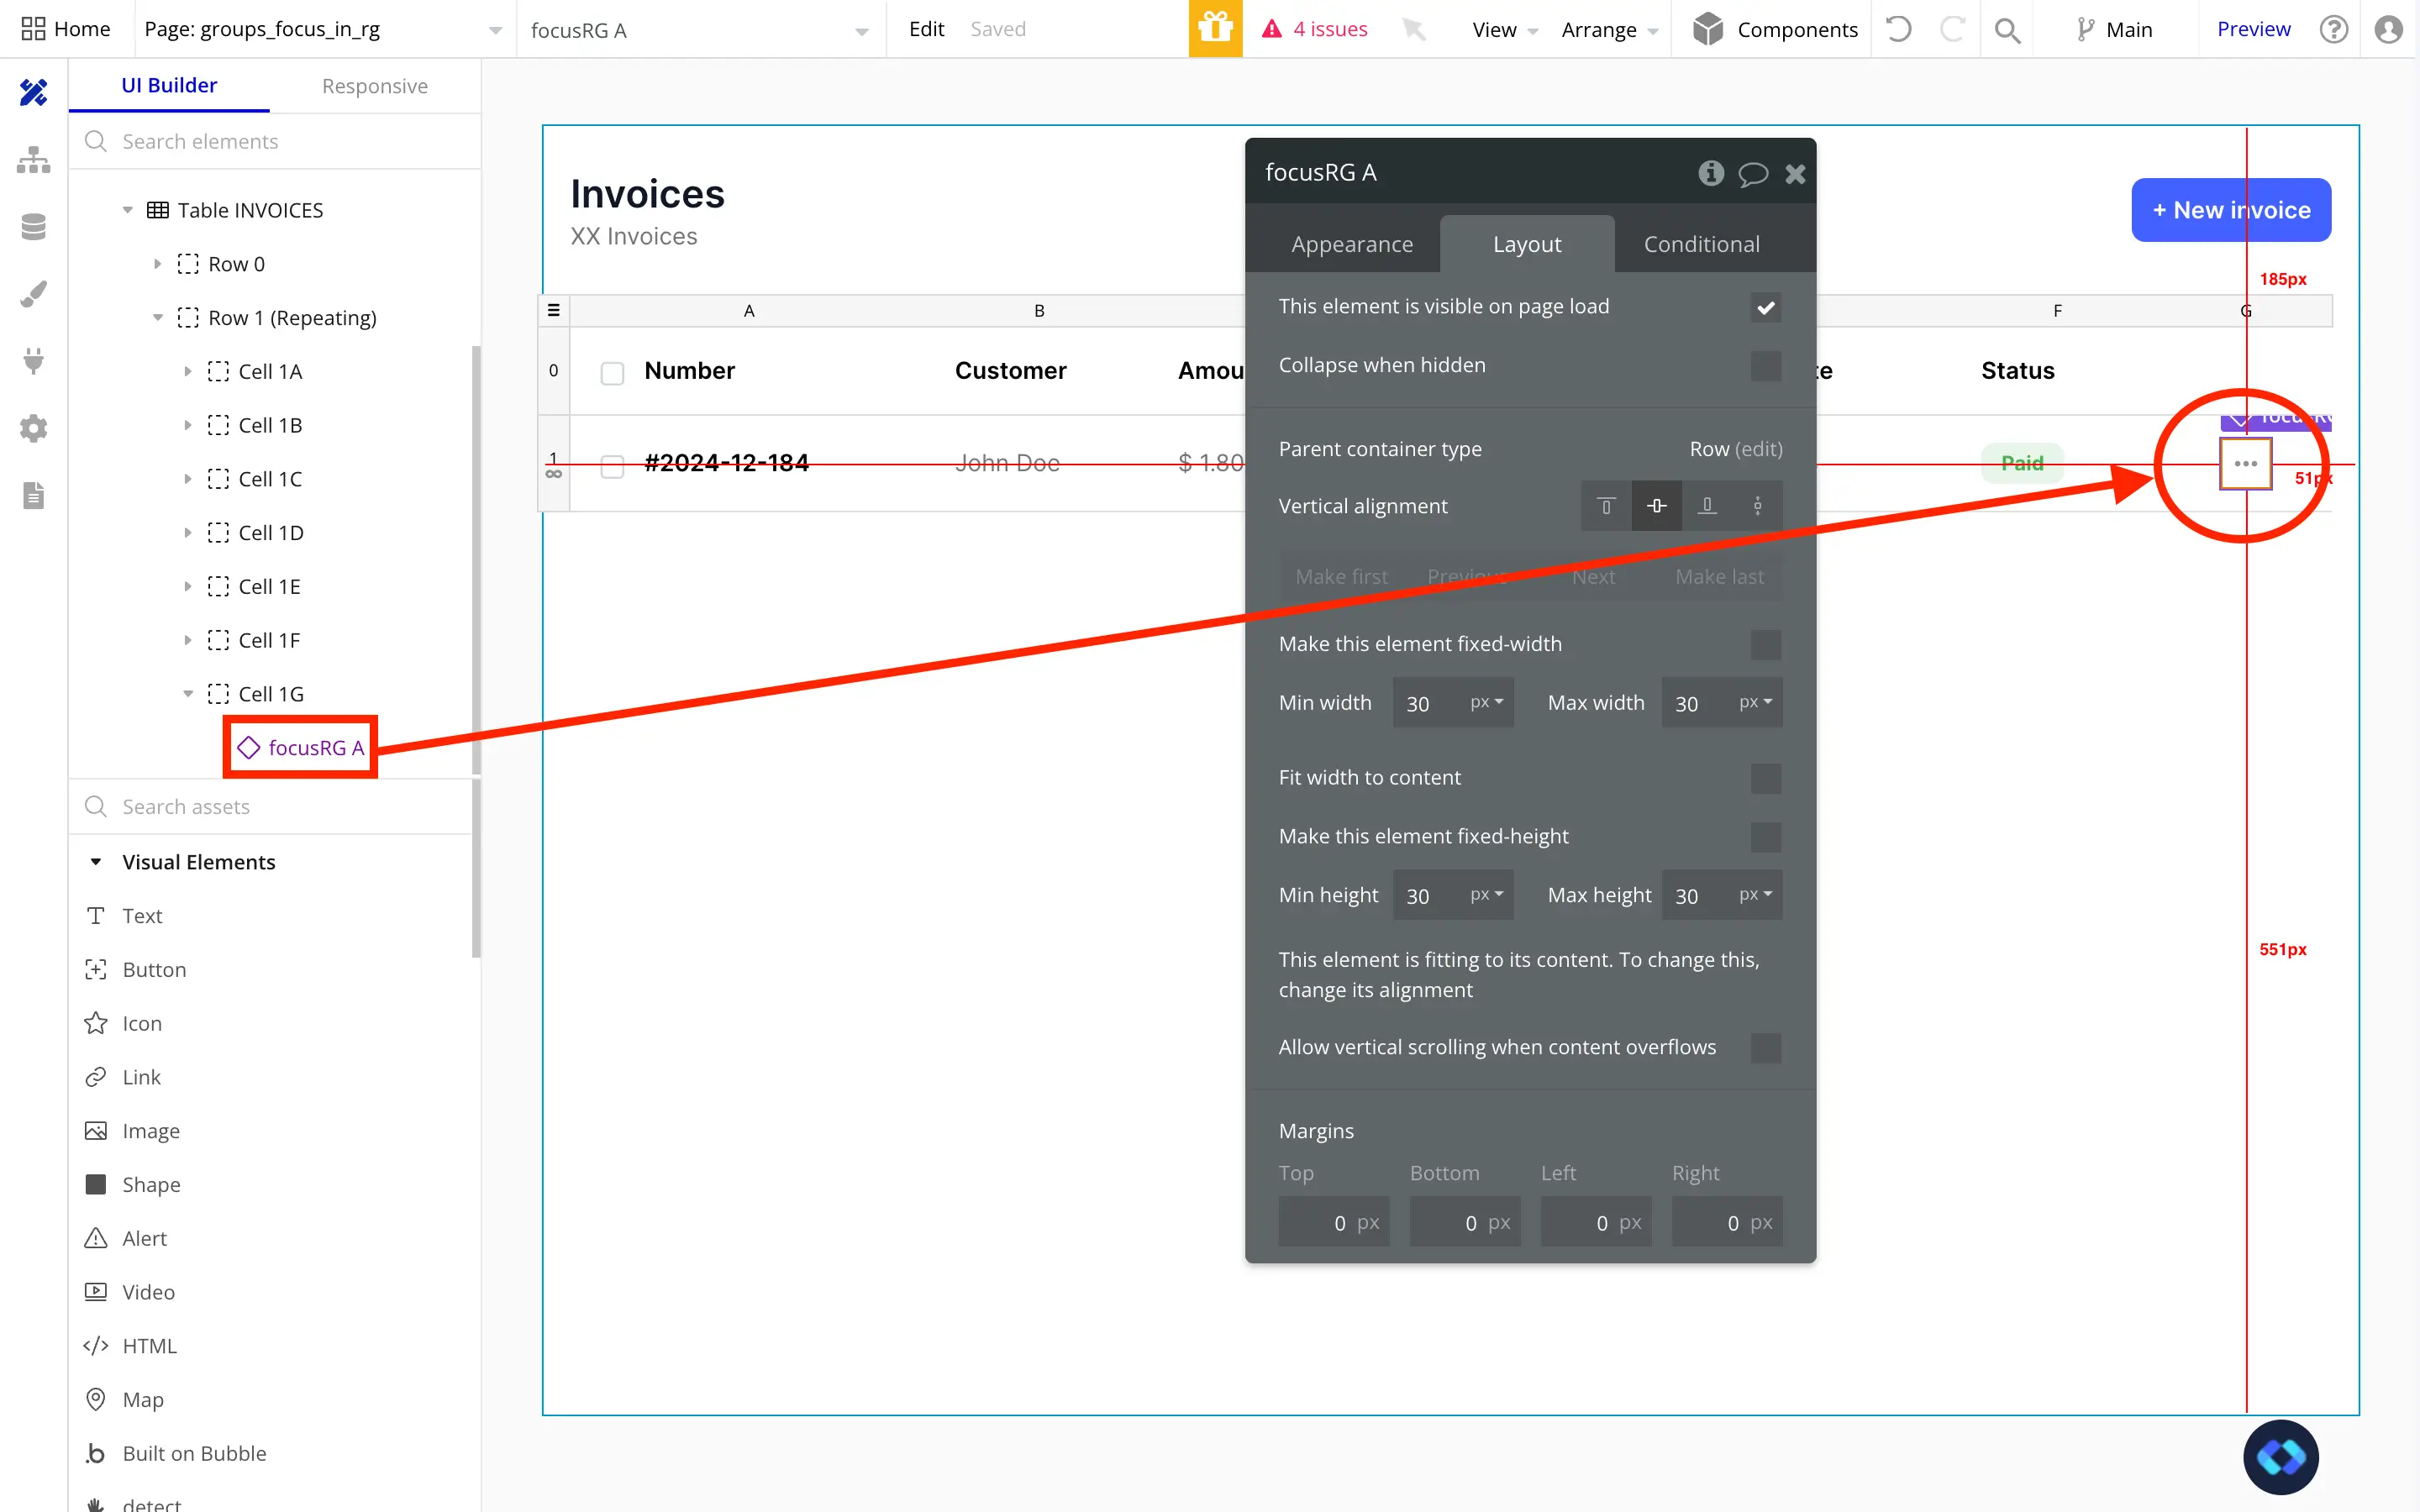
Now that you've done that, when you click on the reusable element in your table, you'll need a new line allowing you to send data through your Reusable Element.
From there, you can send any data you like. In my case, I want to send the Current Row's Invoice, to be able to perform operations on it (like deleting it for example).
Now that it's done, you can perform any workflow using the Reusable Element's Data, like below :
And there you go ! You now have a fully functional Group Focus in a Repeating Group in Bubble !
Final Result
You now have a fully functional Group Focus menu inside a Repeating Group—one that supports clean workflows, data passing, and full Bubble.io compatibility.
It’s a perfect way to build polished UIs with contextual actions, whether you’re working on a dashboard, admin panel, or any table-like interface.
Want More UI Tricks for Bubble?
If you’re looking to save even more time, check out the Nocodable Components Library — we’ve got dozens of ready-to-use Bubble elements and templates that work out of the box.
Quick Recap: How to Use a Group Focus in a Repeating Group
✅ Build your Group Focus inside a Reusable Element
✅ Toggle it using a simple workflow
✅ Insert it into your Repeating Group
✅ Pass data to perform row-specific actions
Thomas Couderq
Founder @ Nocodable
I've been building with Bubble for more than four years now. I've launched several projects (with more or less success). I'm passionate about no code and UI Design, which led me to founding Nocodable Components to help founders and professional Bubble developers build faster on Bubble.


Blog
Continue reading!
Check out our other tutorials to continue improving your Bubble skills!