Even though it's still in beta, I'm a big fan of Bubble new table element.
It makes building and displaying Tables in Bubble much more easier than it is with Repeating Groups.
However, since it's still in beta, a few key features are missing. One of them being the pagination feature.
And that's a shame, because pagination for tables in Bubble is really important, especially when it displays a high number of data.
It both enhances the User Experience and help to optimize your app's speed and WU Consumption.
Thankfully, there is a solution to this problem: build this pagination feature from scratch and without any plugins.
So let's get started !
To go further in Bubble, you can also read our article on how to build a sidebar in Bubble.
Step 1 : Building and connecting data to our Table
Obviously, the first step here will be to actually build our table and connect it to our data.
In this example, I'm going to be using a Table template that I copied from Nocodable Component's library.
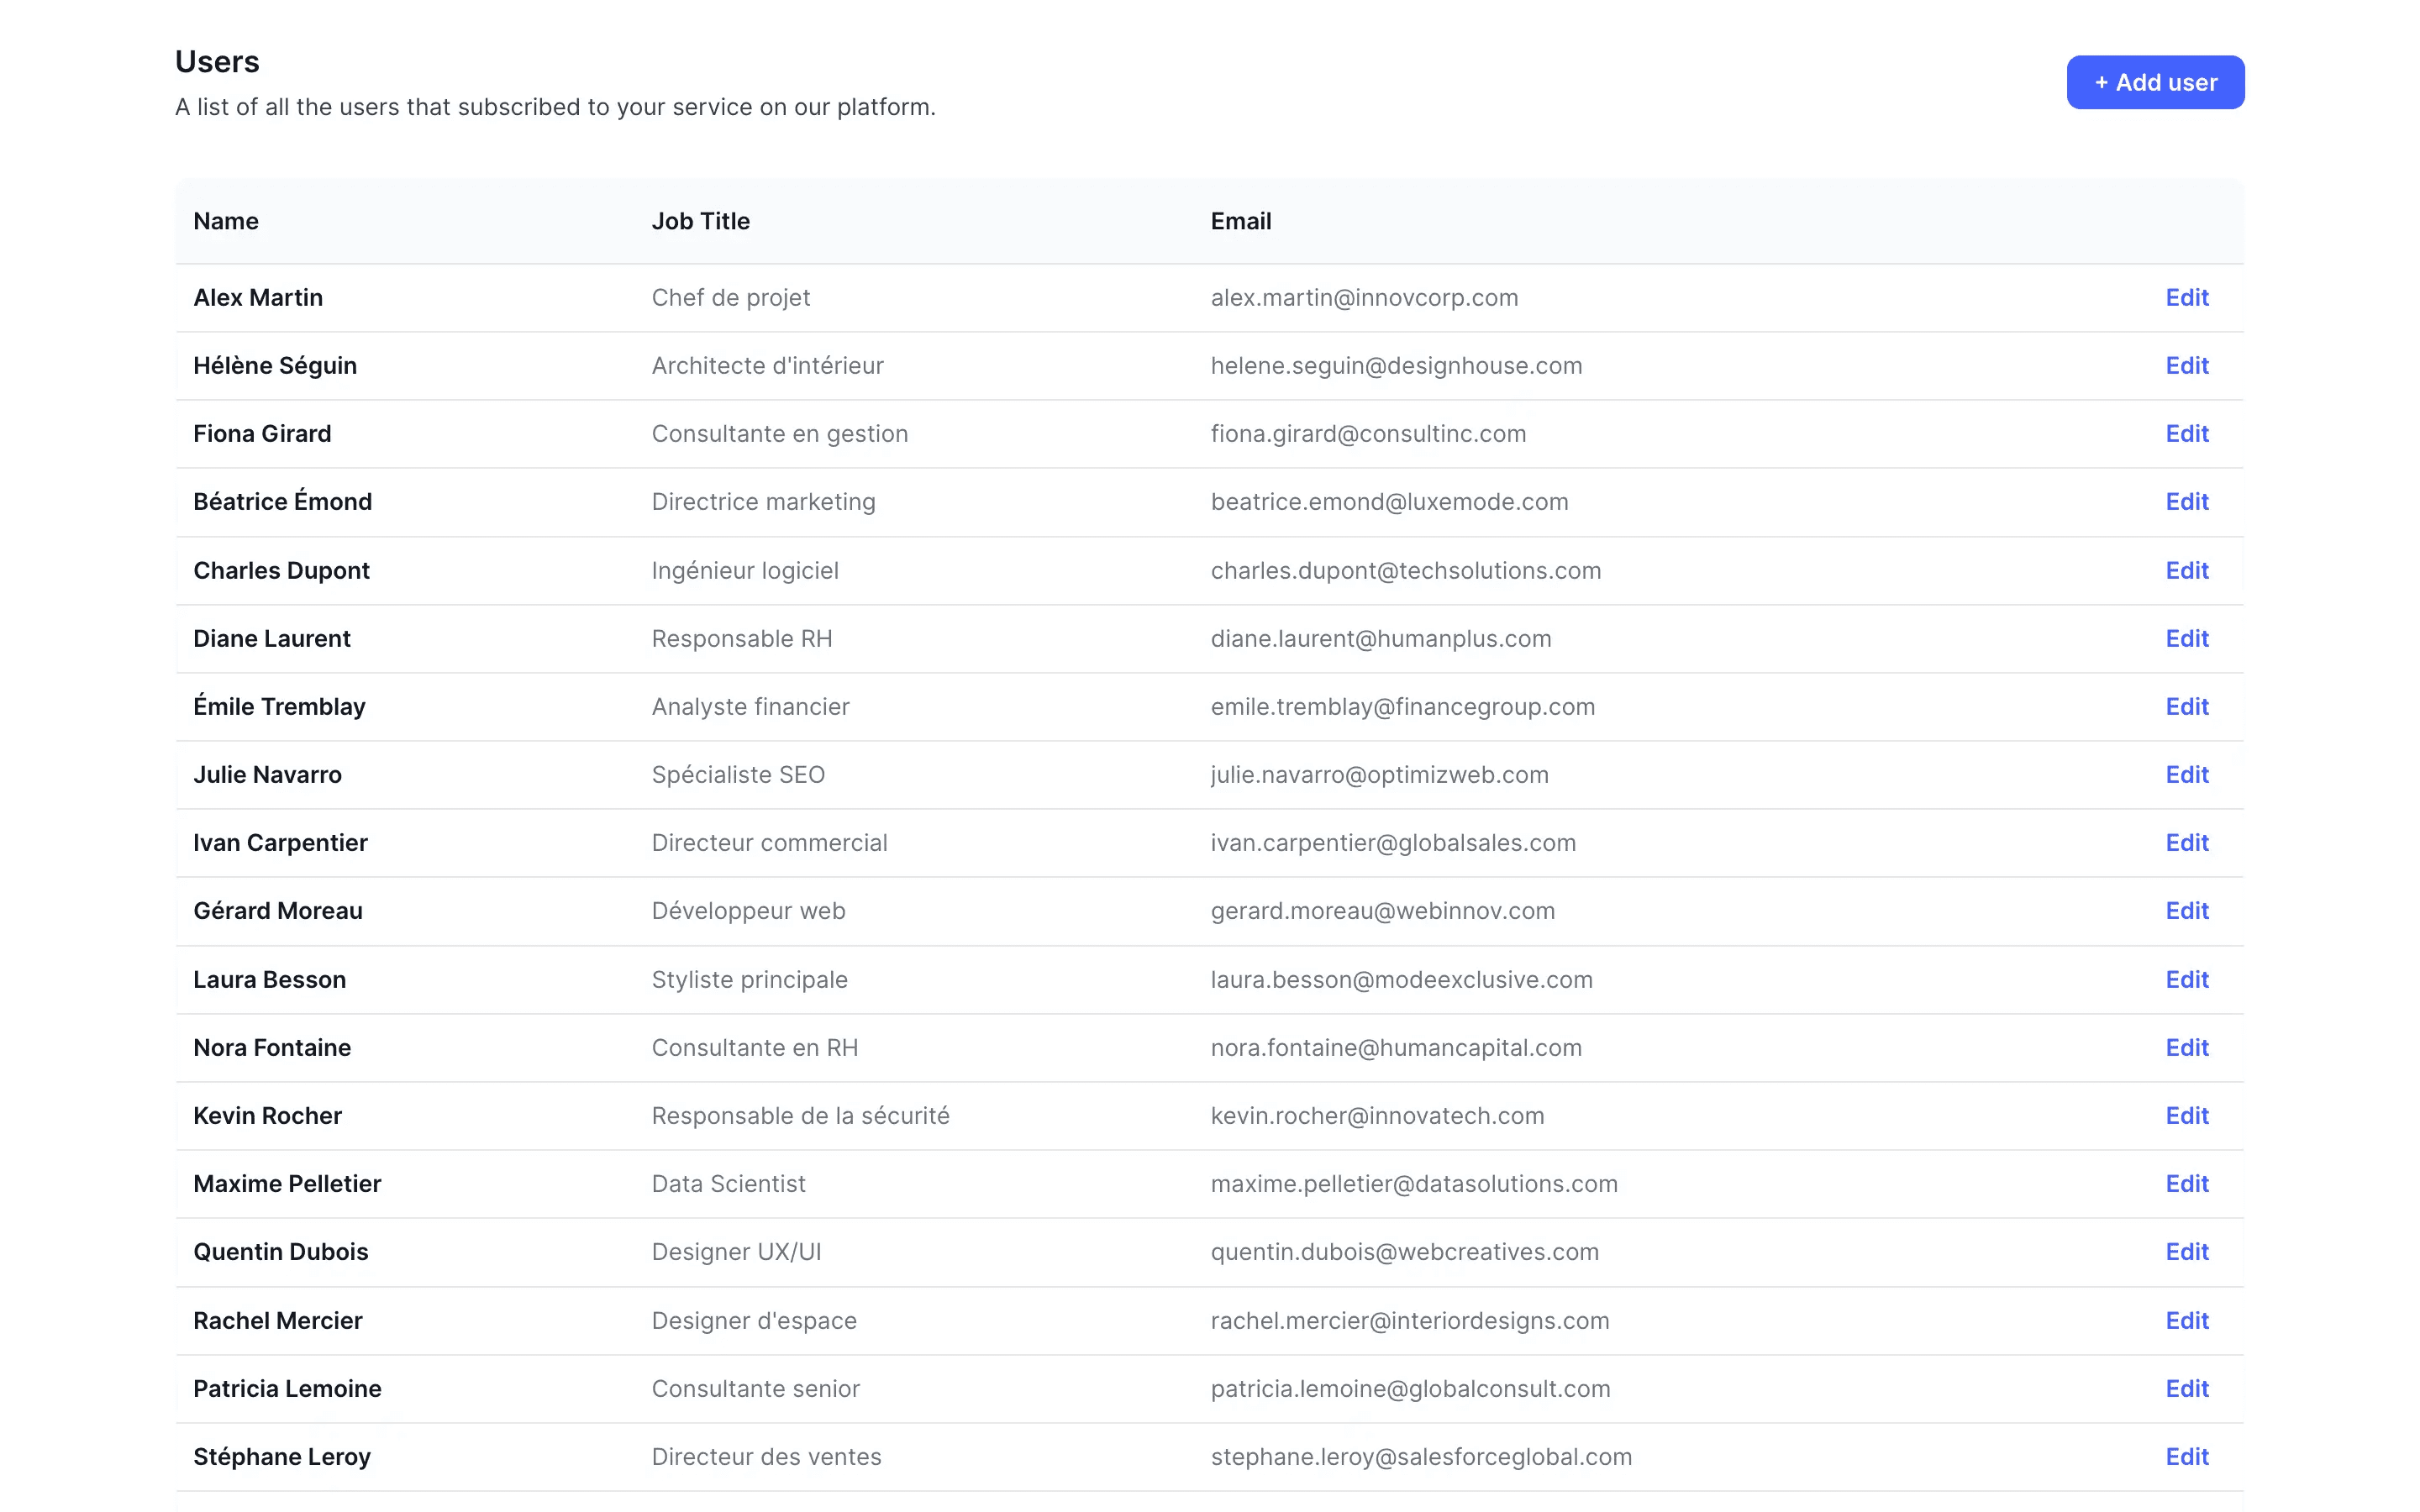
If you want to find more ready to use Tables Template for Bubble.io, so feel free to check them out.
After pasting it, I populated it with a bunch of Dummy Data that are representing contacts.
And here is how I set up my Data Source :

Nothing too fancy for now !
Then I also built a basic interface that we'll for the implementation of our pagination feature.
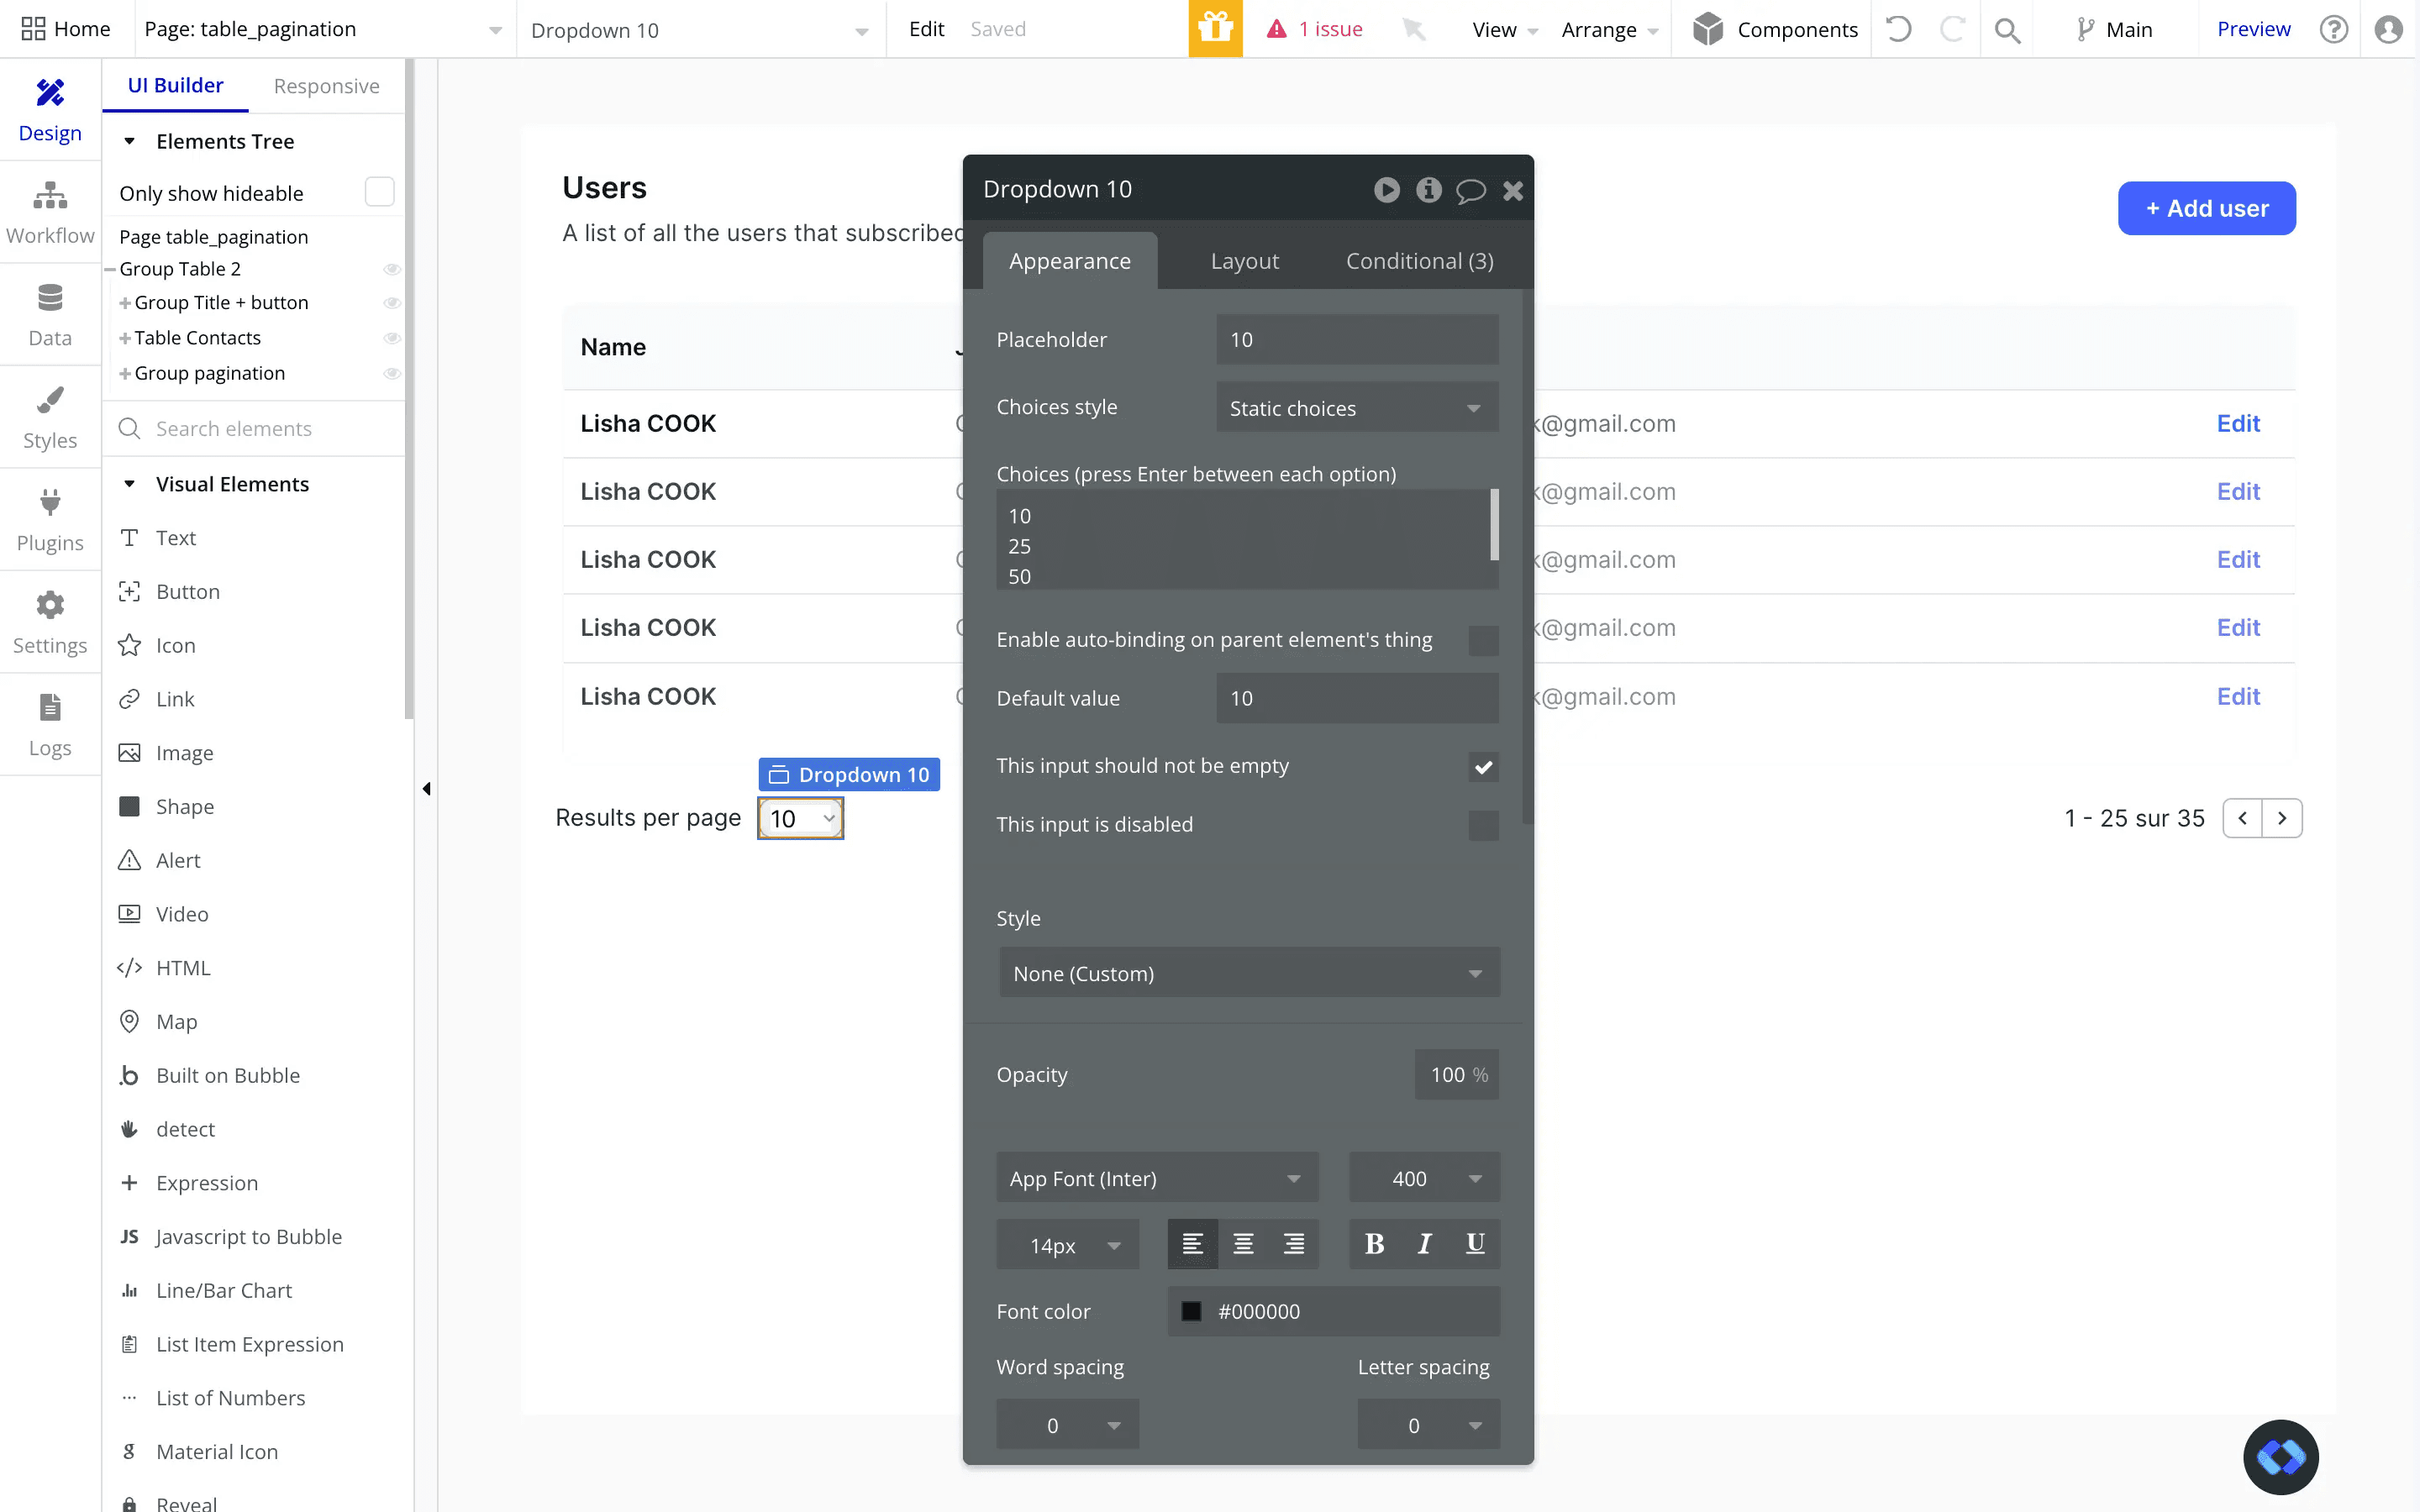
Step 2 : Displaying a fixed number of results per page
Alright, now that we have our interface built, we first need to limit the number of records displayed per page.
And for the sake of our user's experience, we need to give them the ability to change this number.
If they want to display 10 or 100 records per page, they should be allowed to do it.
However, keep in mind that displaying a reasonable number of records by default is the best way to make your pages load faster, and optimise your WU consumption.
A search that returns 1000 records will end up consuming more WU than a search returning 20.
As you saw earlier, I added a dropdown with the mention "results per page" at the bottom of my element.
This is what we're going to use.
This is straightforward to setup, all you need to do is to feed your dropdown with some options.
The only thing you need to make sure it that these options are numbers.
Now, you also need to make sure of two important things :
1 - Check the checkbox "This input should not be empty"
2 - Set a default value for your dropdown
This way your dropdown will always have a value. If it's not the case, your users might break your pagination system.
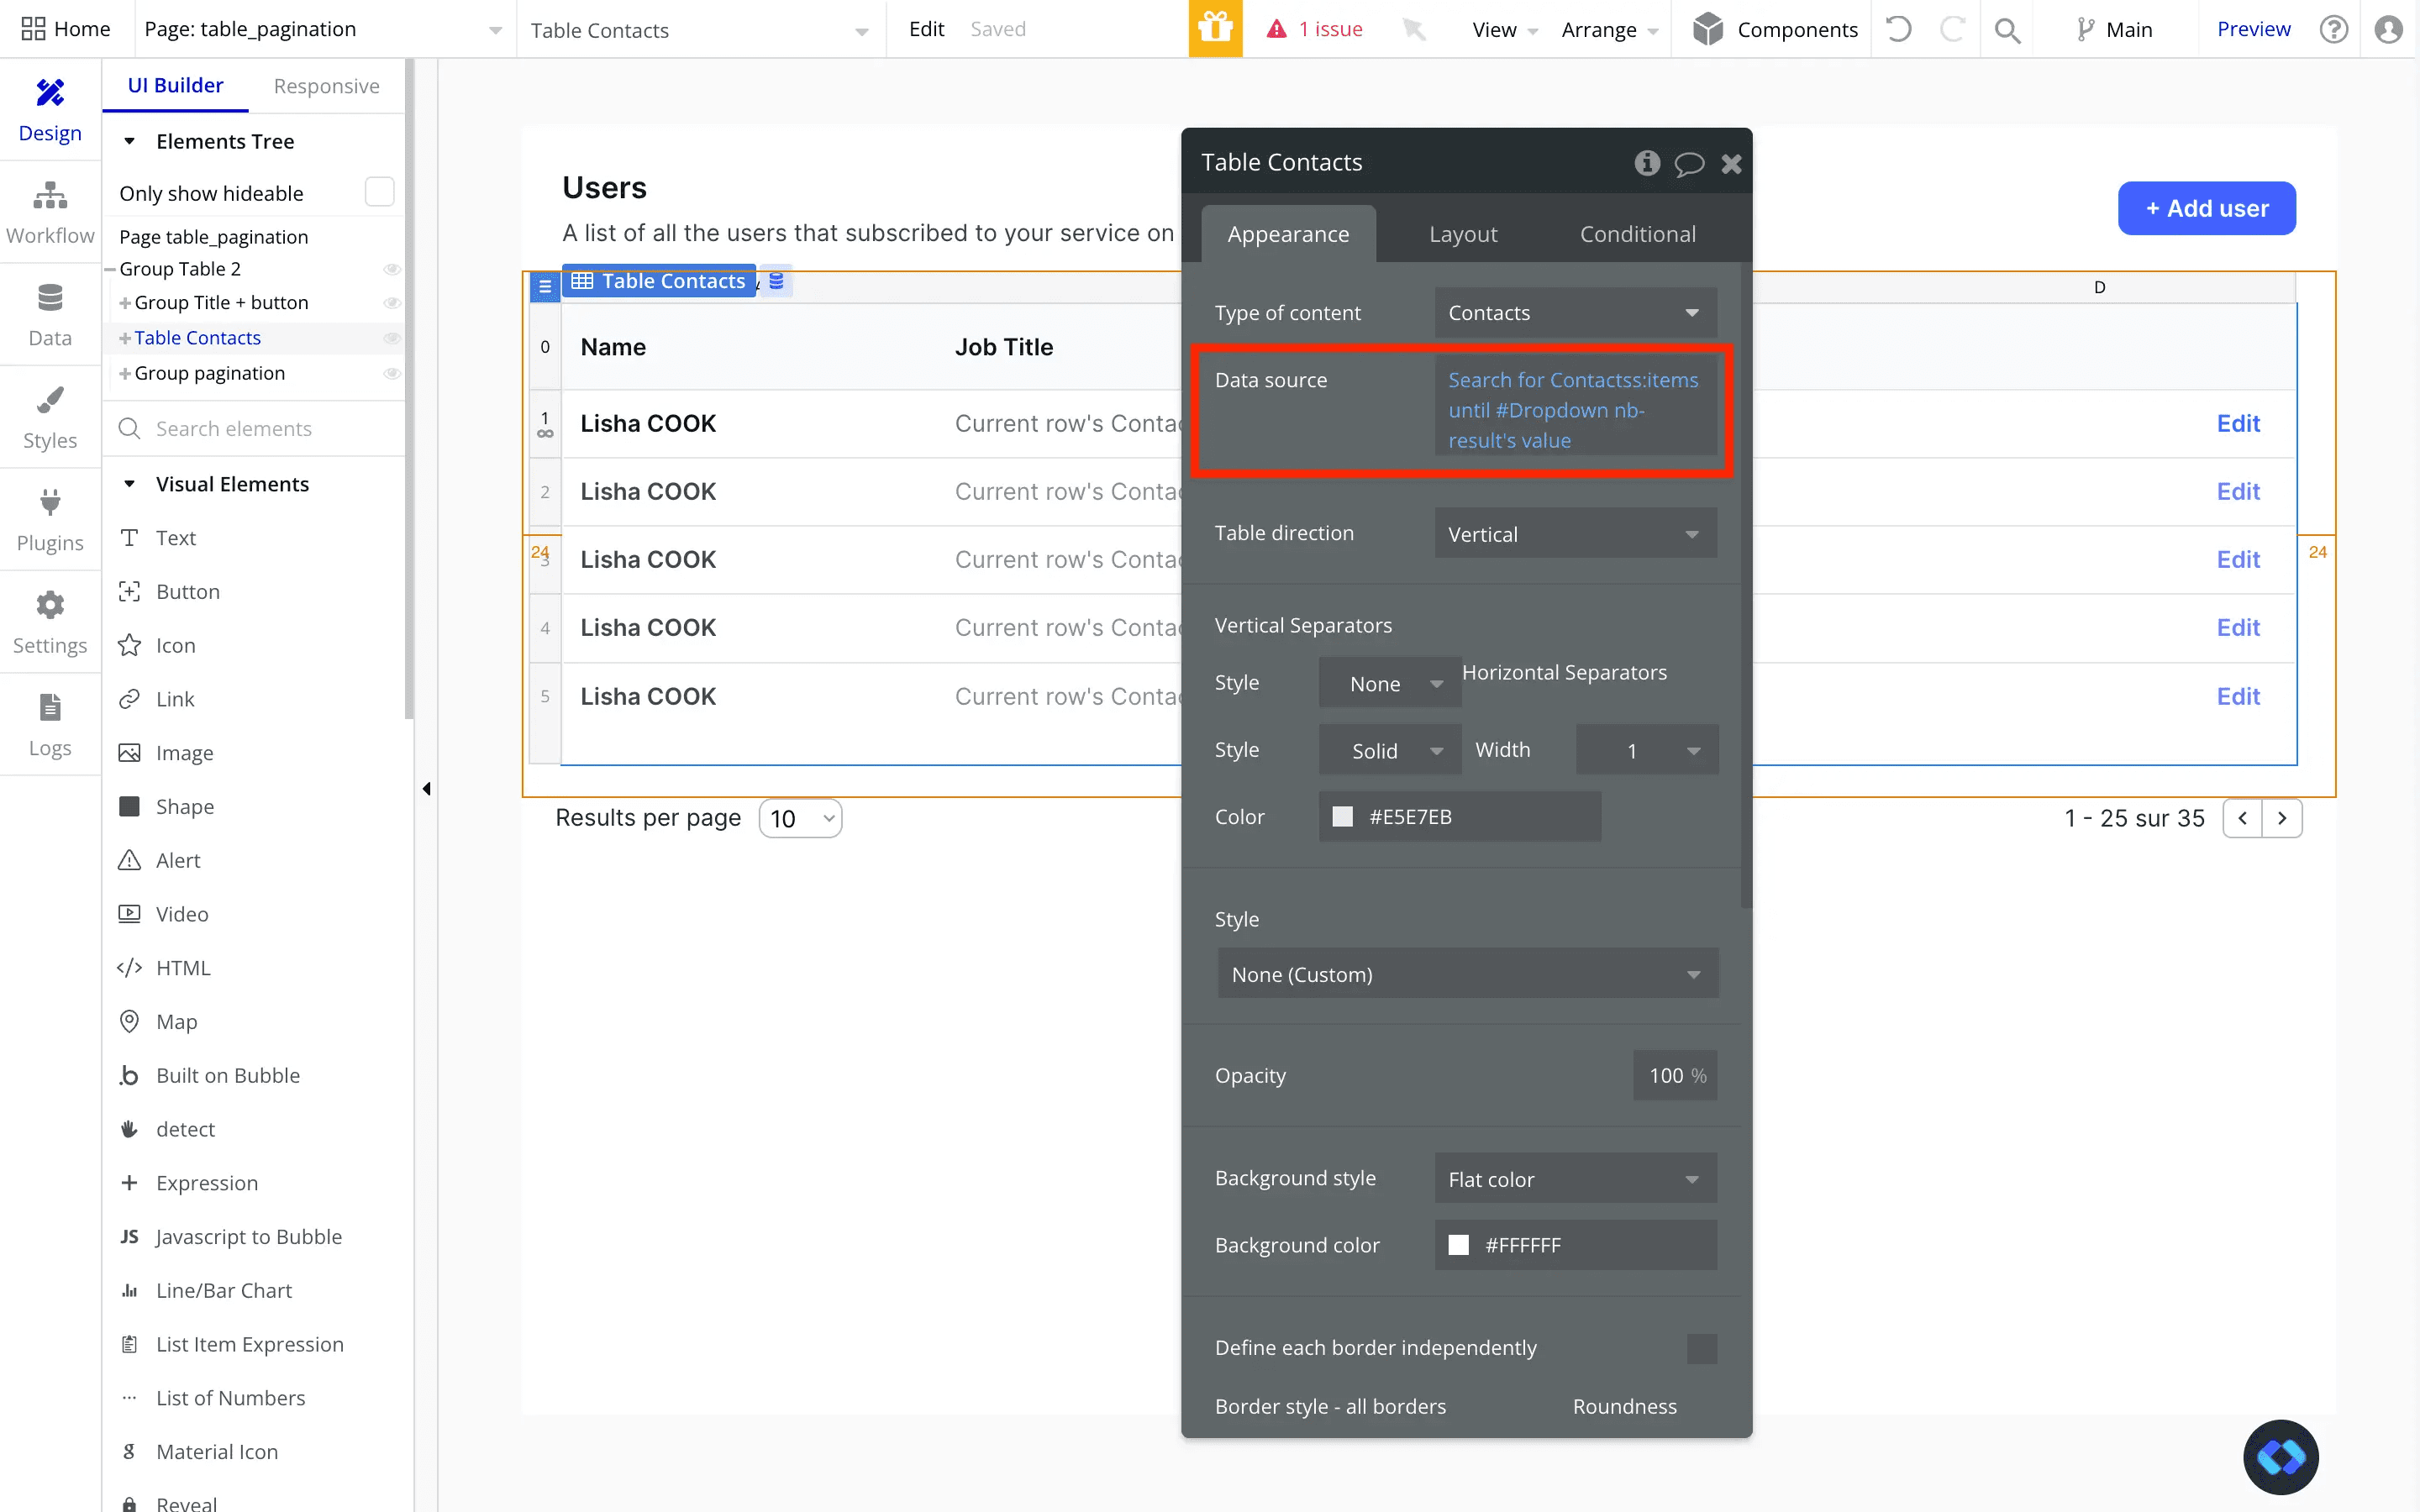
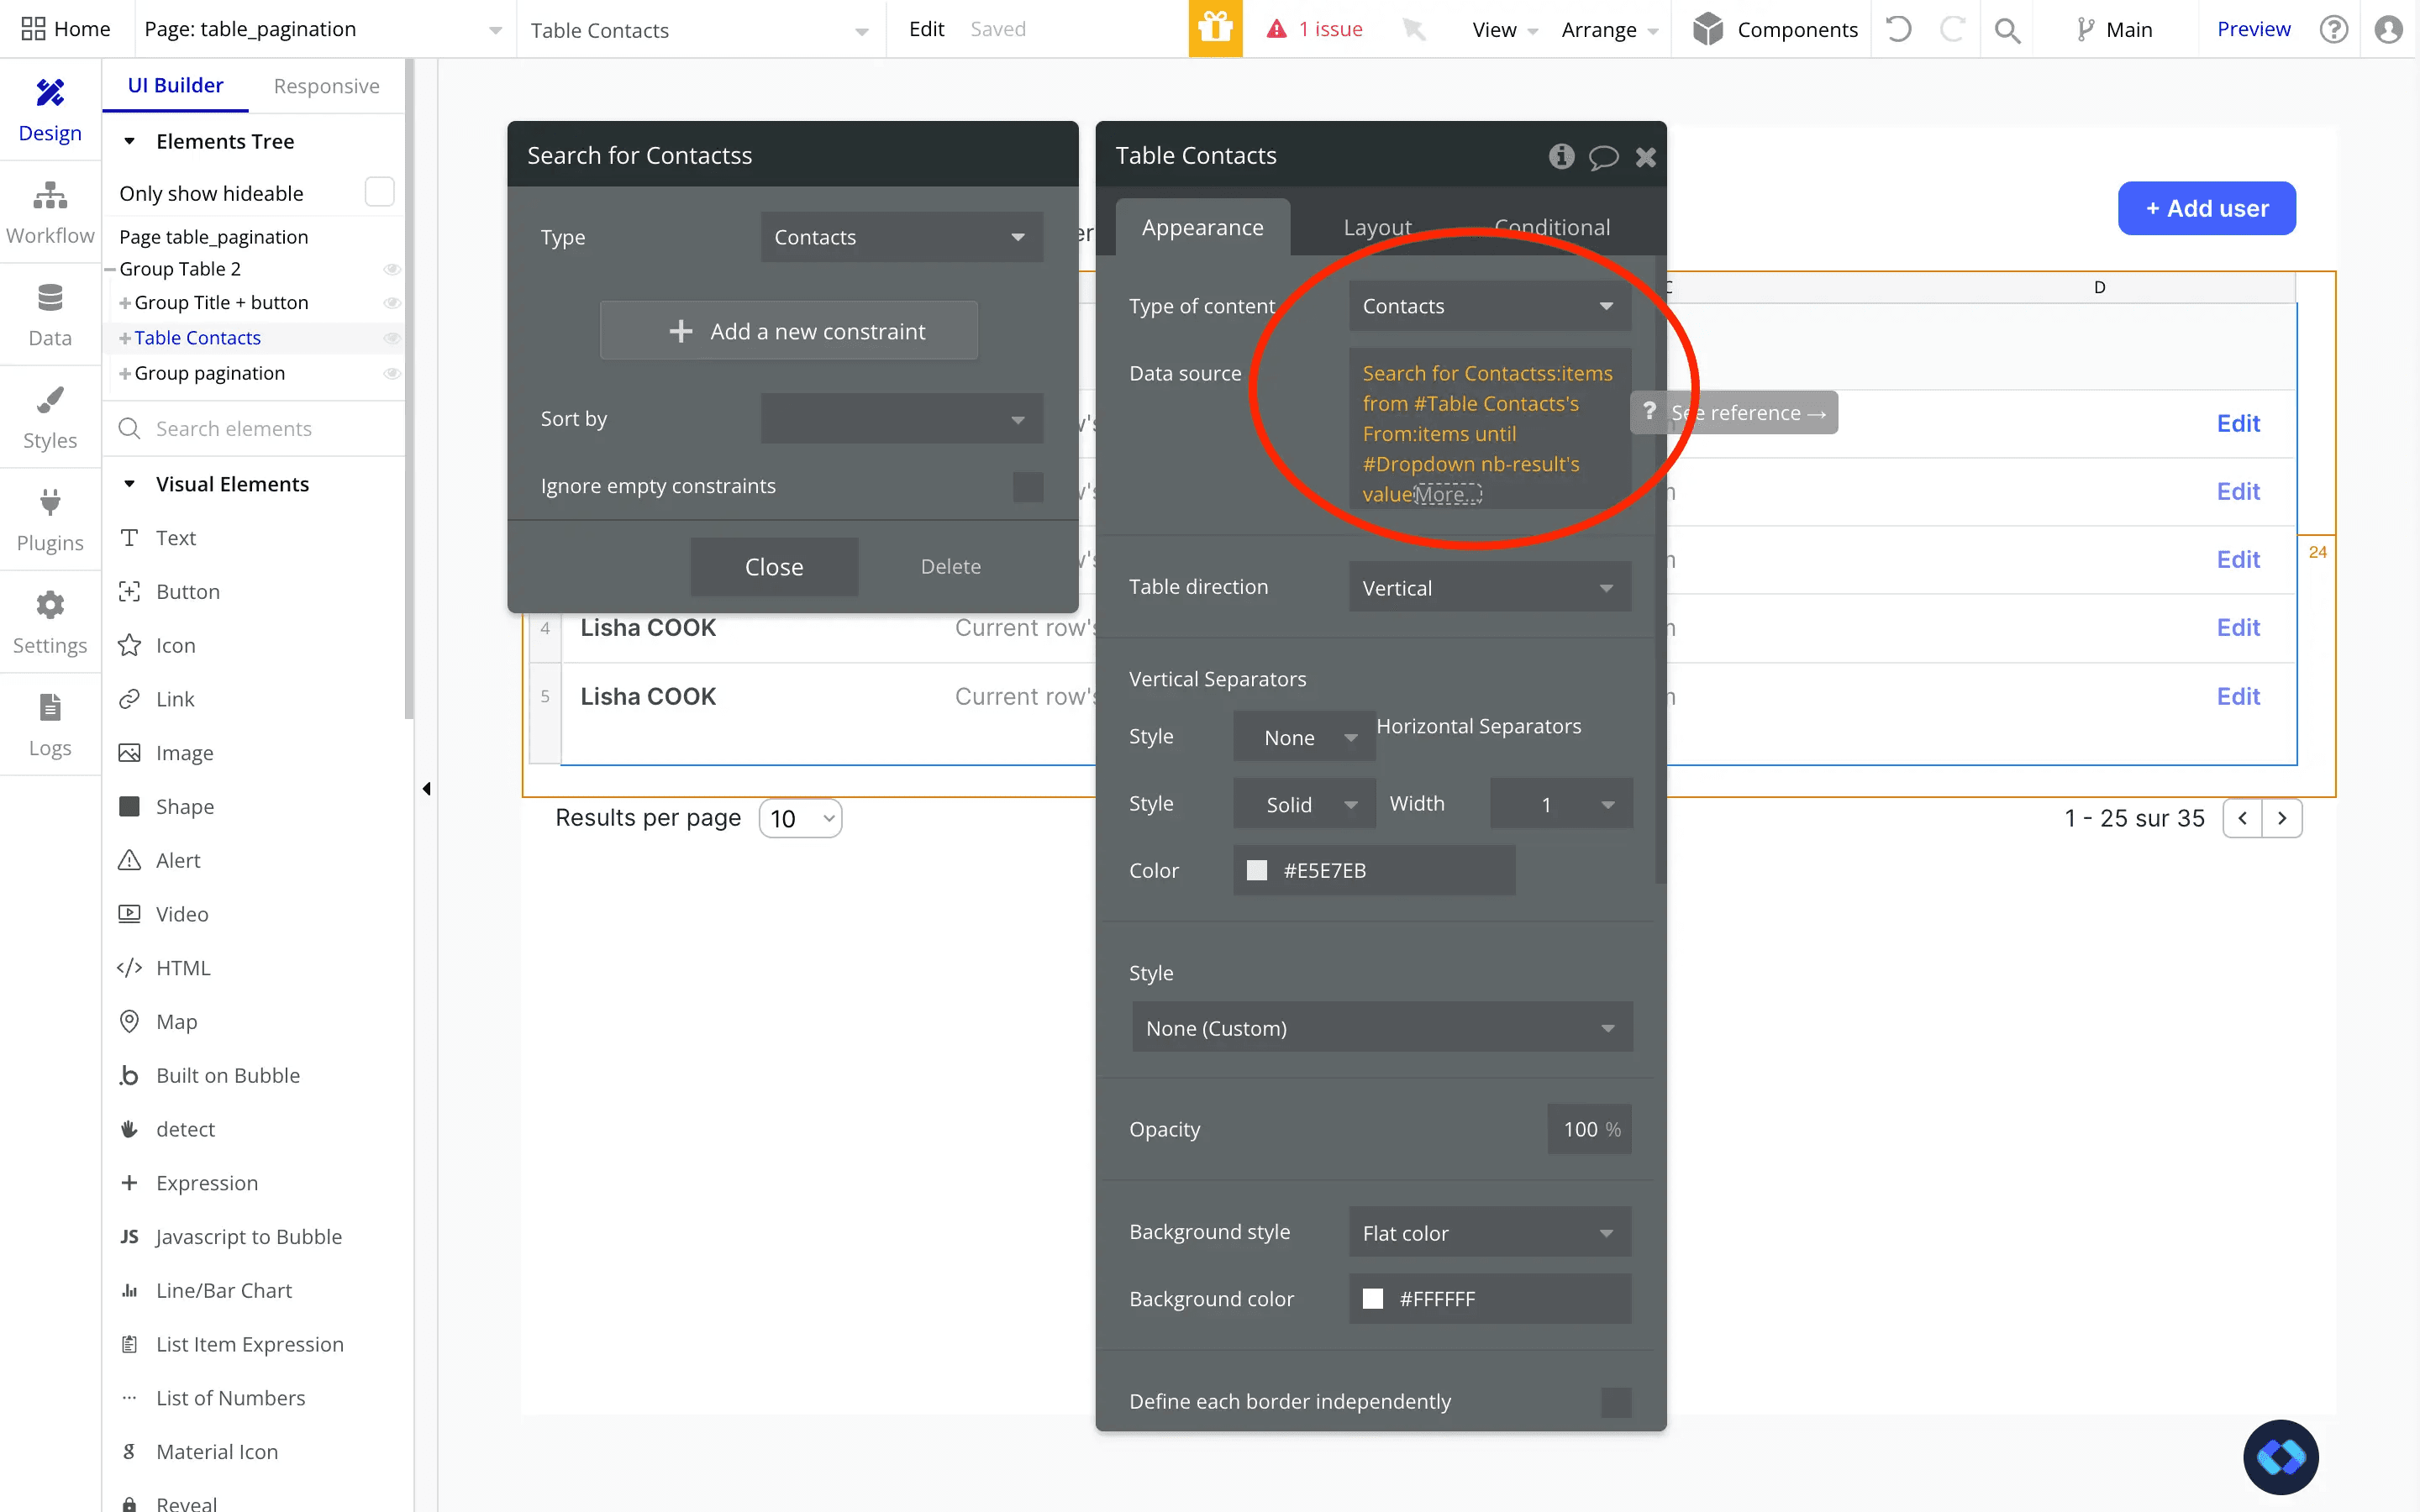
Now we simply need to constrain our search so that it only shows us items up to our dropdown's number of desired results.
To do this, we simply need to go back to our table's data source and use the ":items until #" operator.
This operator restrain a search to a given number of items, which is exactly what we want !
Here's how it looks :
Step 3 : Building our navigation workflows
Alright, now comes the more tricky part, which is building the actual system that we'll use to navigate through our pages.
Overall, a pagination system is nothing more than a manner of showing results whose index are located between a number A and a number B. The index being the position of the result in our list.
So basically, we want our system to show us the results that are located between A and B.
Simple as that.
Now, how do we do this in Bubble ?
Well, all we are going to need is a Custom State, that we'll name "From" and give it a type of Number.
We'll also give it a default value of "1", because by default, we want it to show records from the first result of our search.
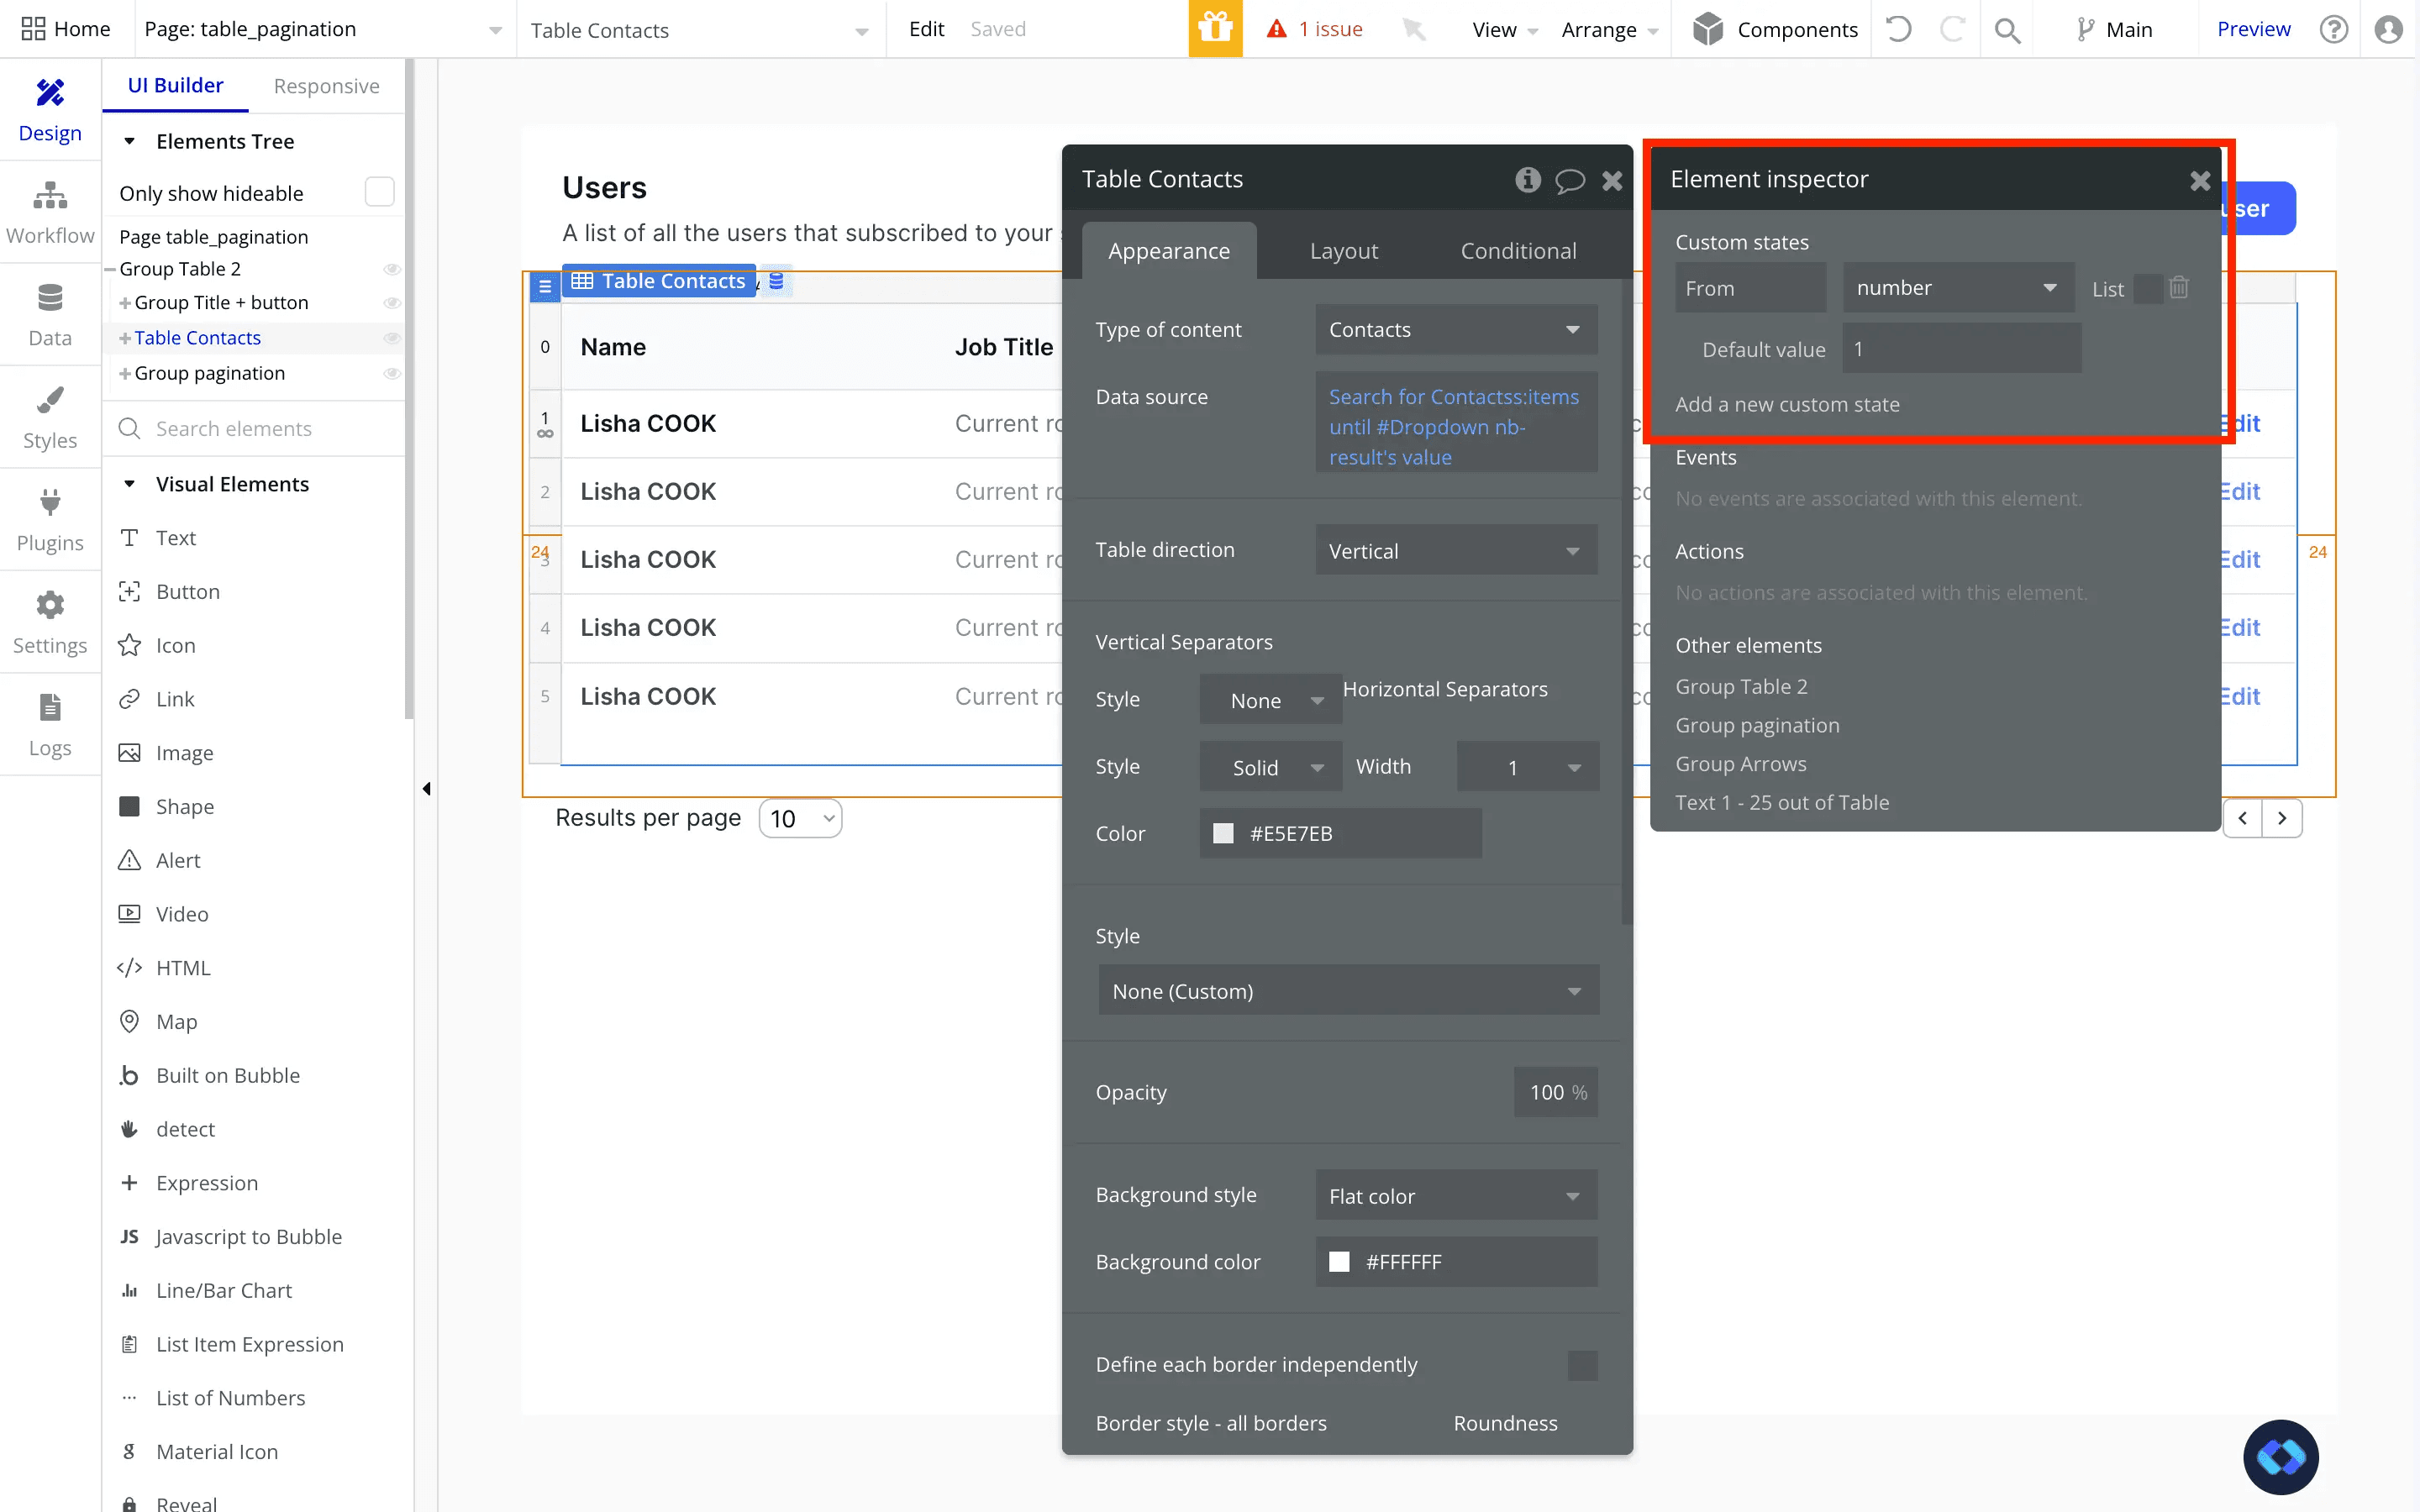
Now that we have our Number A, we need to figure out how to get our Number B.
But in reality, we already have it, it's the value stored in the dropdown we configured earlier.
So now that we have both our Constraining Numbers, we can modify our Data Source to reflect these when we navigate through pages.
And here's how it looks :
Basically, we're telling our search "Show me the results from this position, to this position"
In this example, my dropdown's default value is 10, so by default my table will show records from number 1 to number 10.
And now, switching through pages is nothing more than increase these values. With the same example, going to Page 2 would equate to "Show me the results between 10 and 20".
Starting to make sense ?
Cool ! So let's add our workflows :
1 - Navigating to the next page
As we saw earlier, going to the next page is simply of matter of increasing our "From" parameter. And it's pretty easy, because we keep track of it thank to the custom state we created earlier.
But, by how much should we increase it ? Well, by the number of results per page we're displaying, which is stored in our dropdown.
So here's how it looks :
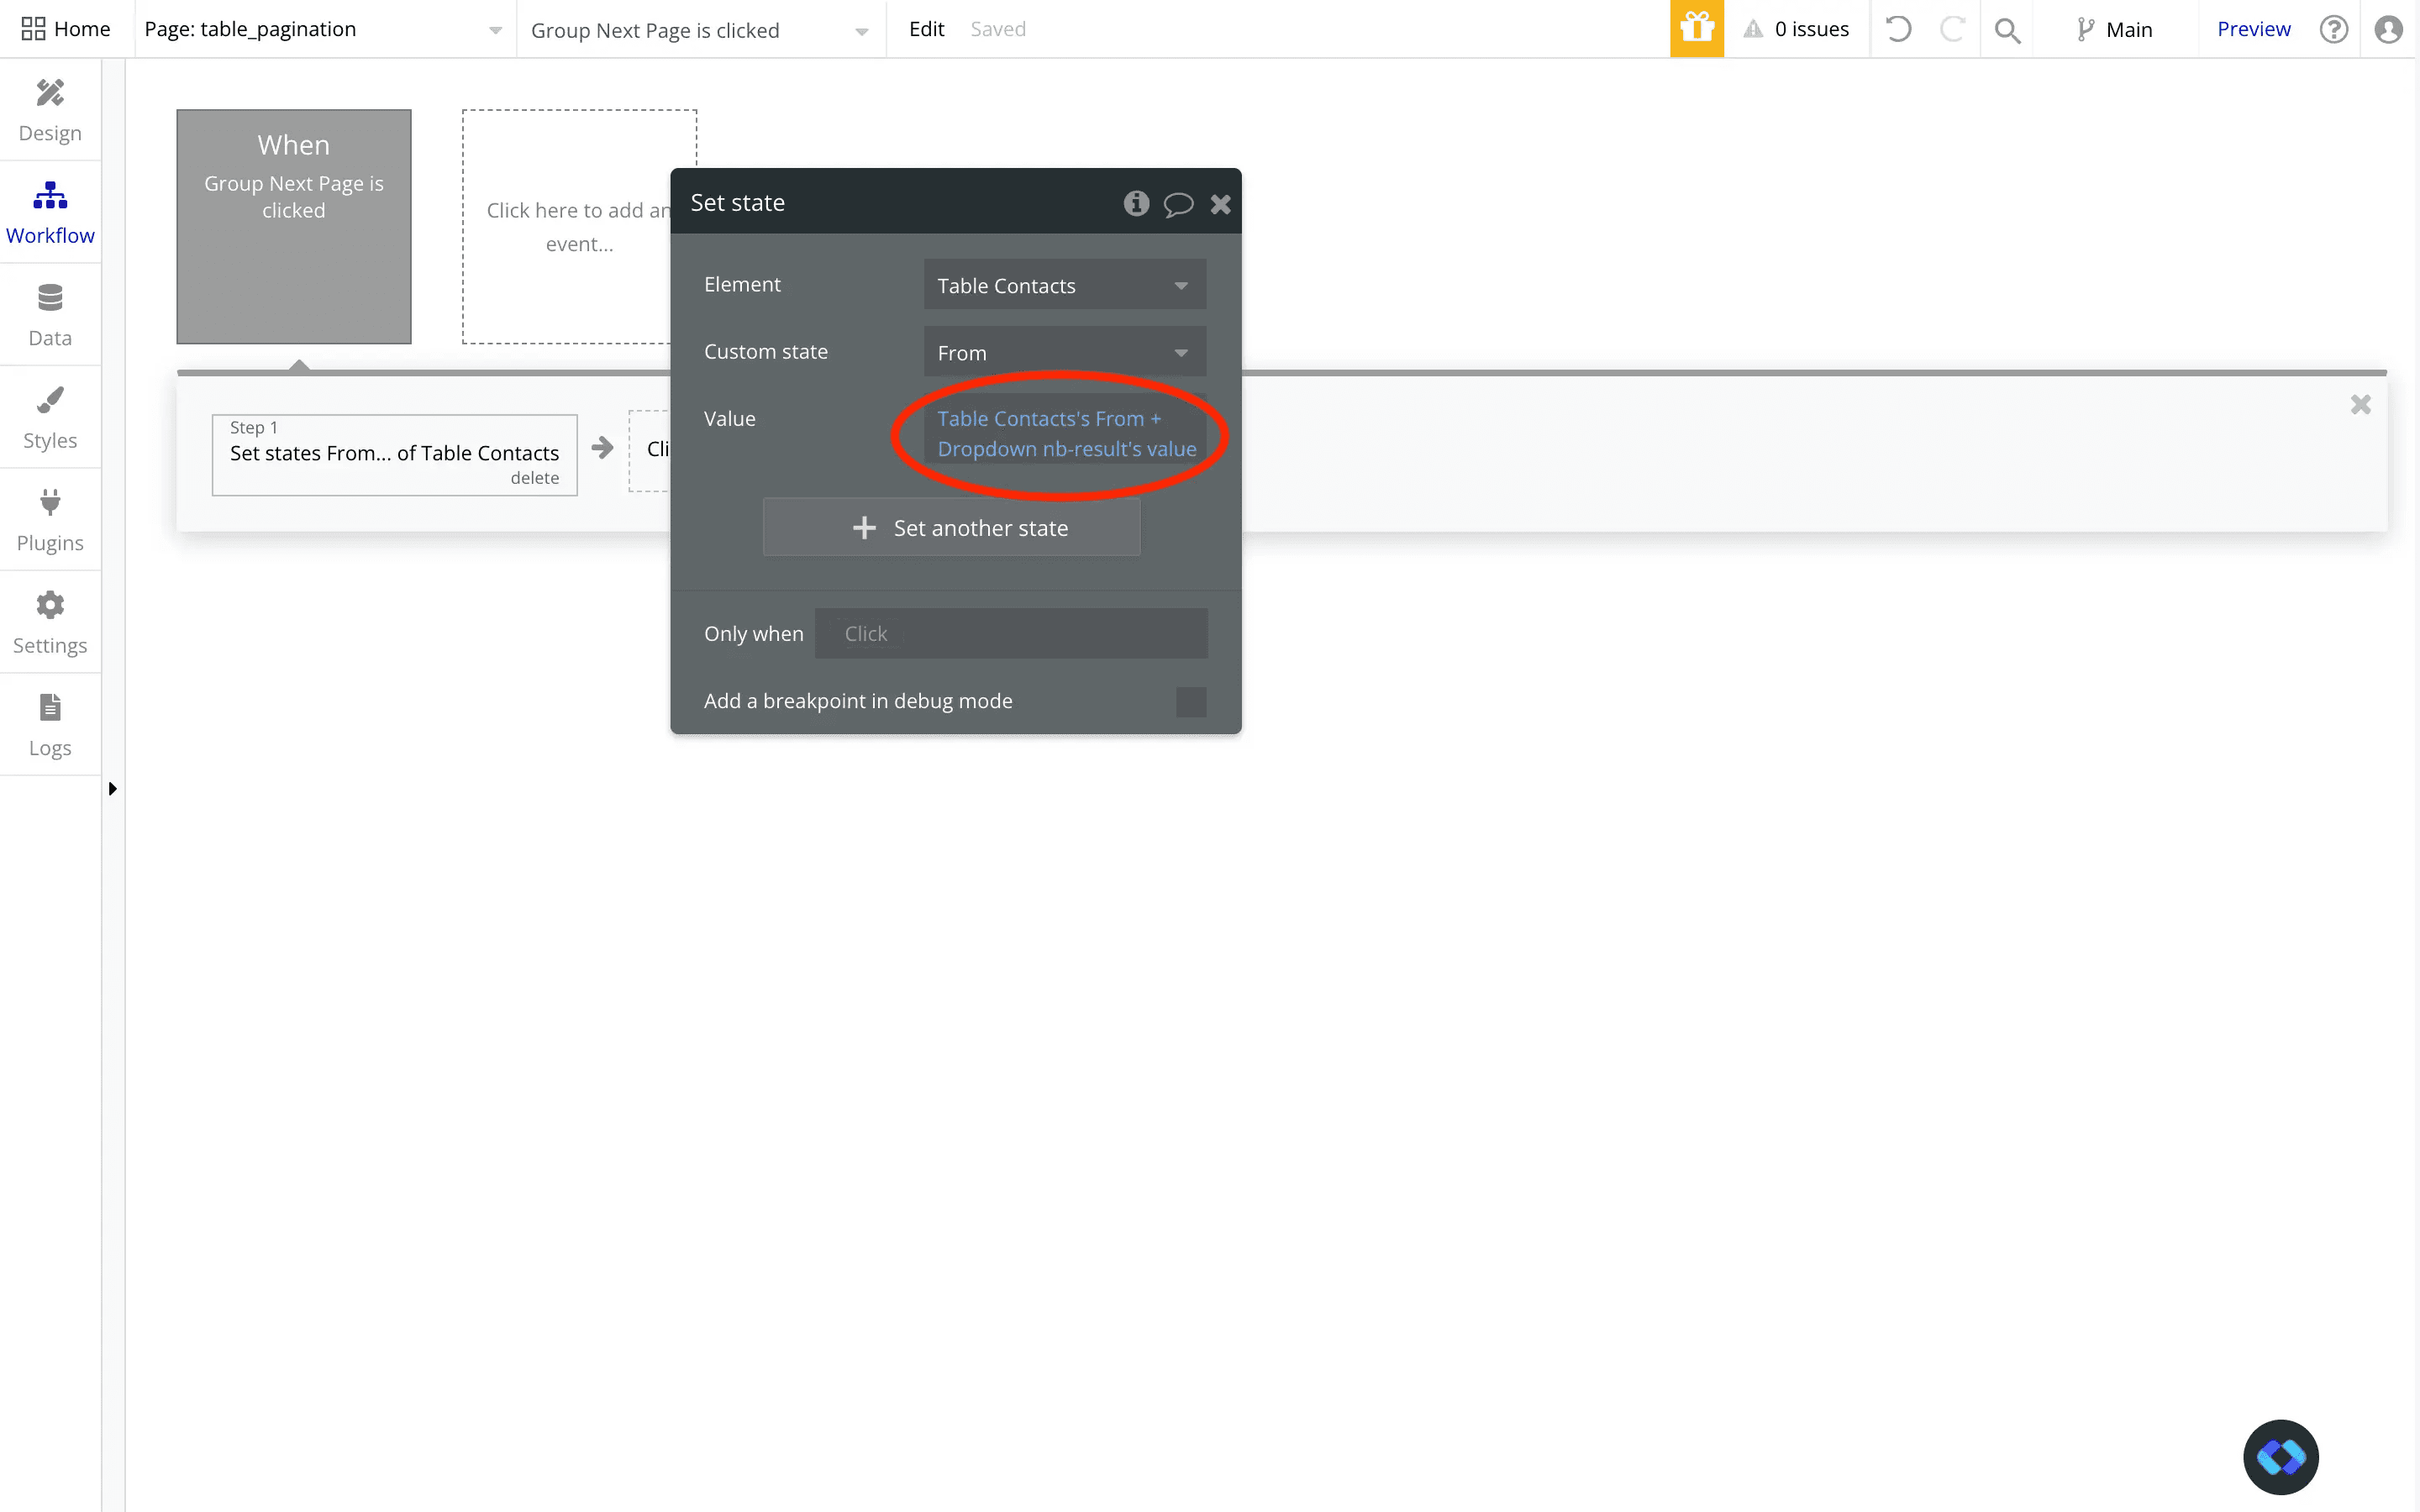
As you can see, I simply reference our "From" Custom State and add the value of our dropdown to it.
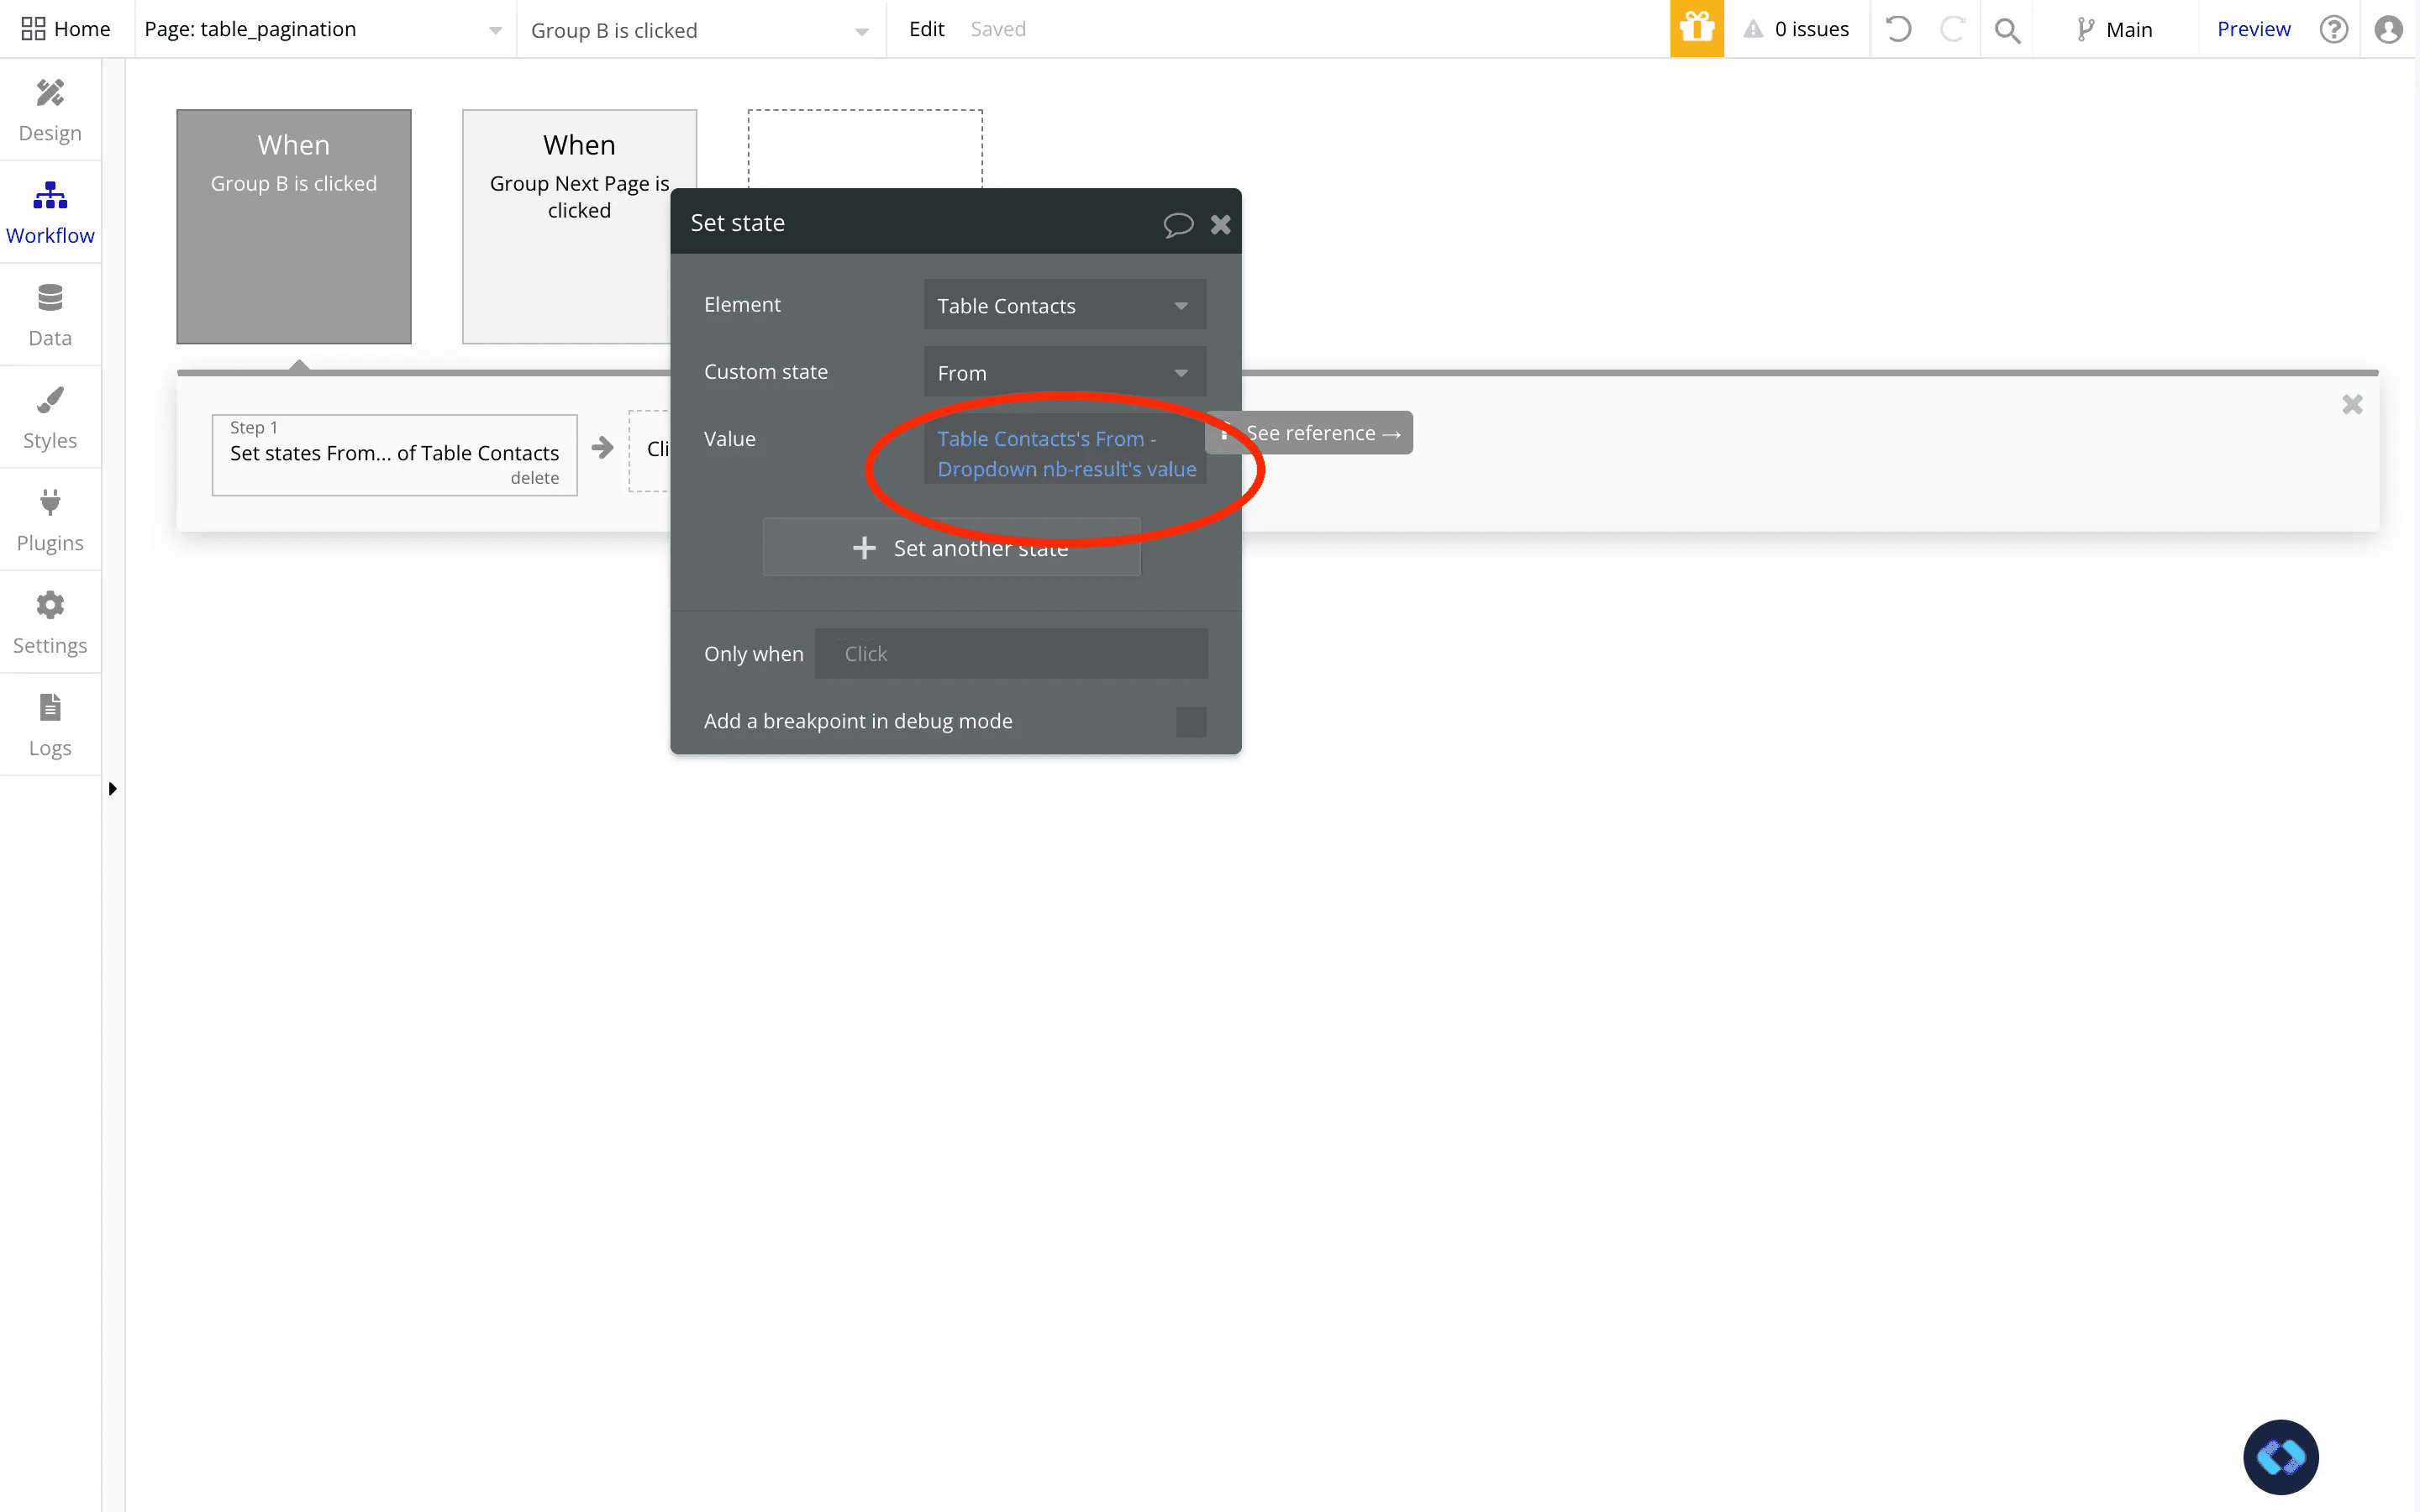
And now, we can make the same thing work to navigate to the previous page.
2 - Navigation to the previous pages
To go to the previous page, we now simply need to decrease our From parameter value, the same way we increased it.
And there you go ! You now have a fully functional pagination feature !
Step 4 - Polishing up our pagination system
We now have a pretty solid pagination system. But why not go into the details are make it stronger and more refined ?
For starters, we need to address an issue. If your users are on the first page of your Table and click on previous, our From parameter will end up being negative, which will break our system.
Adding safety conditions
So we need to add a condition to our workflow to make sure they can't do that :
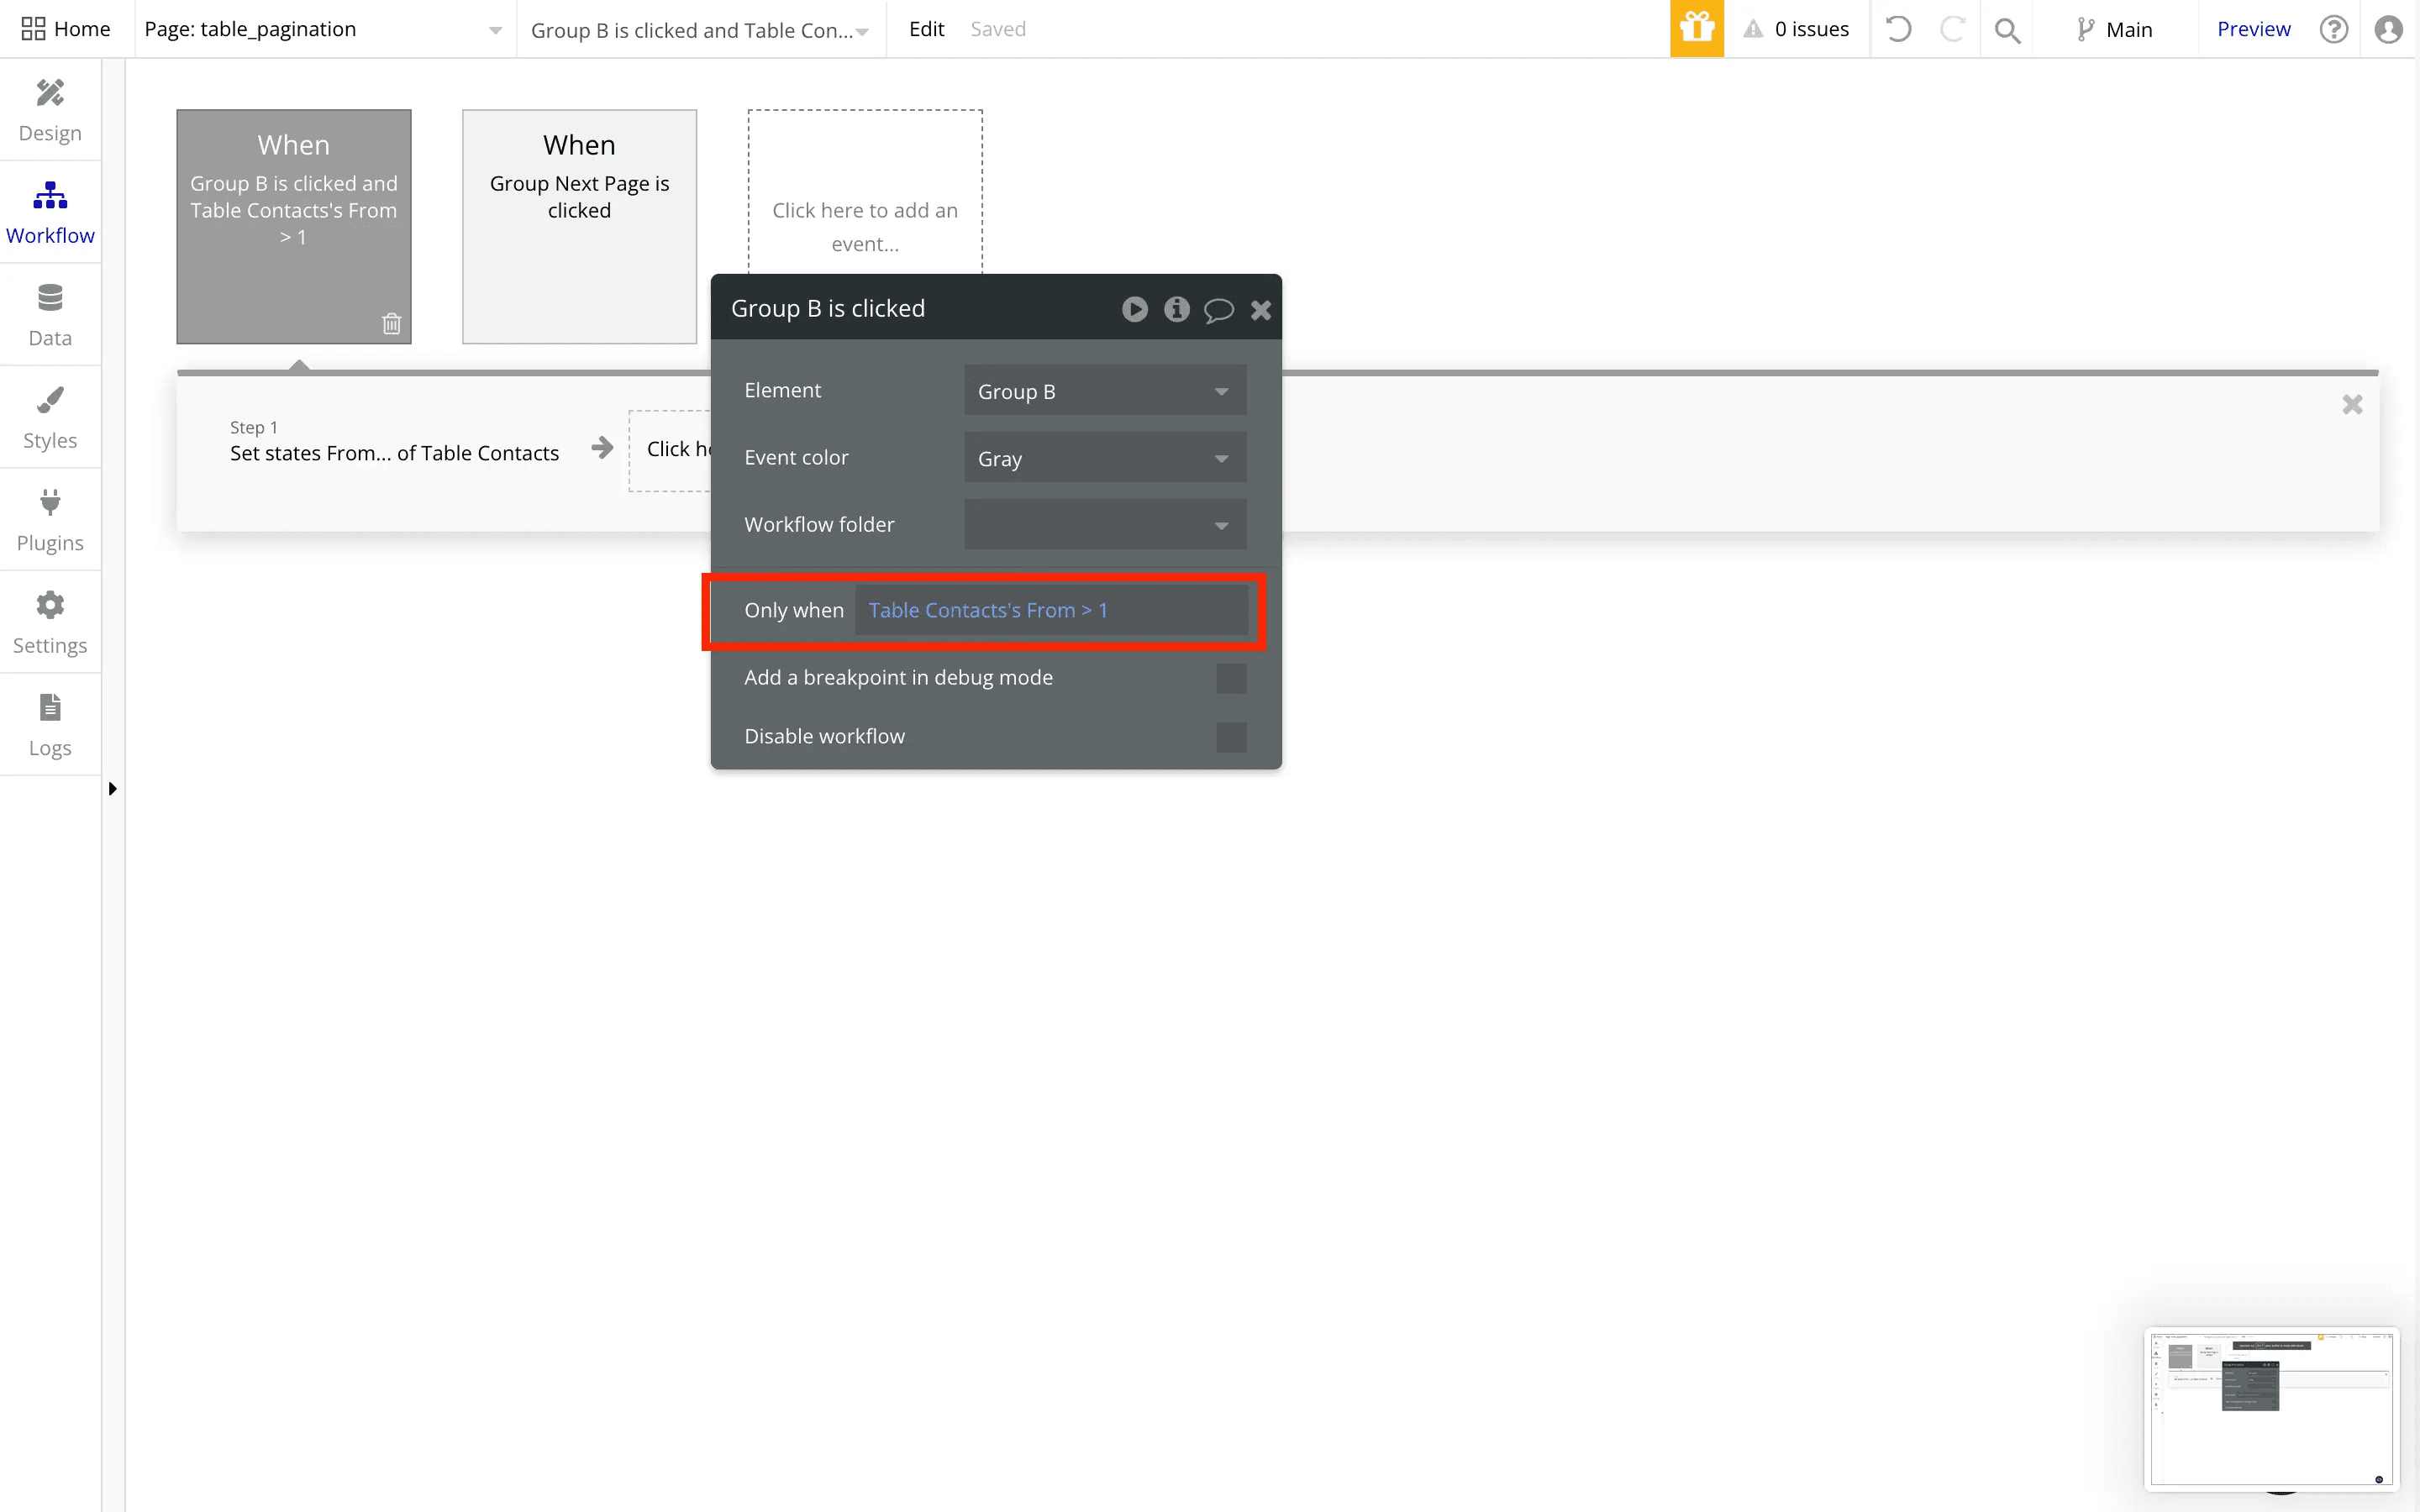
And then, we need to do the same thing for the "Next" action :
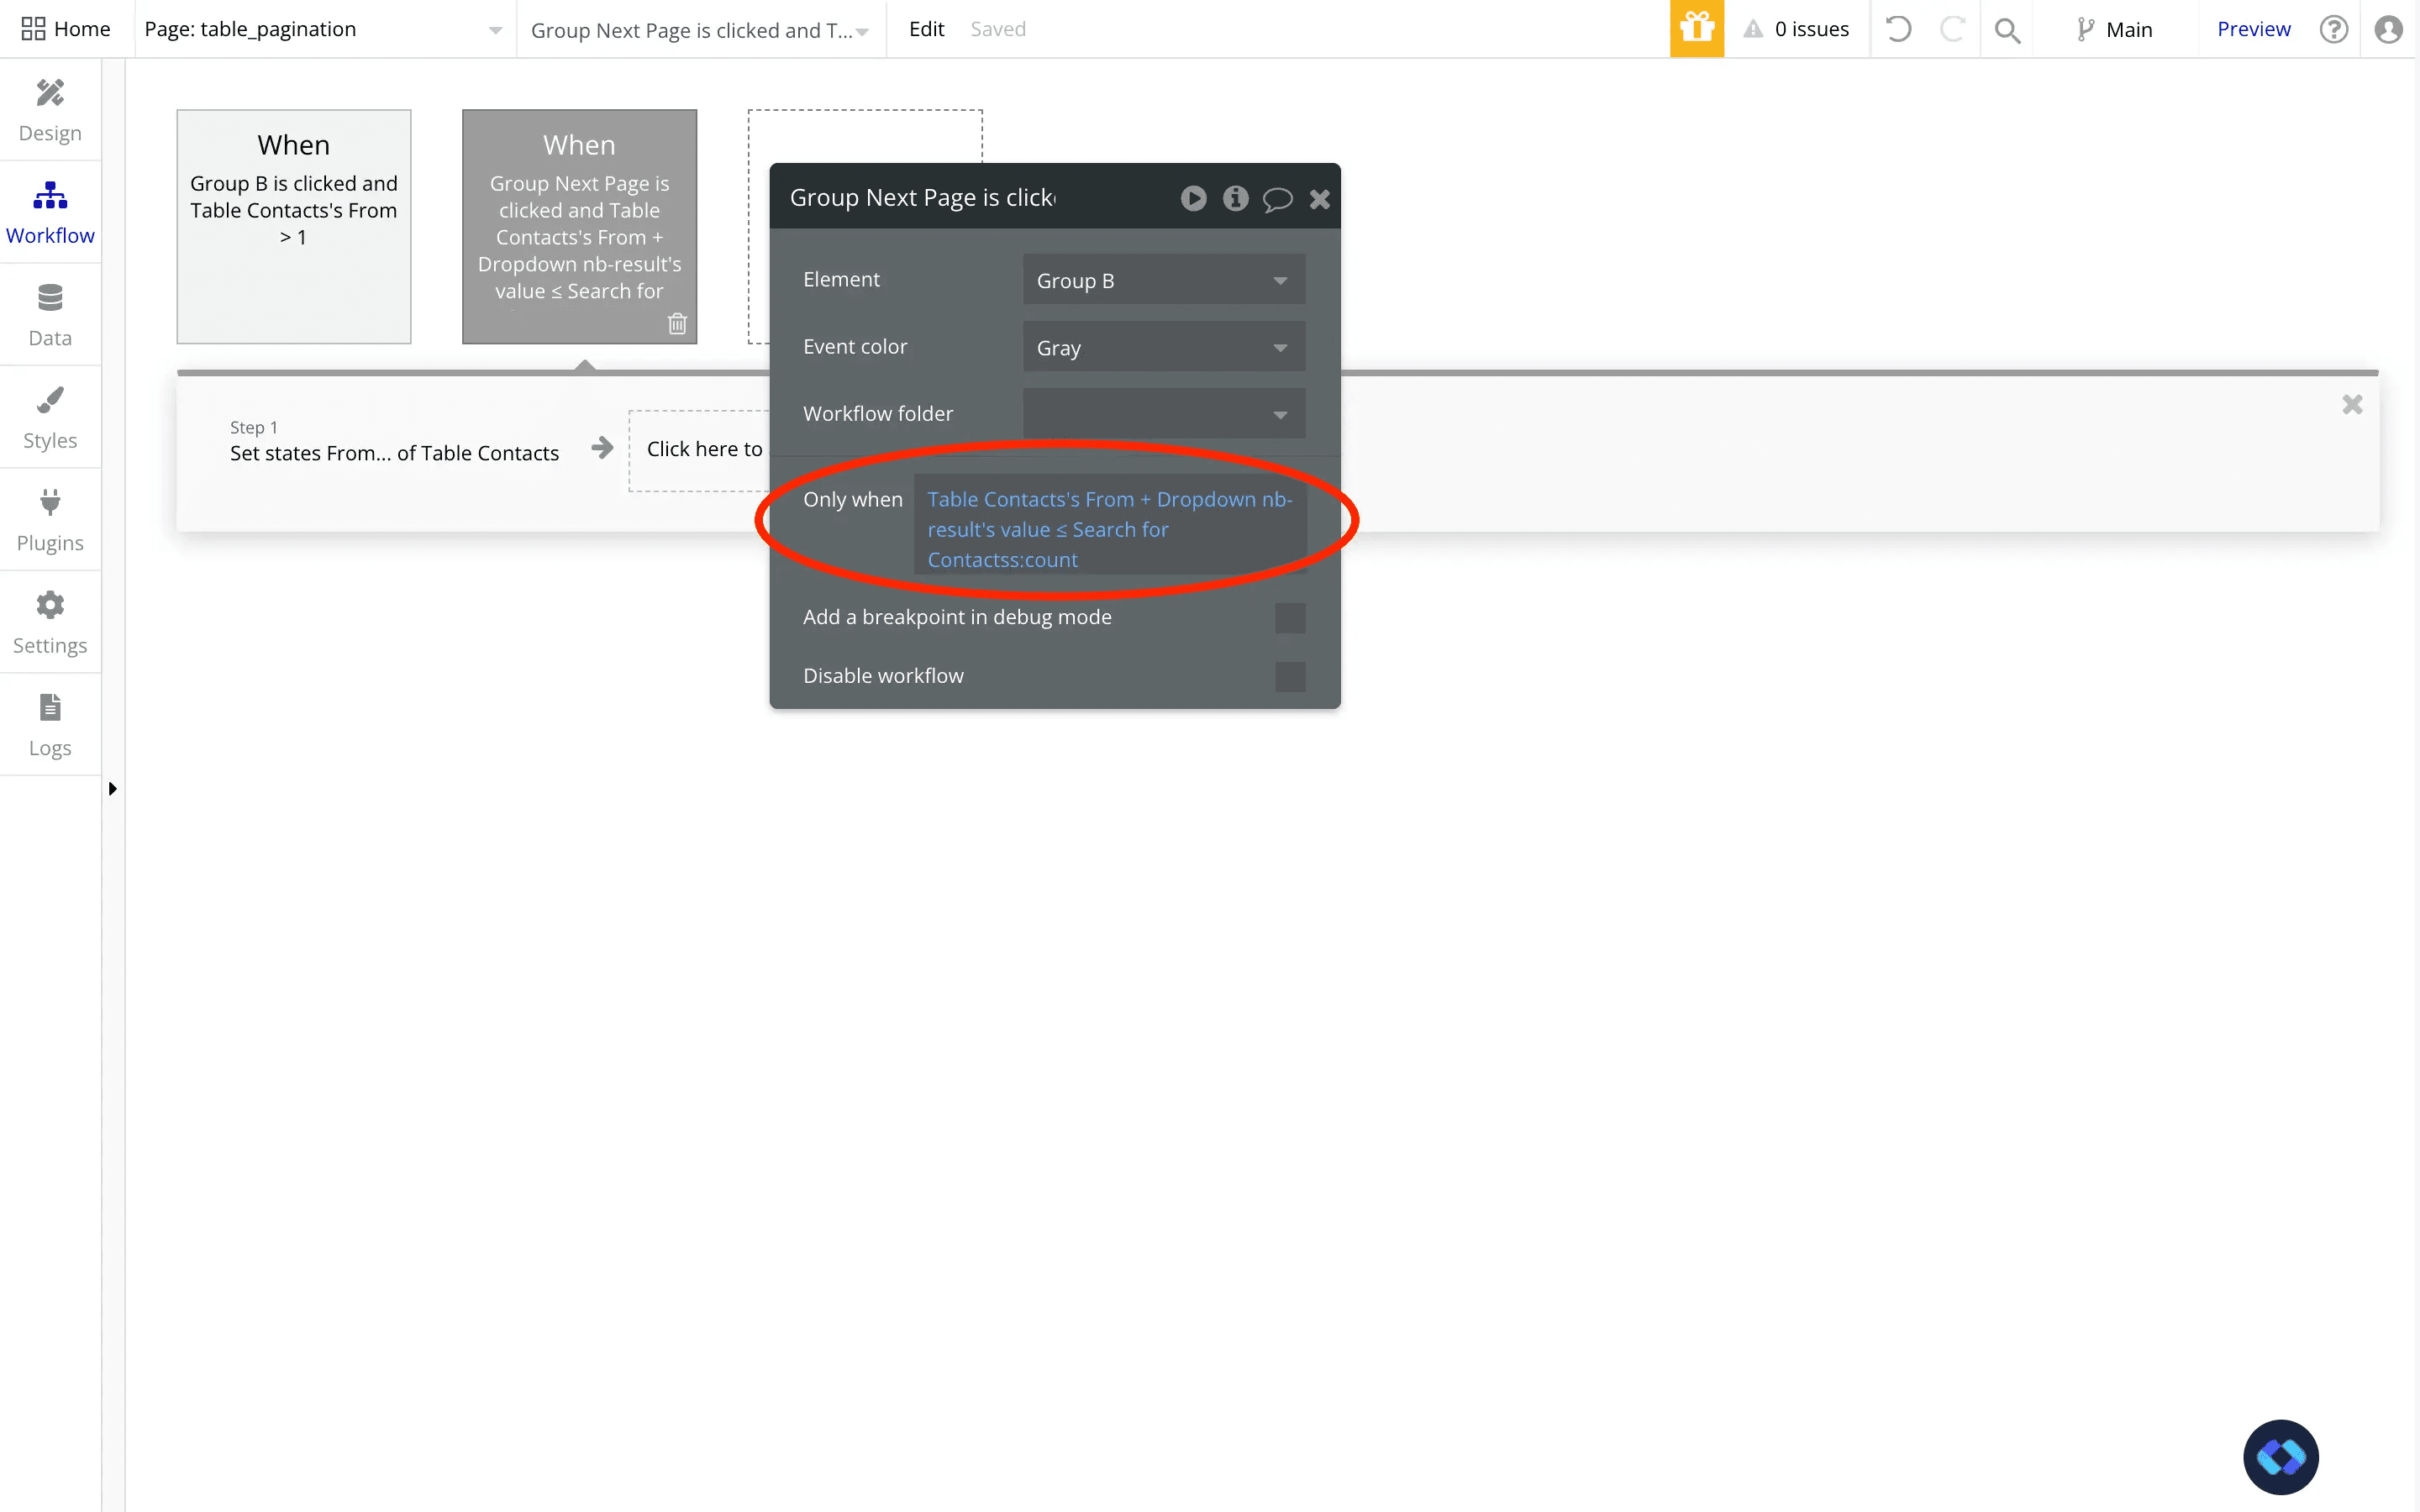
Now, our workflow will only trigger when needed, which will avoid having a faulty pagination feature.
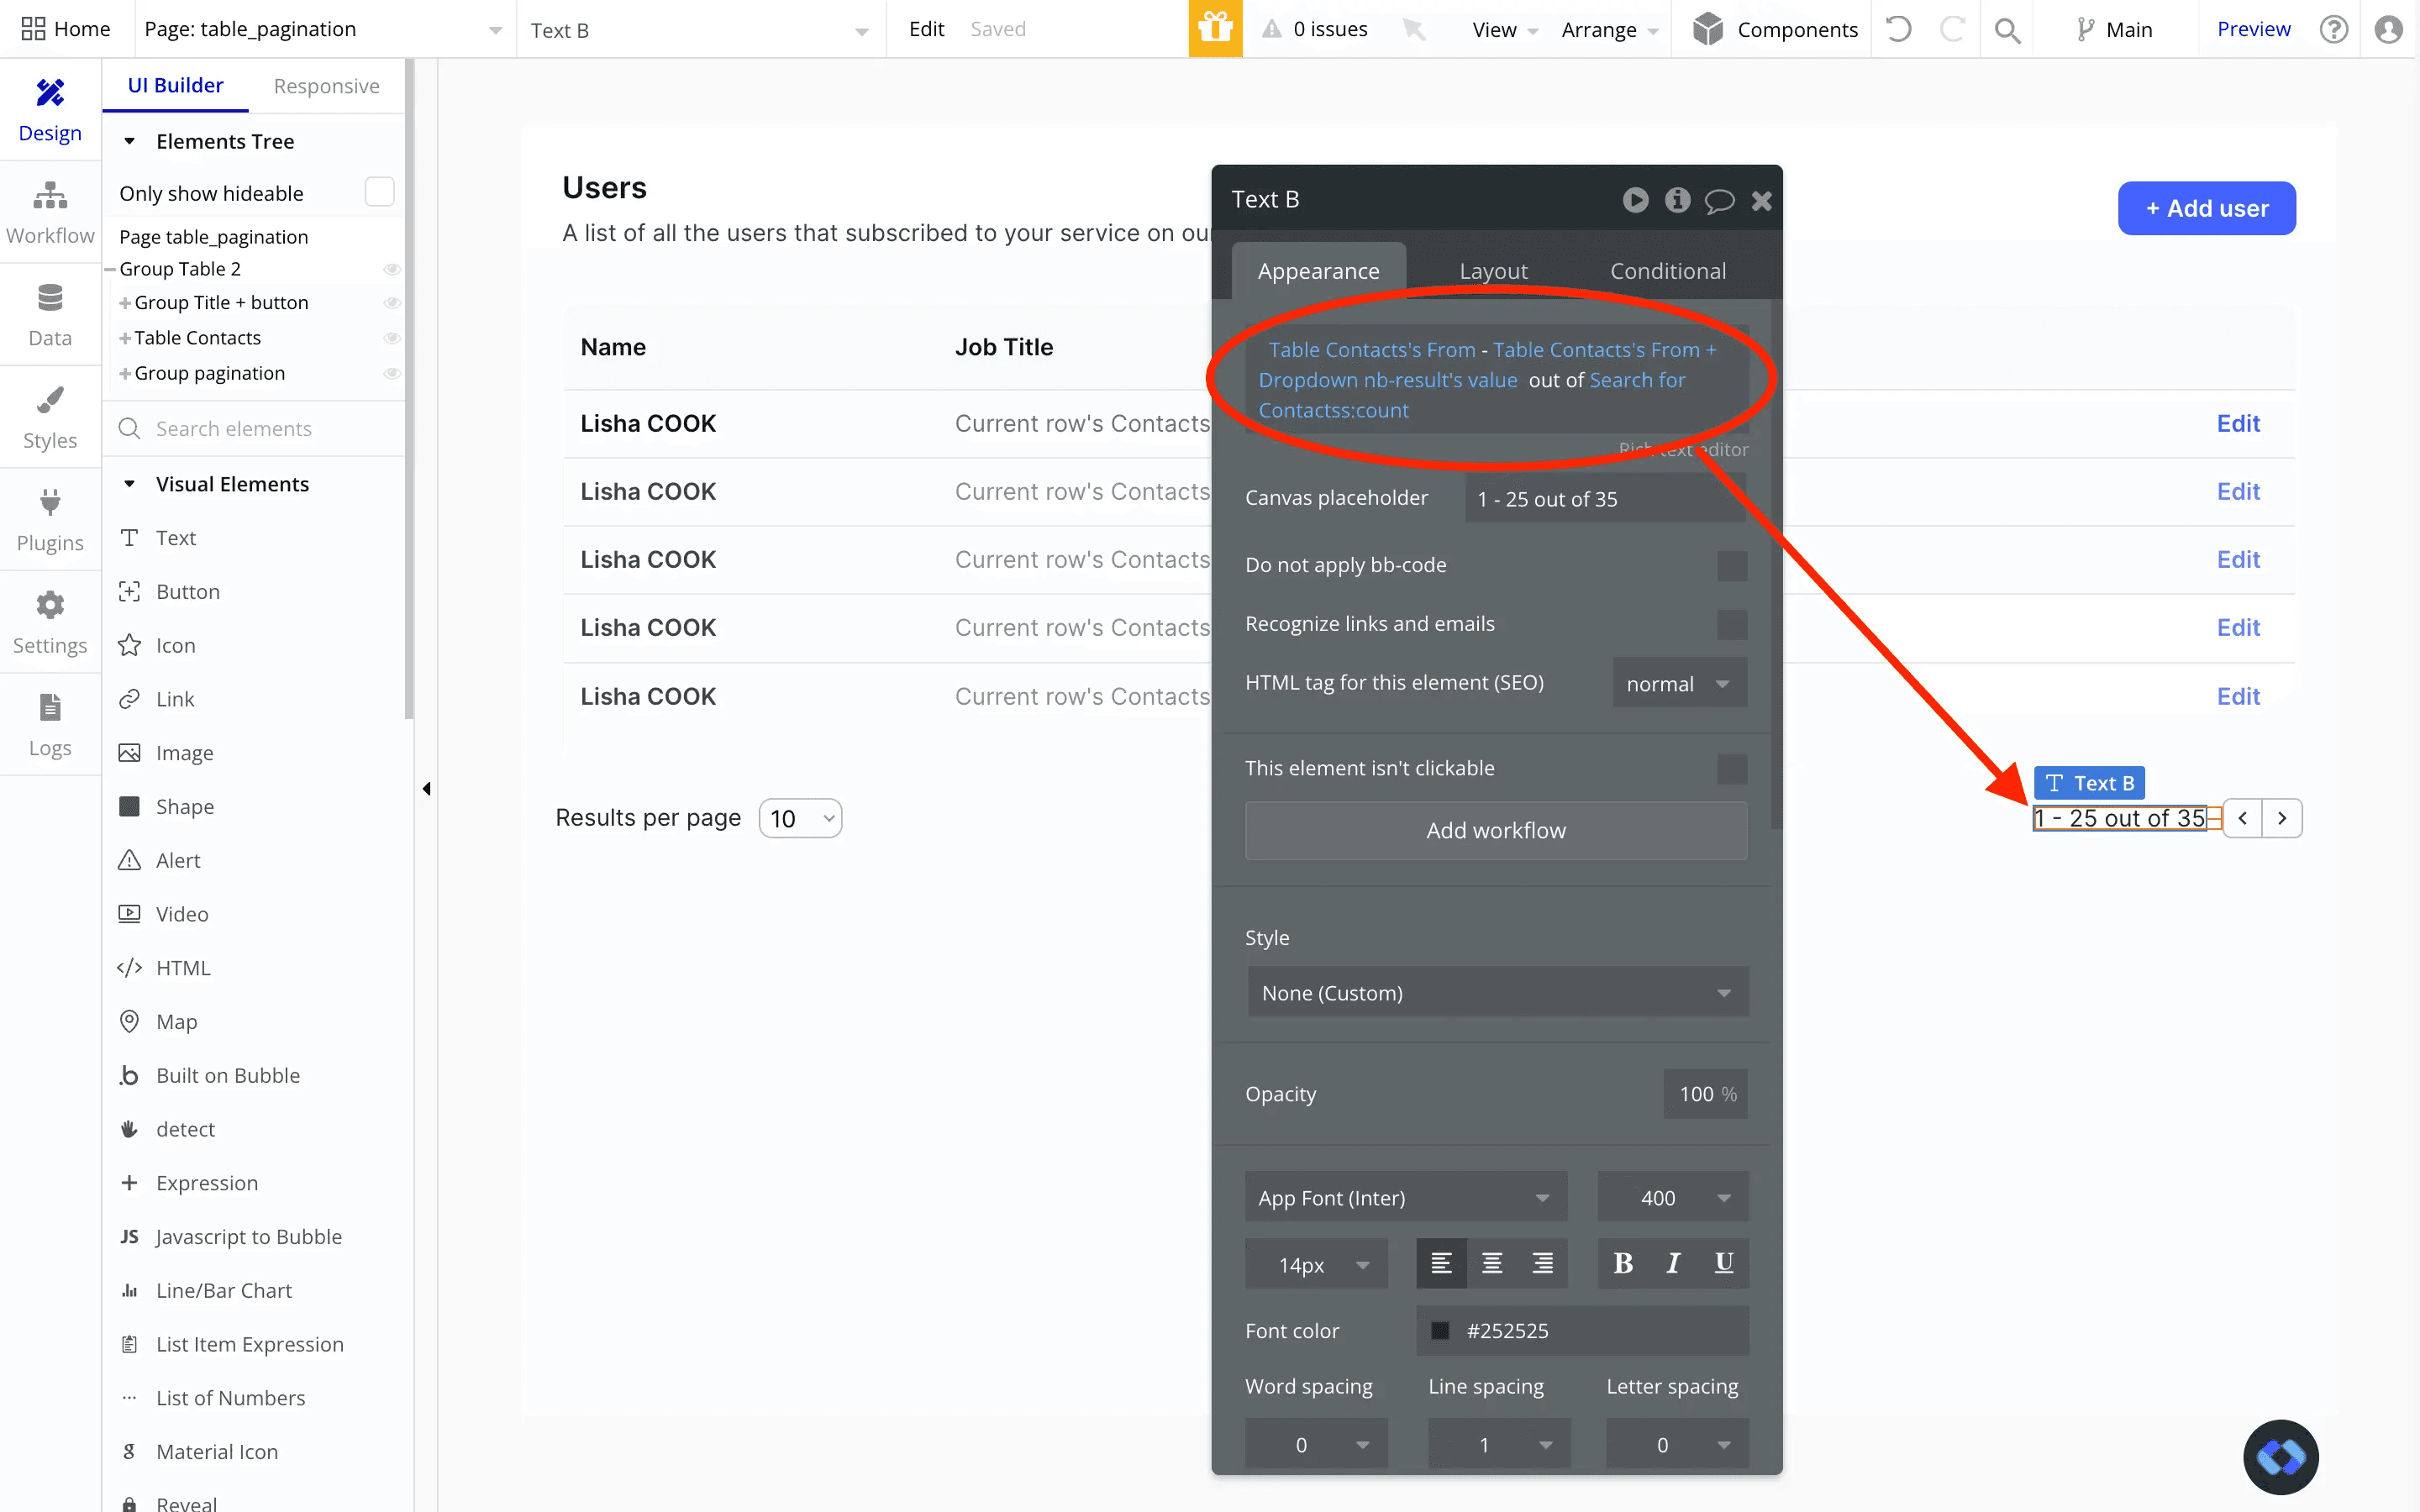
Displaying information
Finally, we can display some more information to our user, such as the total number of results (and the number of results being displayed) :

Thomas Couderq
Founder @ Nocodable
I've been building with Bubble for more than four years now. I've launched several projects (with more or less success). I'm passionate about no code and UI Design, which led me to founding Nocodable Components to help founders and professional Bubble developers build faster on Bubble.
Find me on Linkedin