
Adding the ability for user to show the password they are typing is an easy way to improve your user's experience on your bubble app.
It enables them to make sure they don't make any typo when choosing their password.
Nothing too fancy, but it's something every Bubble dev must know how to realize.
In this guide, you'll learn how to do just that, in 2 ways.
The first one will be by using some custom Javascript, and the second one will be by using a free plugin.
Let's begin, shall we ?
Note : You can also read our article on how to build a bubble password strength indicator to go further.
Approach 1 : Using Javascript show password
Alright !
Let's start with the first approach.
This approach is - in my opinion - the best approach to use for this case.
In general, avoiding using plugin when possible is a good practice, because it'l help keep your apps lightweight, and it's also a good security practice.
Which is why I recommend following this method.
Step 1 - Install the Toolbox plugin
The first step to use this method will be to install the ToolBox plugin for Bubble.
It's a very useful plugin, and it's basically a must-have for any bubble app.
So go ahead and install it (it's 100% free).
Click here to access the Toolbox plugin
This plugin will enable us to run some custom Javascript inside a workflow we will trigger (amongst many other useful things).
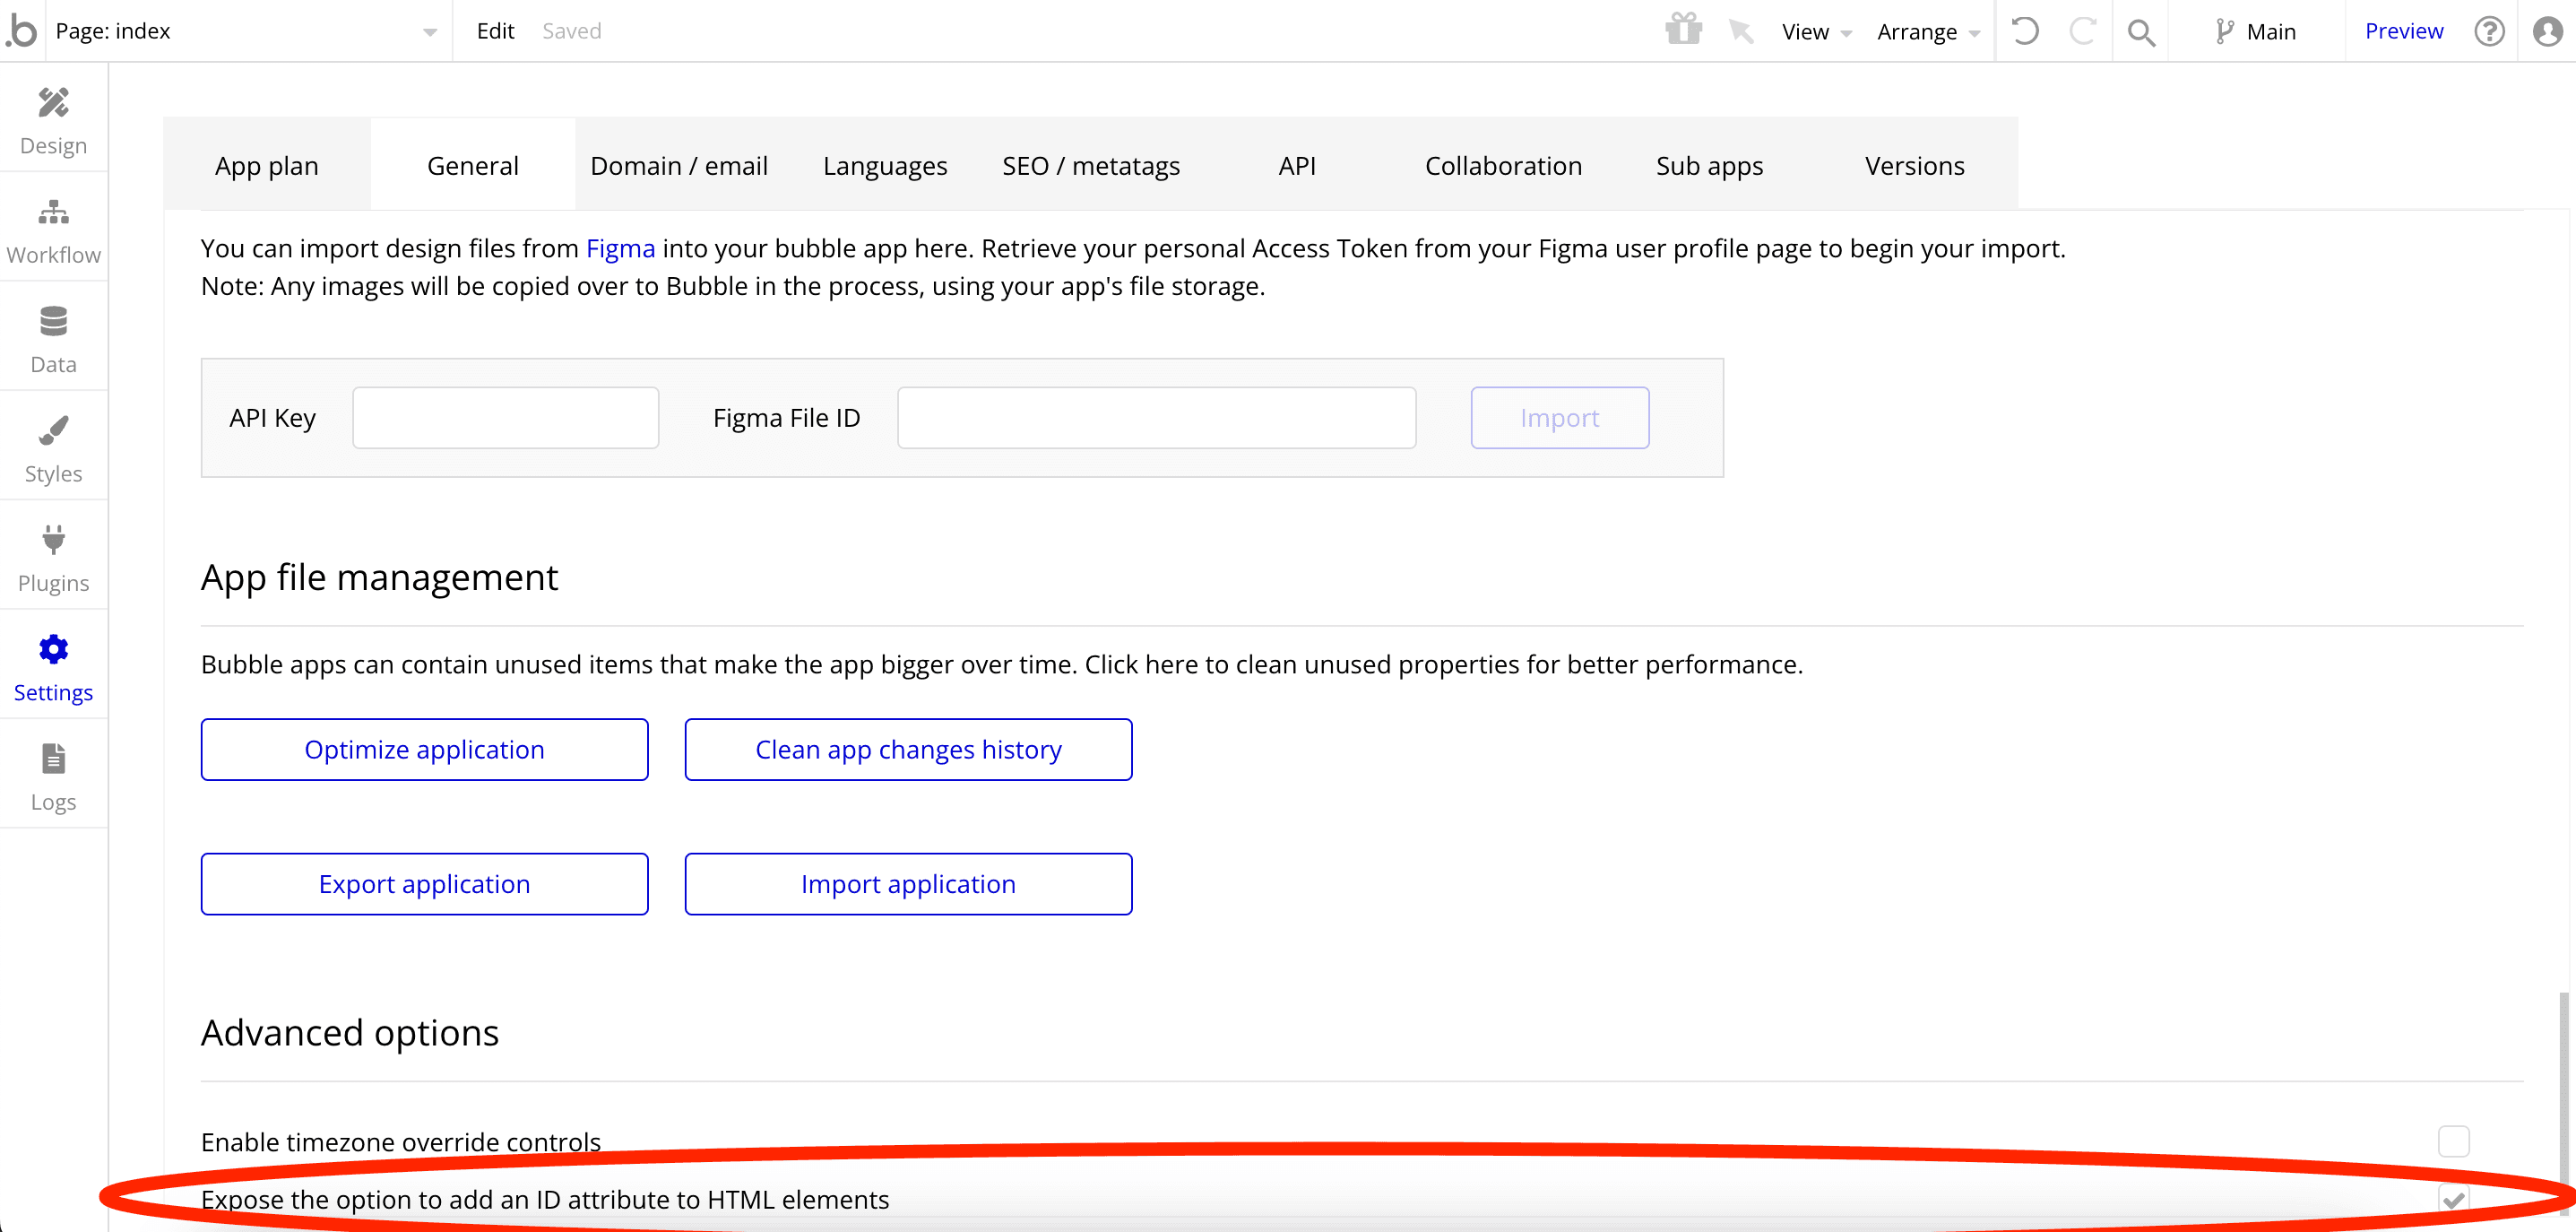
Step 2 - Enabling HTML ID attributes
The second step will be enable the option to expose HTML ID attributes.
In short, this option allows us to set a custom ID on every Bubble element, which makes it possible to target them in our custom code.
To enable it, go to : Settings --> General --> and check "Expose the option to add an ID Attribute to HTML Elements"
Once this is done, you will see an new input in your element's property panel, like this one :

Step 3 - Build our interface
Now that your application and set up accordingly, we need to create a basic interface.
If yours is already created, you can go to step 4.
As you can see below, I created a very basic interface with an input and an icon that we will use to show or hide the password.
IMPORTANT : For this tutorial to work, you need to make to use an input for the password, and to set the input content format to "Password".

Step 4 - Building our Copy to Clipboard workflow
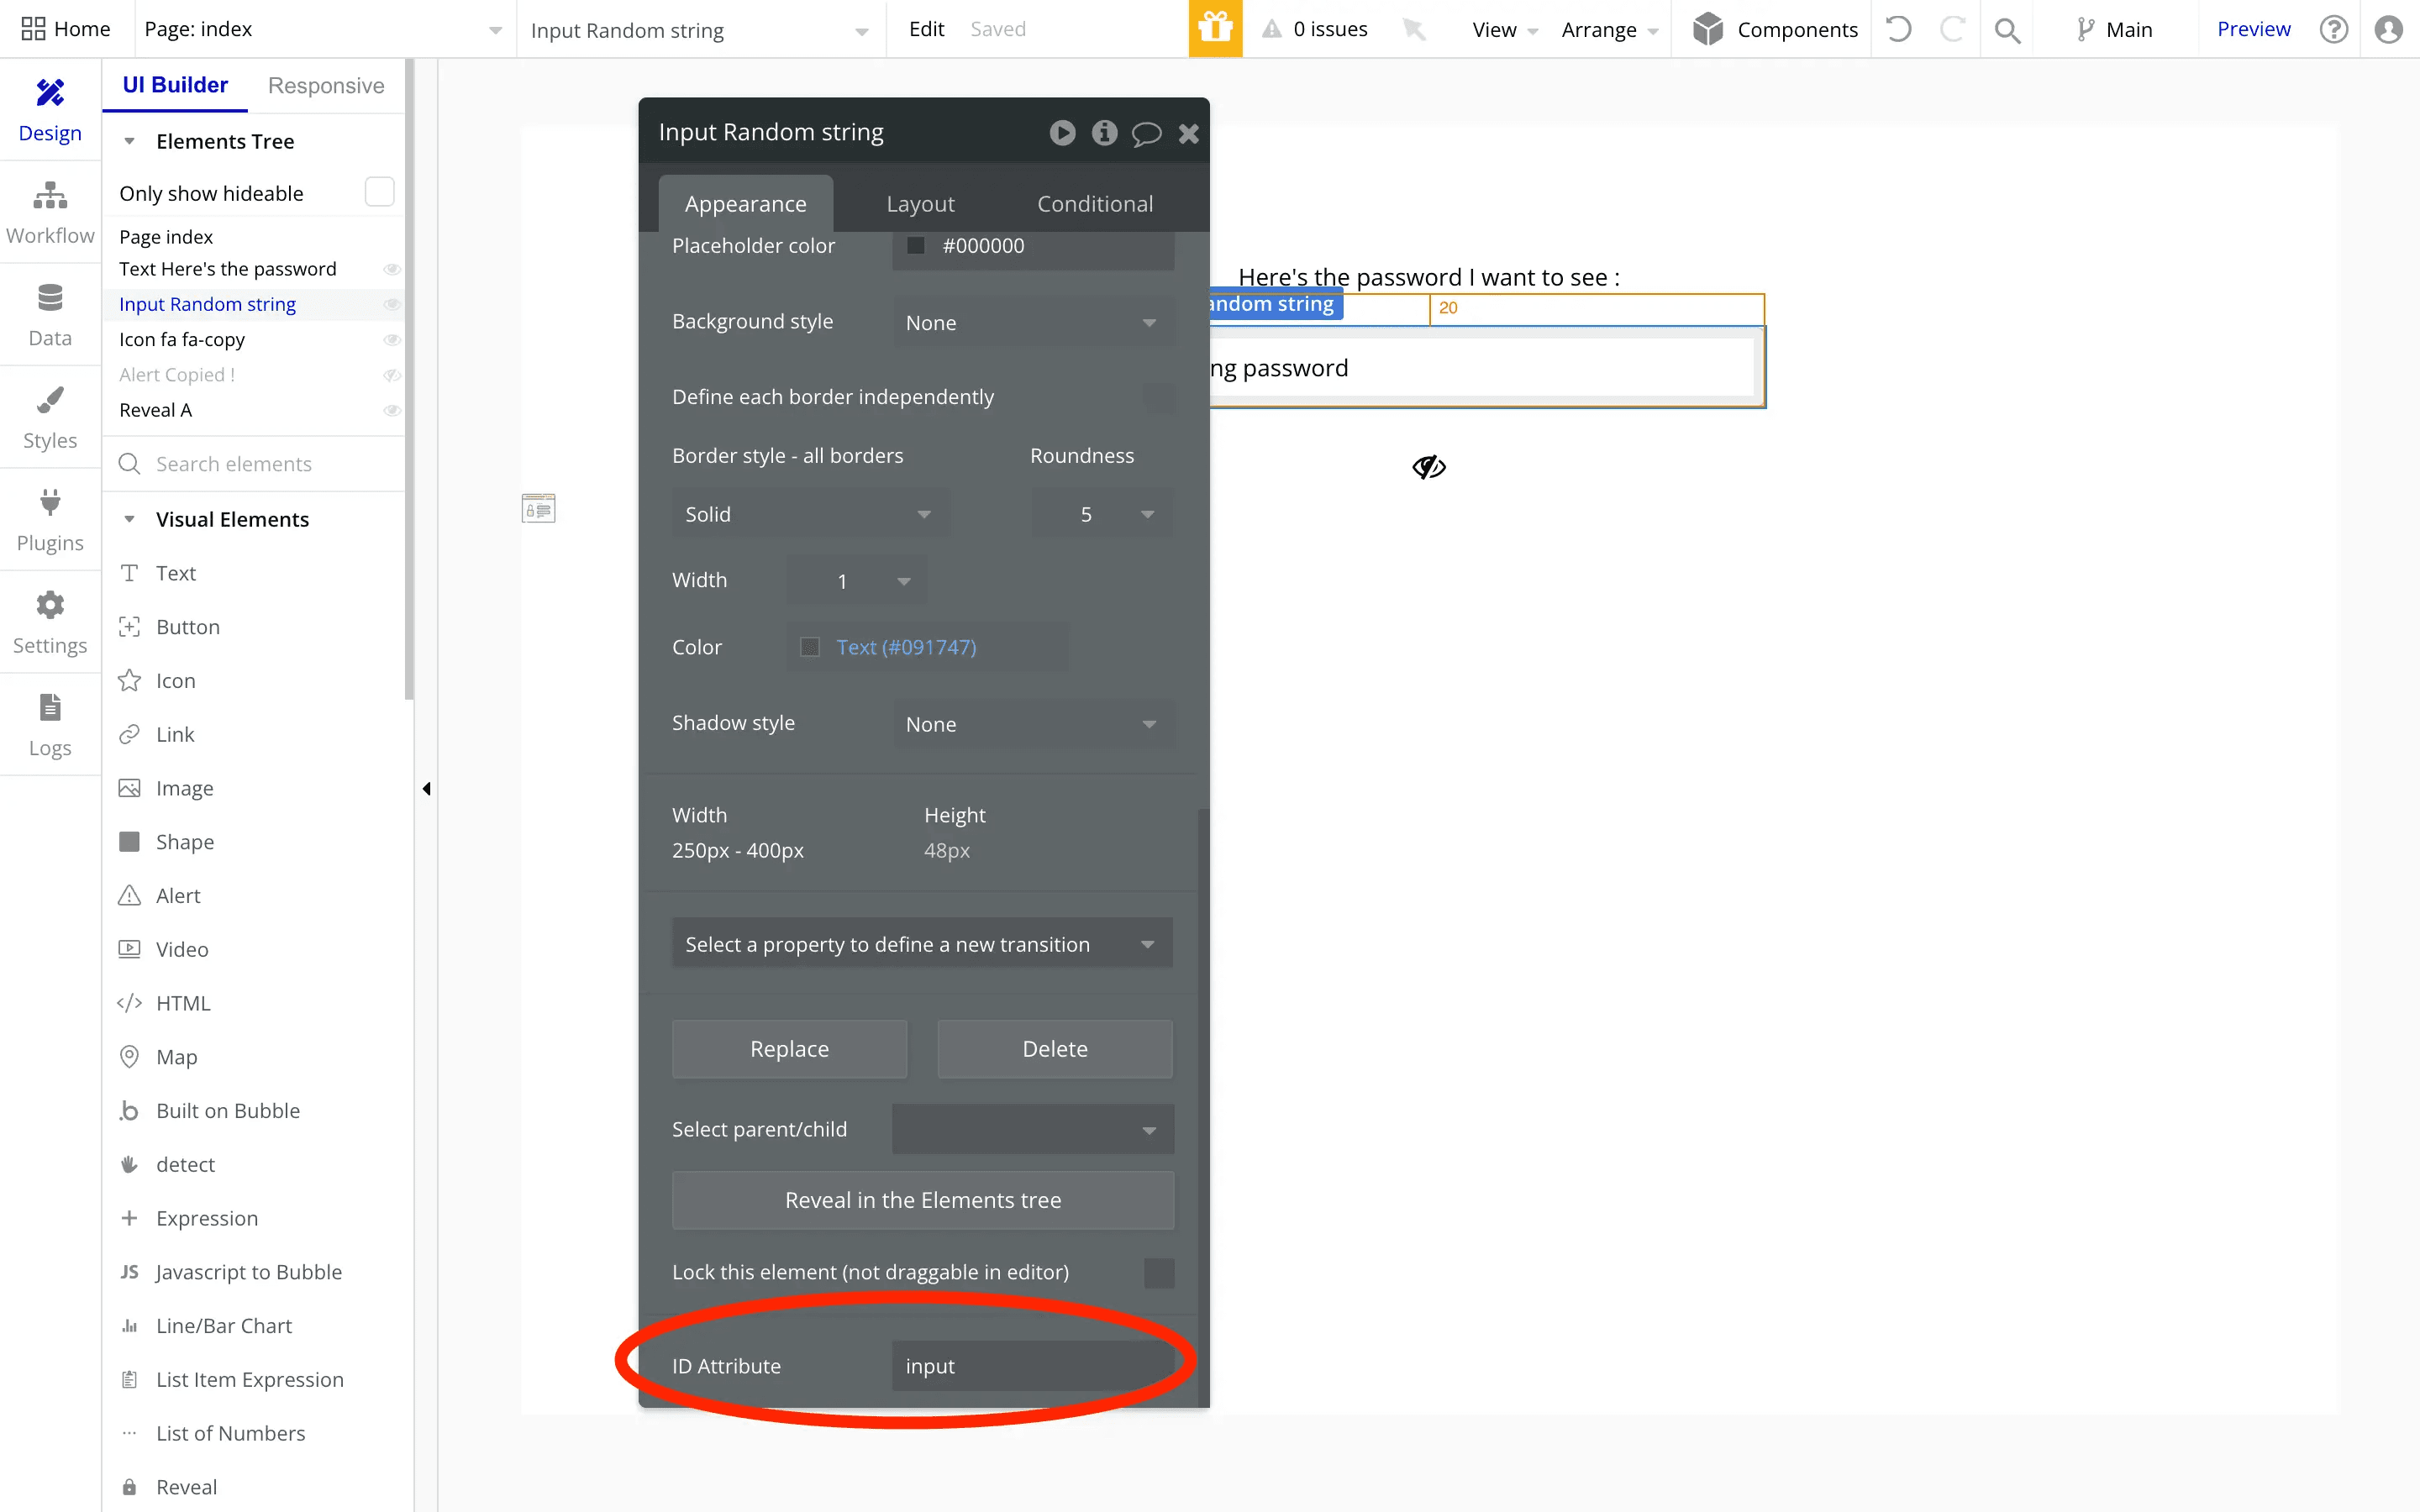
Step 1 - Assign an ID to the password input
Before going any further, we need to set an ID on the input that holds the password you want to reveal.
To do this, simply write an ID into the ID Attribute input of your input, and make sure to remember it (you'll need it later).
In my case, I set it to "input".

Step 2 - Build the actual workflow
Alright, now that we're all set, let's work on our workflows.
As mentioned earlier, I'm going to add a workflow on the "eye" icon you can see in the screenshot above.
When this icon will be clicked it will show or hide the content of my password input.
To do this, we will use an action from the Toolbox plugin called : "Run Javascript"
This action, you've guessed it, enables us to run custom javascript in our Bubble app.
And within this action, you are going to paste the code hereunder :
var passwordInput = document.getElementById('ENTER-YOUR-ID-HERE'); // Use the ID you set for your input
if (passwordInput.type === 'password') {
  passwordInput.type = 'text';
} else {
  passwordInput.type = 'password';
}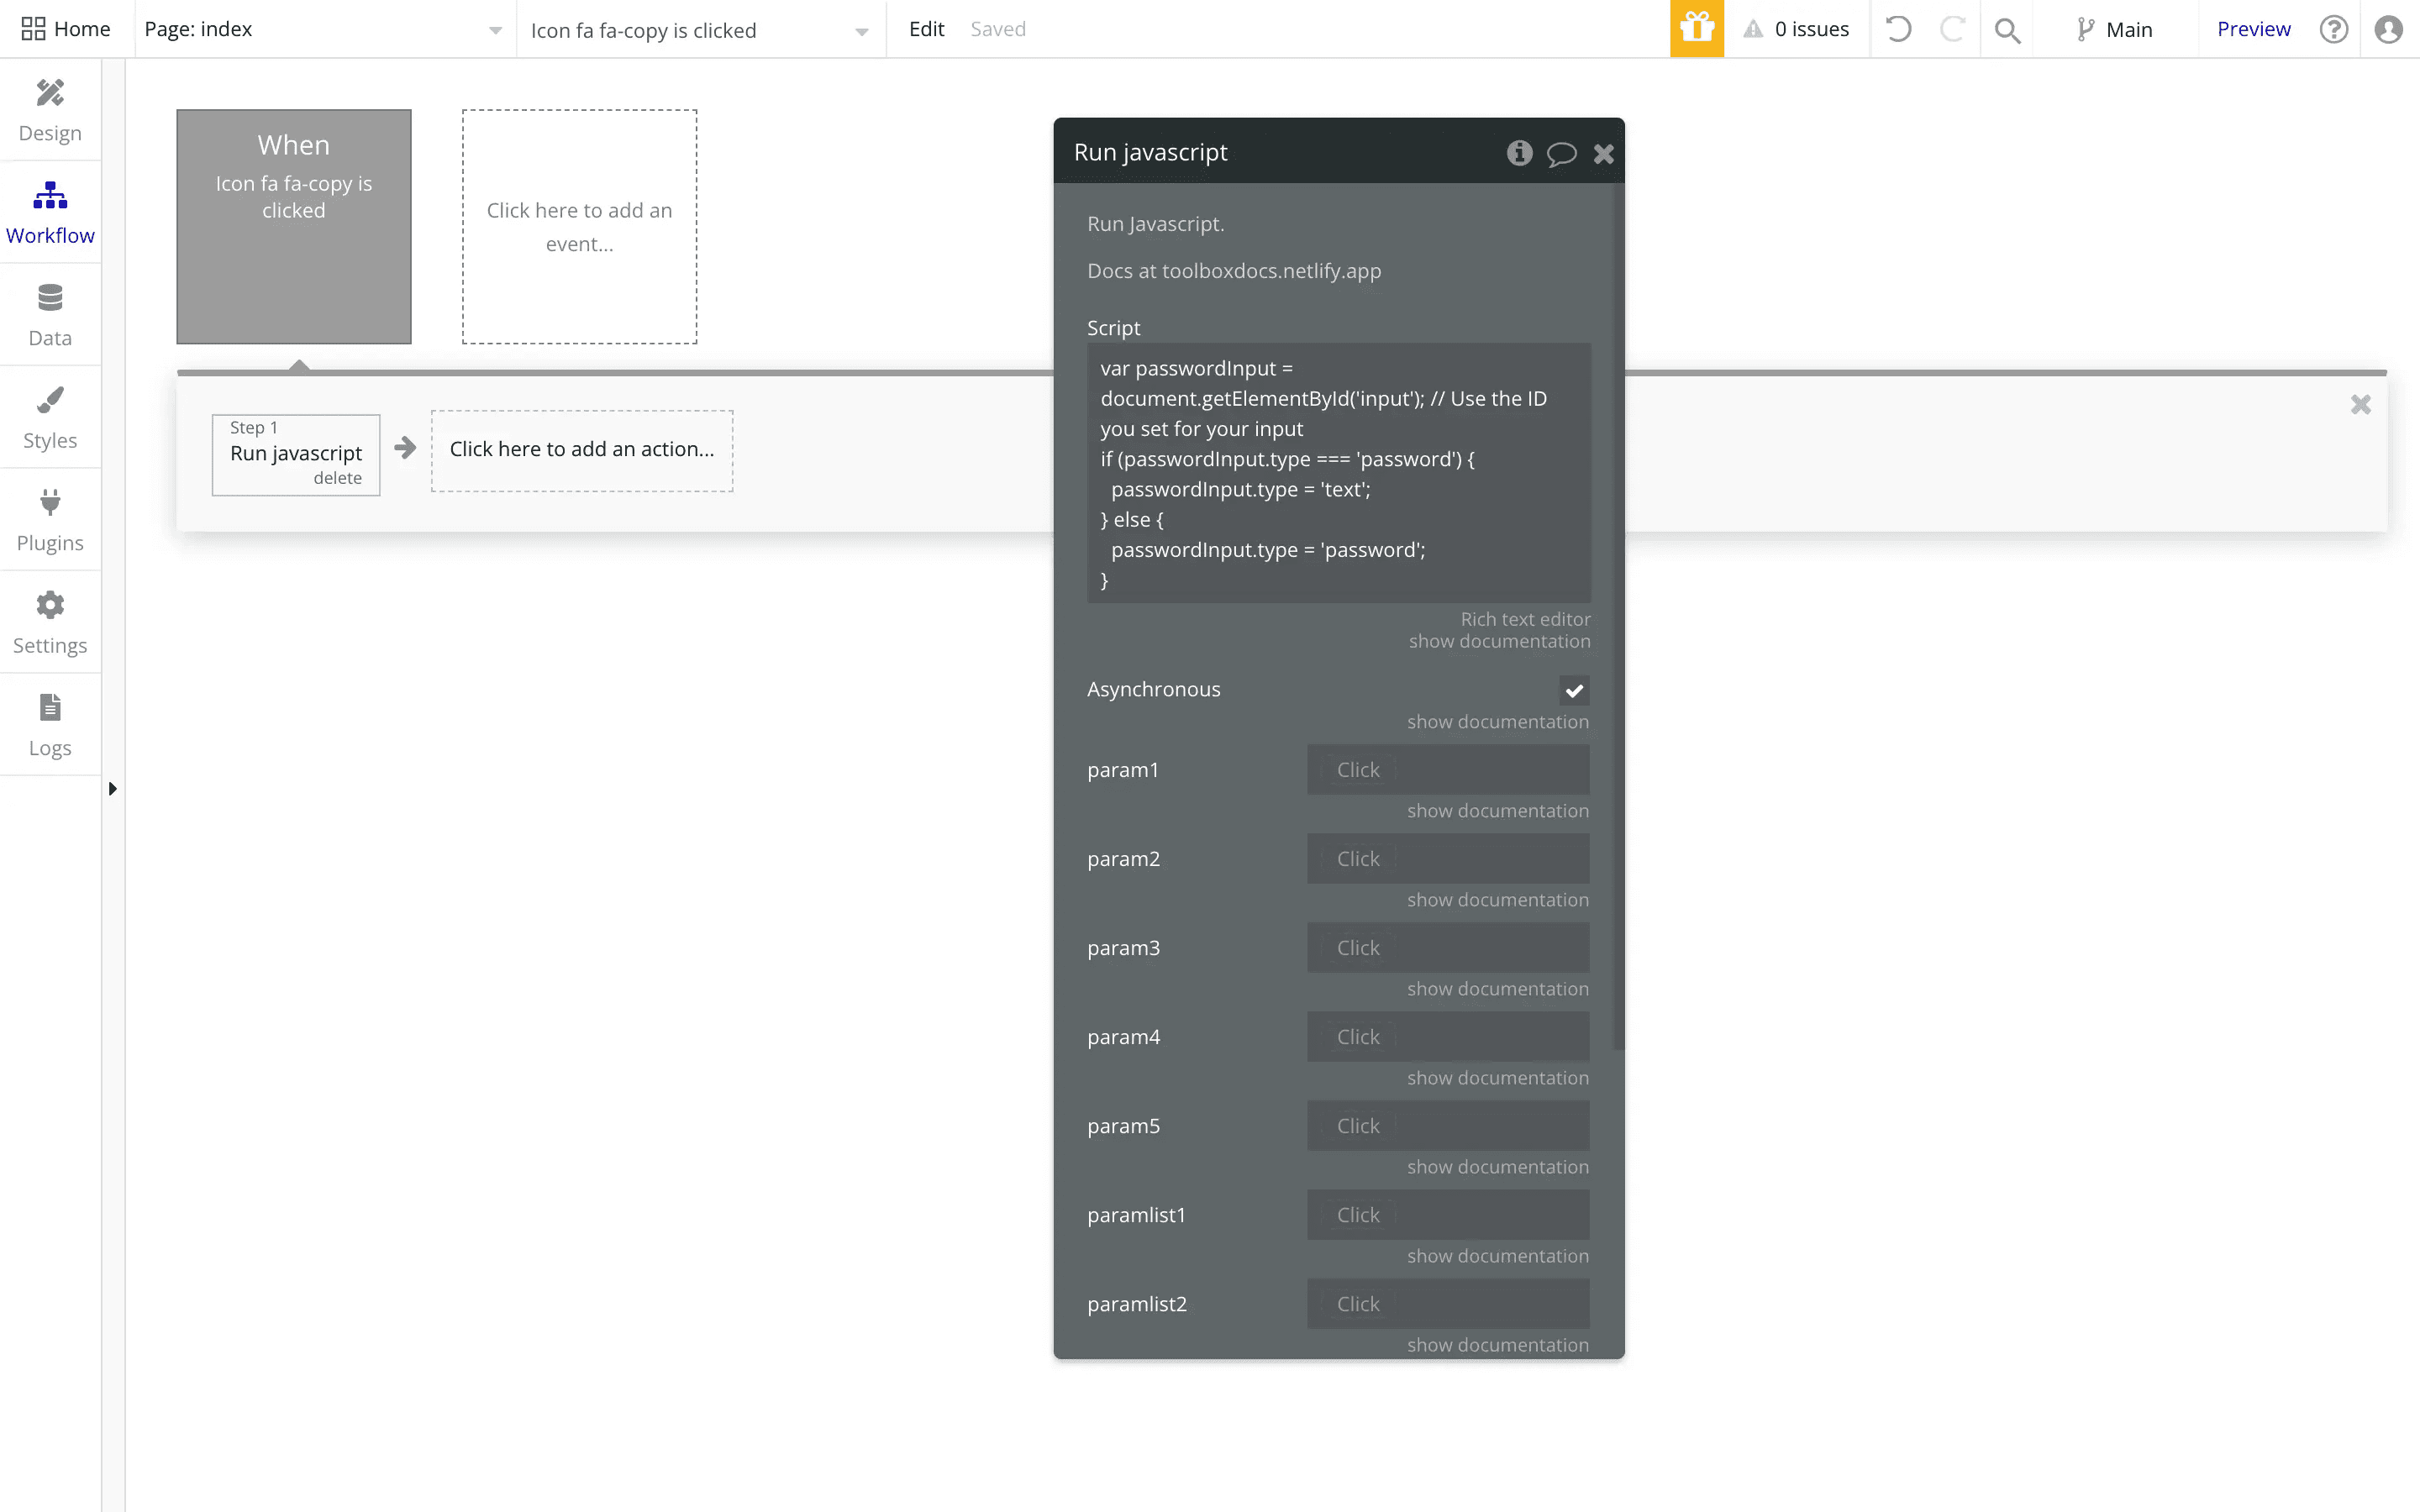
You should have something similar to the screenshot above.
And there you go !
Every time the user will trigger this workflow, the password into the input will be show or hidden based on its current state !
Approach 2 : Using a Plugin to Copy to Clipboard
Now that we've covered the custom code approach, let's see how to do it with a free plugin.
As mentioned earlier, I really recommend using custom code rather than a plugin for this use case.
But hey, you may have your reasons, so here's how to do it with a plugin !
Step 1 - Install a reveal password plugin
The first step will obviously be to install the plugin that will enable you to show or hide password.
This is a pretty basic thing, so you can go ahead and select the one you want.
In my case, I selected this plugin from Zeroqode :
Click here to access the Reveal and Hide password plugin
Step 2 - Building our workflow
Now that you've installed the plugin, start by dragging a "Reveal" element onto your page and make sure it is not hidden.
Now that it's done, you can create your workflow and add a "Toggle Reveal" action.
If you have several reveal elements on your page, make sure to select the right one.
In the ID section, type in the ID you want (in my case I wrote "input").
Now the final step is to make sure that the ID Attribute of the input holding the password you want to show is exactly the same than the ID you've just filled in the workflow.
If you don't know what I'm talking about, you need to read the 1st approach of this article.

And there you go, when you'll trigger this workflow your the content of your input will be shown to your users !

Thomas Couderq
Founder @ Nocodable
I've been building with Bubble for more than four years now. I've launched several projects (with more or less success). I'm passionate about no code and UI Design, which led me to founding Nocodable Components to help founders and professional Bubble developers build faster on Bubble.
Find me on Linkedin