How to recreate Gumroad's button on Bubble in 5 min
Recreate Gumroad's button design in a few steps and level up your Bubble design skills!

Thomas Couderq
16 Jan 2025


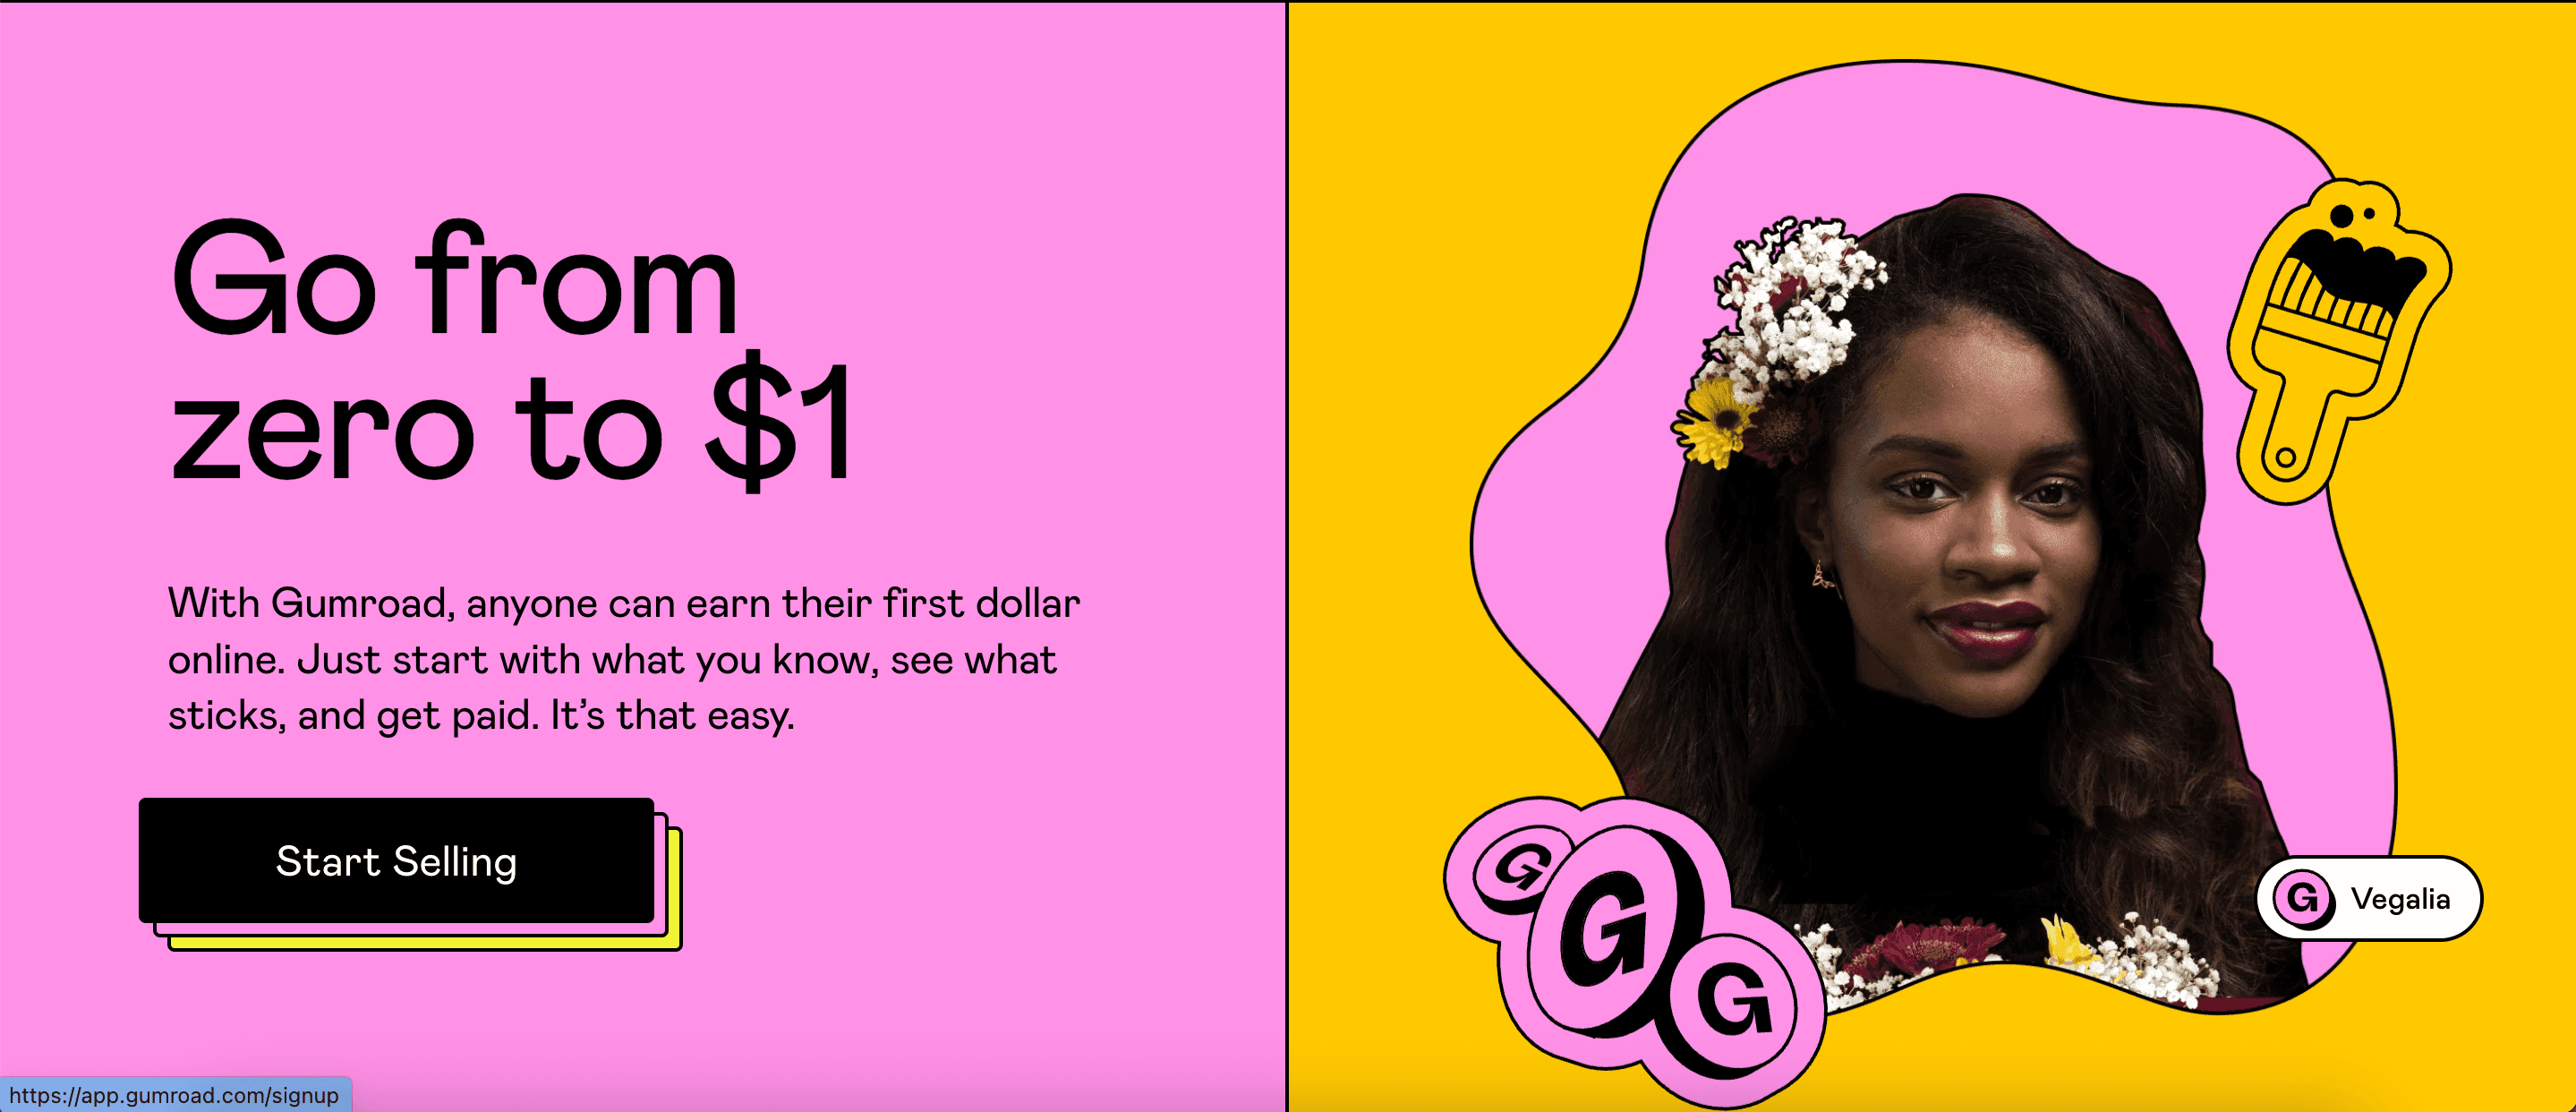
You know Gumroad, right ? This website is used to sell various types of digital products and has a very distinctive and unique style.
Well, this style of UI Design is called NeoBrutalism (or Neubrutalism). And it is caracterized by its rejection of traditional UI Design codes, especially when it comes to page organization and colors.
And Gumroad, particularly, has some very interesting design particularities, that may be challenging to recreate on Bubble.
In this article, we are going to learn how to recreate Gumroad’s main button, the one used in all their Call to actions.
If you want to keep going further in Bubble, you can also read our article on how to use popups in Bubble.
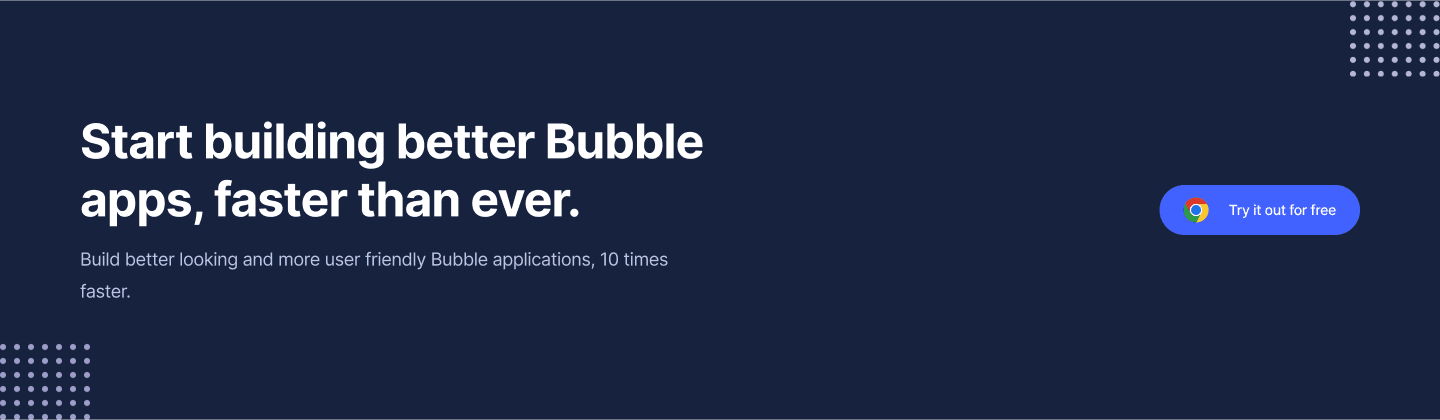
What are we going to re-create ?
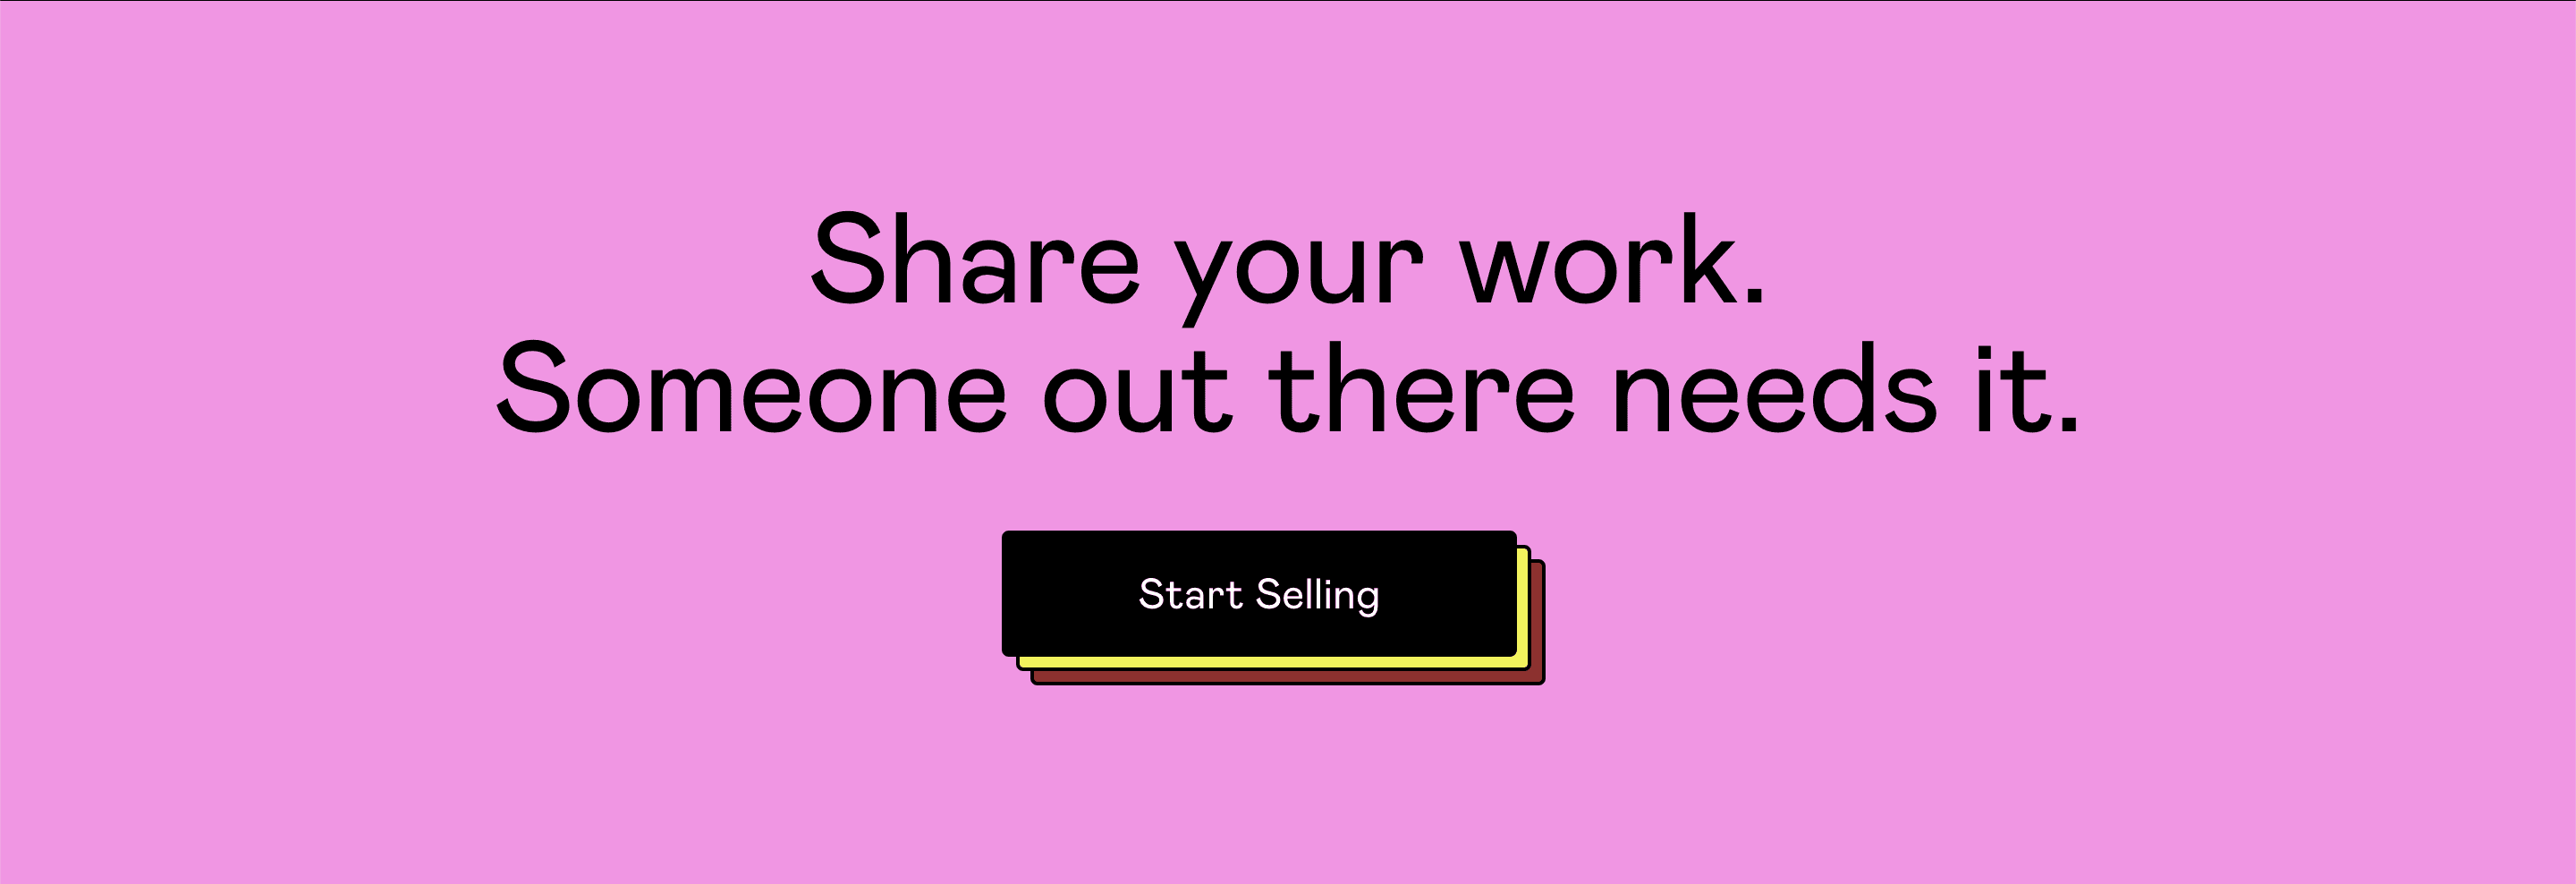
We are going to re-create, step by step, this button :
If you want to try it, you can do it here : https://gumroad.com
Analysis
Okay so first, let’s analyze the button we want to recreate.
This is Gumroad’s main CTA, and it is used at various places in the website.
When hovered, we can see that the main button goes up to the left, and two other rectangles appear behind it.
Creating our rectangles
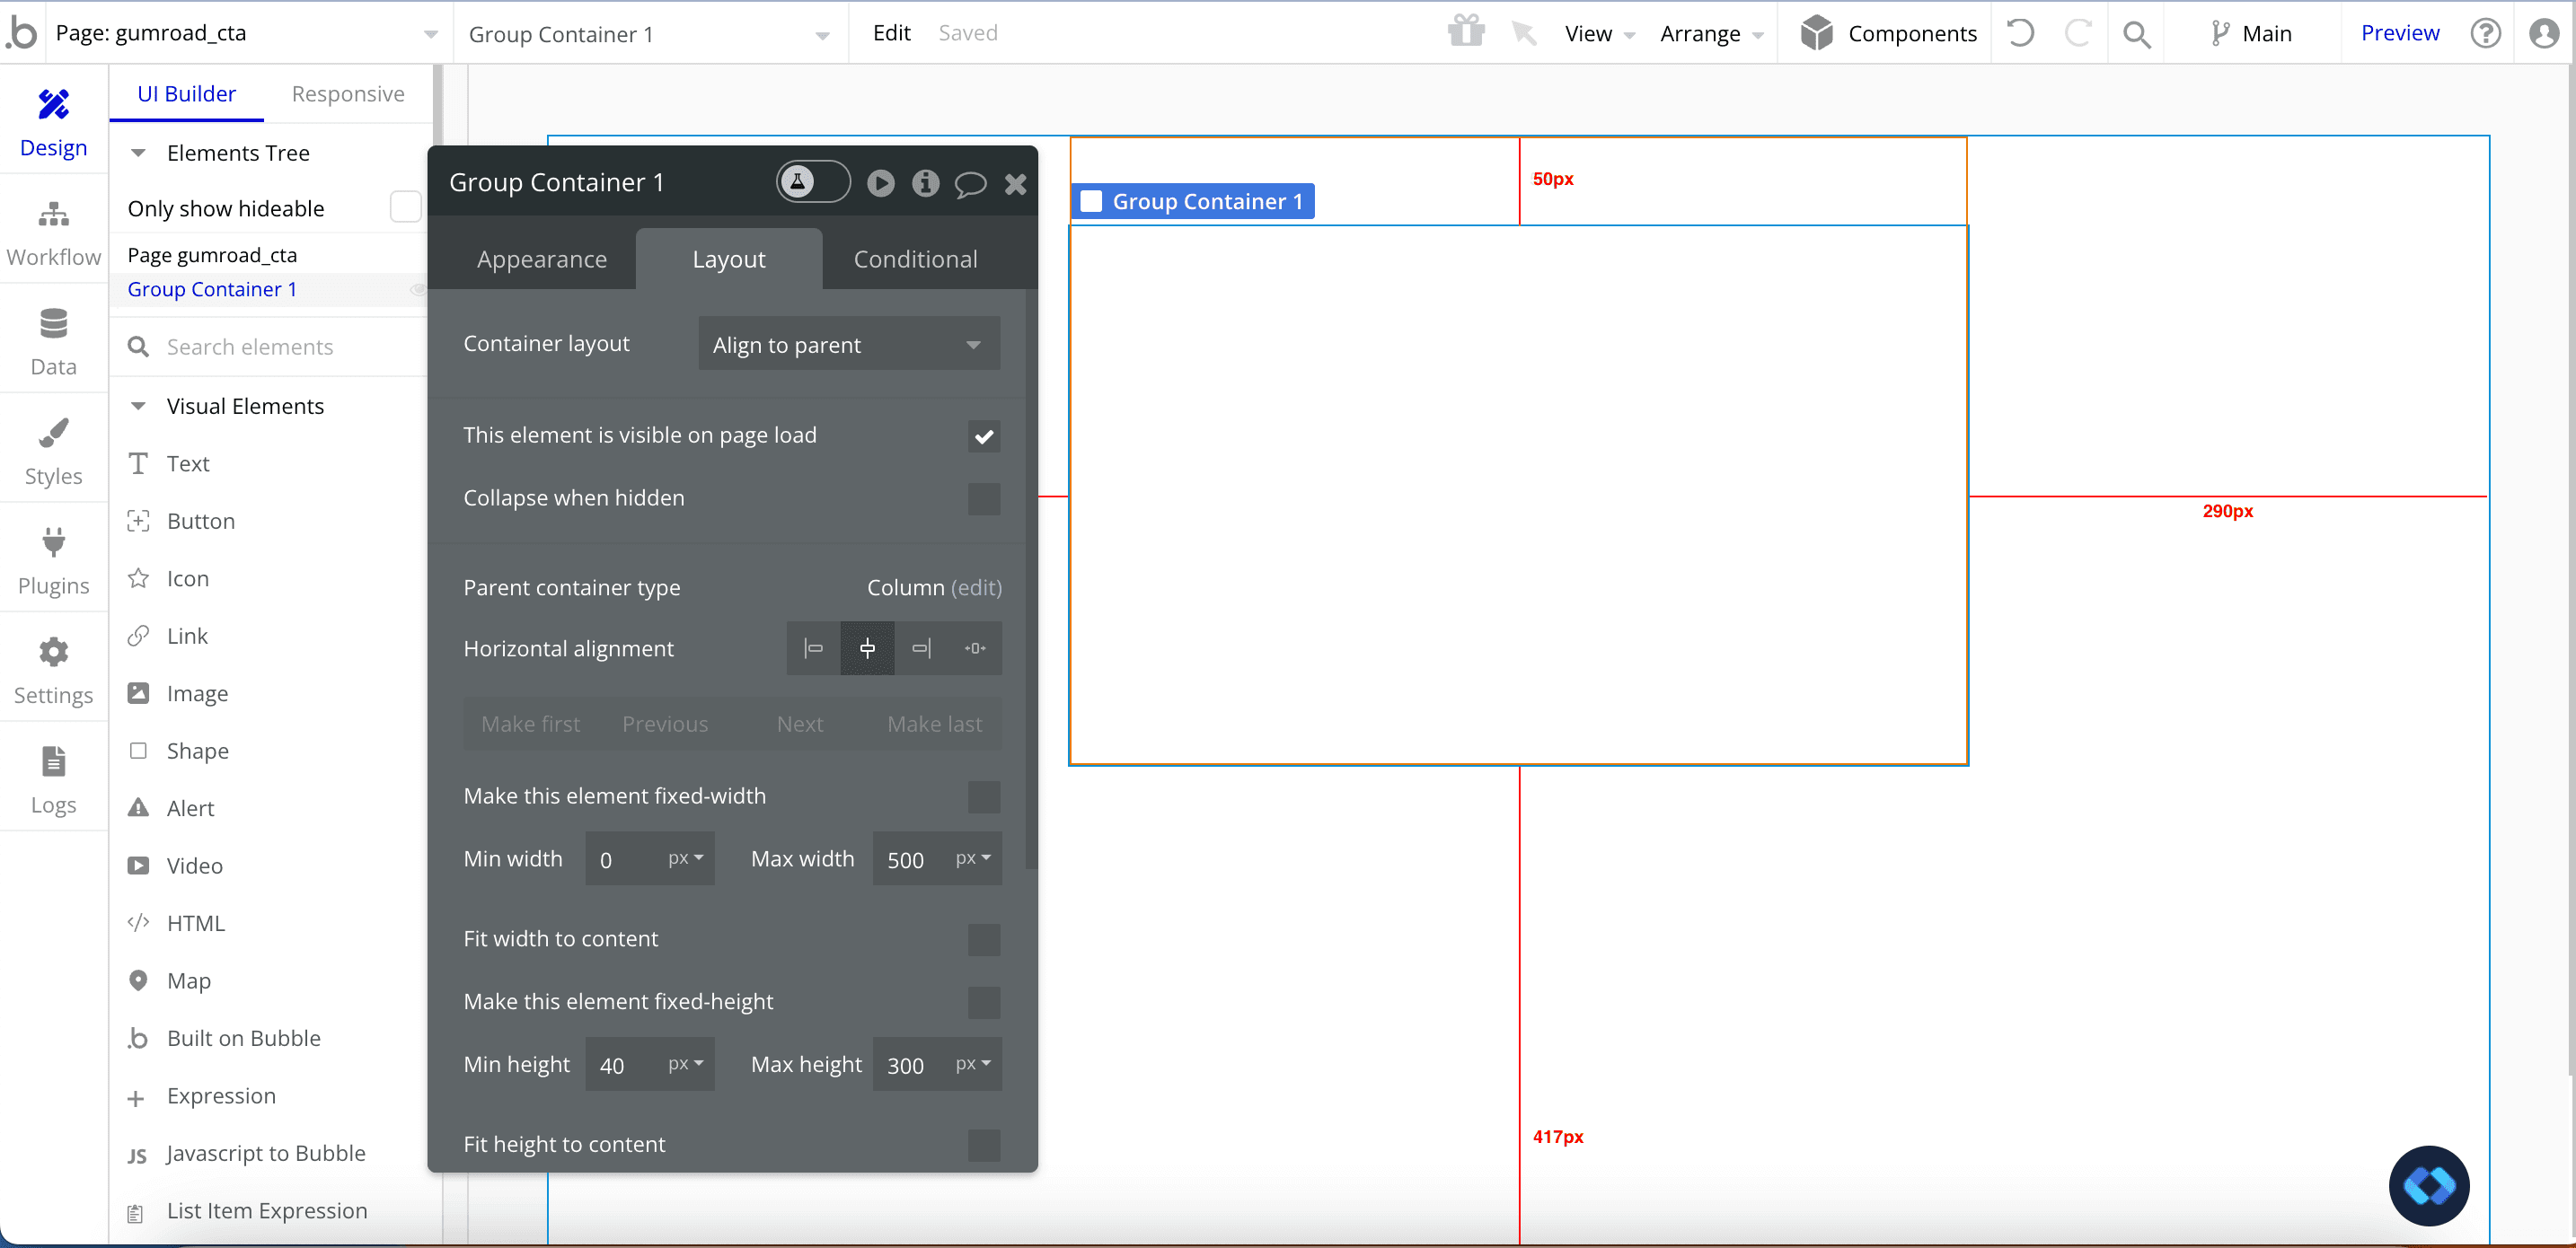
Okay so first, we’re gonna need a container. It’s goal is to contain all the rectangles our button is composed of.
For now, just create a group, and set it to a fixed width and height, we’ll adjust it later on.
Important : set this group’s layout to Align to Parent
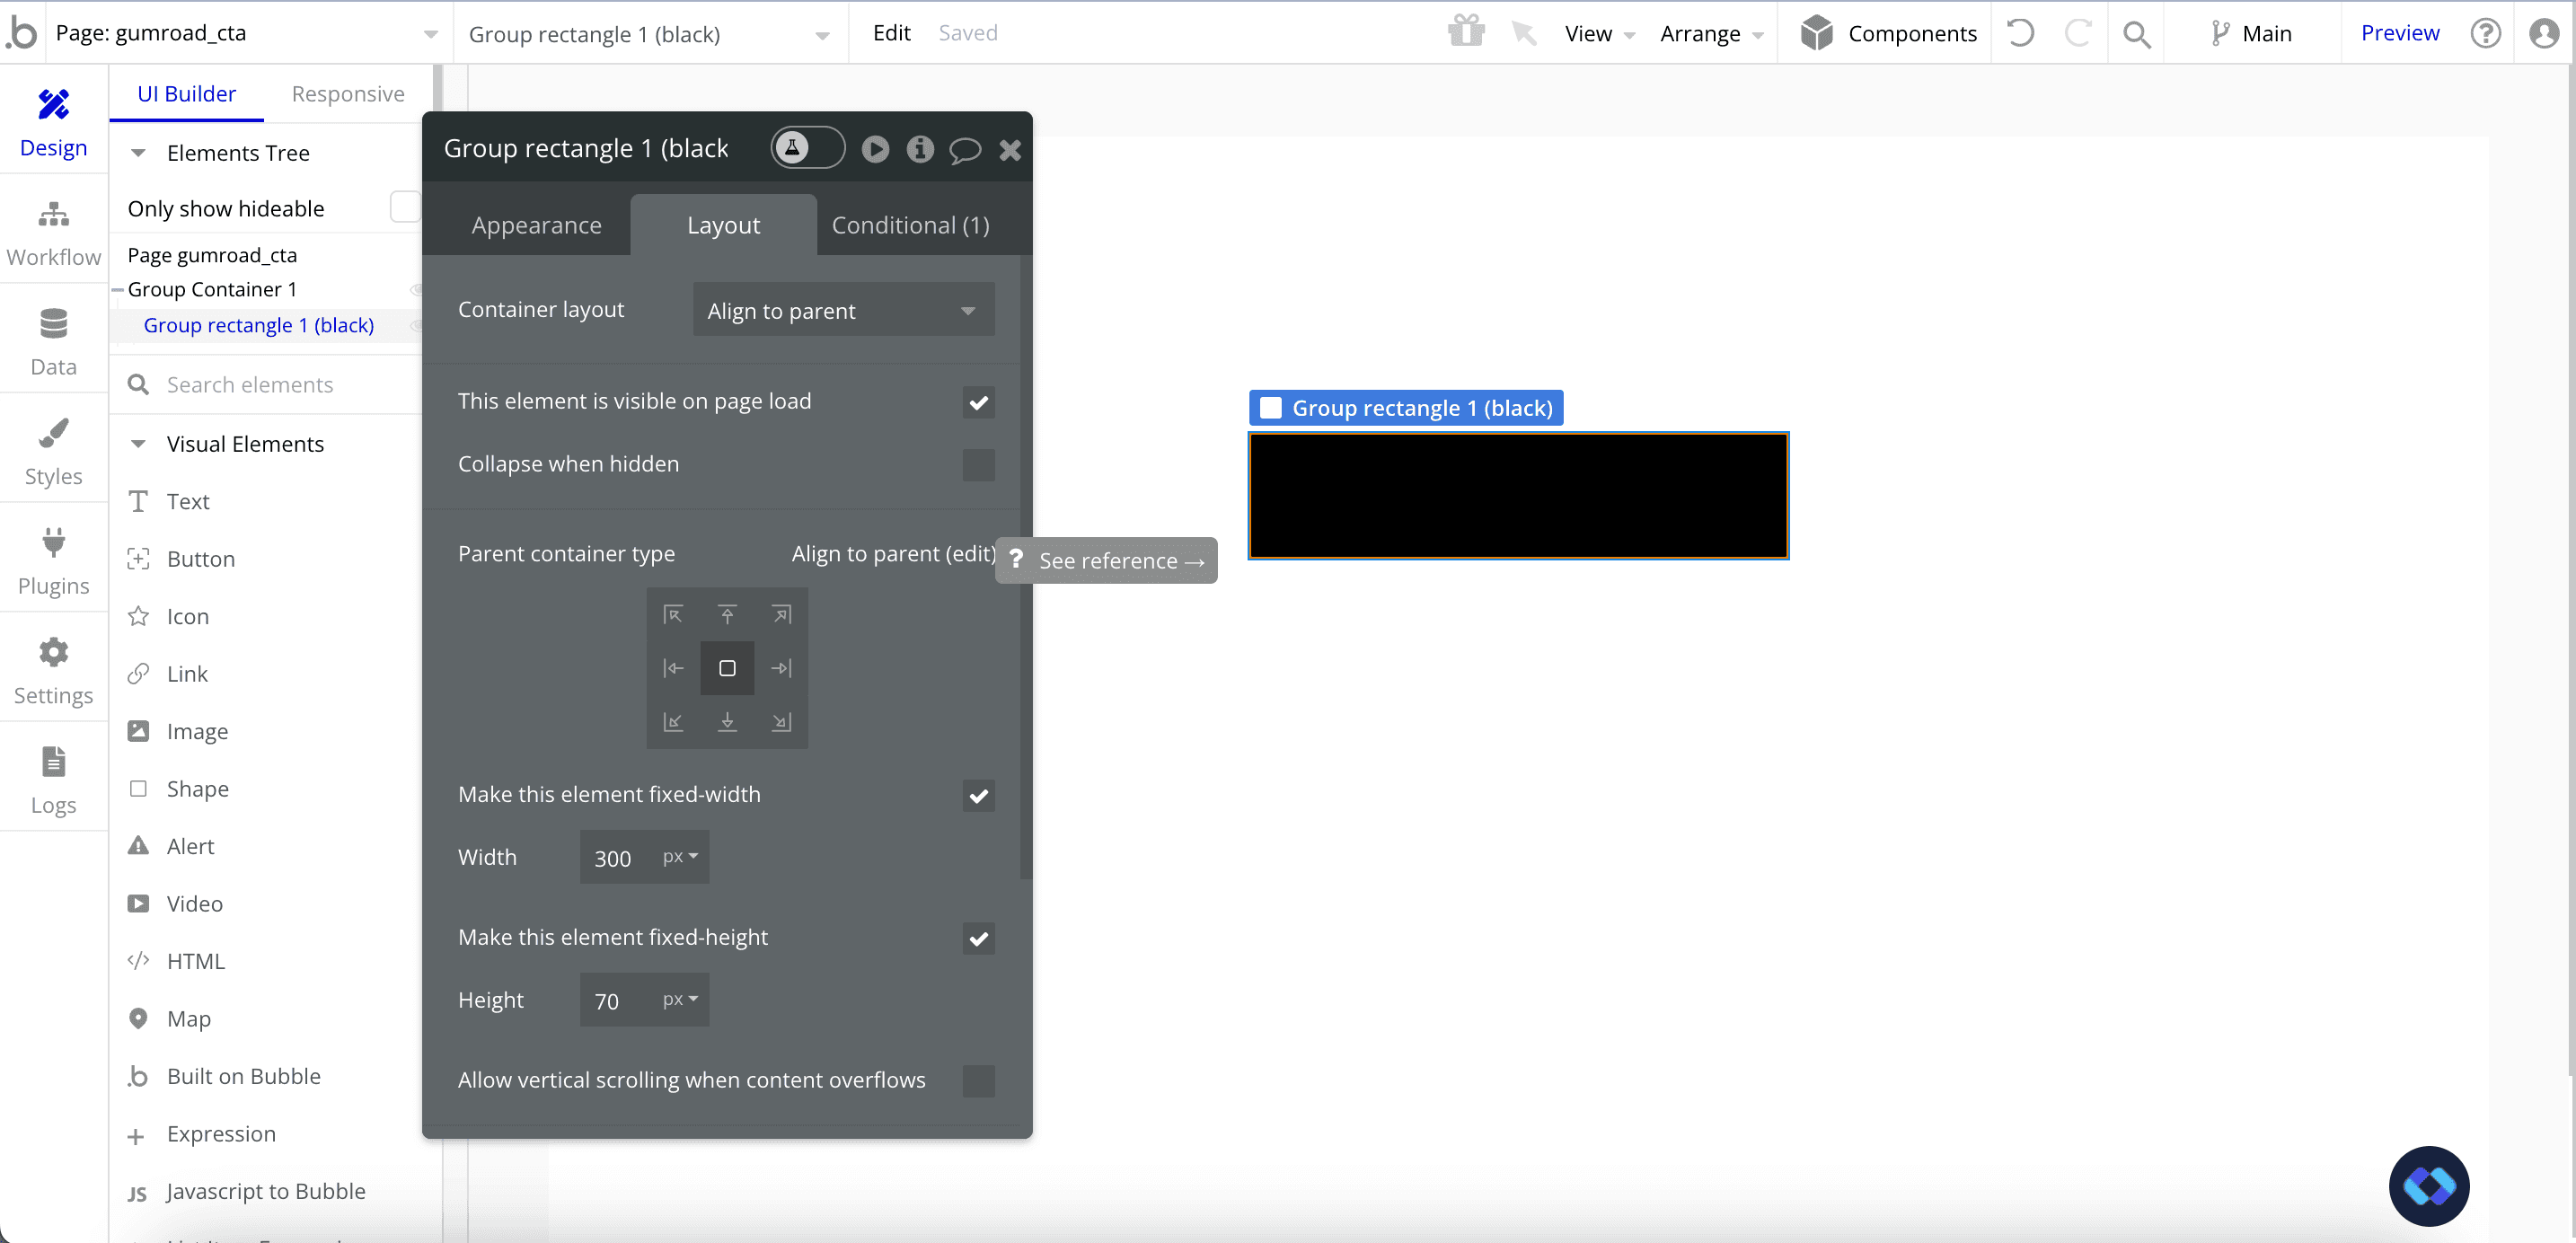
Then, we’ll create our first rectangle (the black one).
Go ahead and create another group inside of our container, give it the width and height you want and center it.
You should obtain something that looks like this :
Now, you’ll just need to add some text inside of it like this :

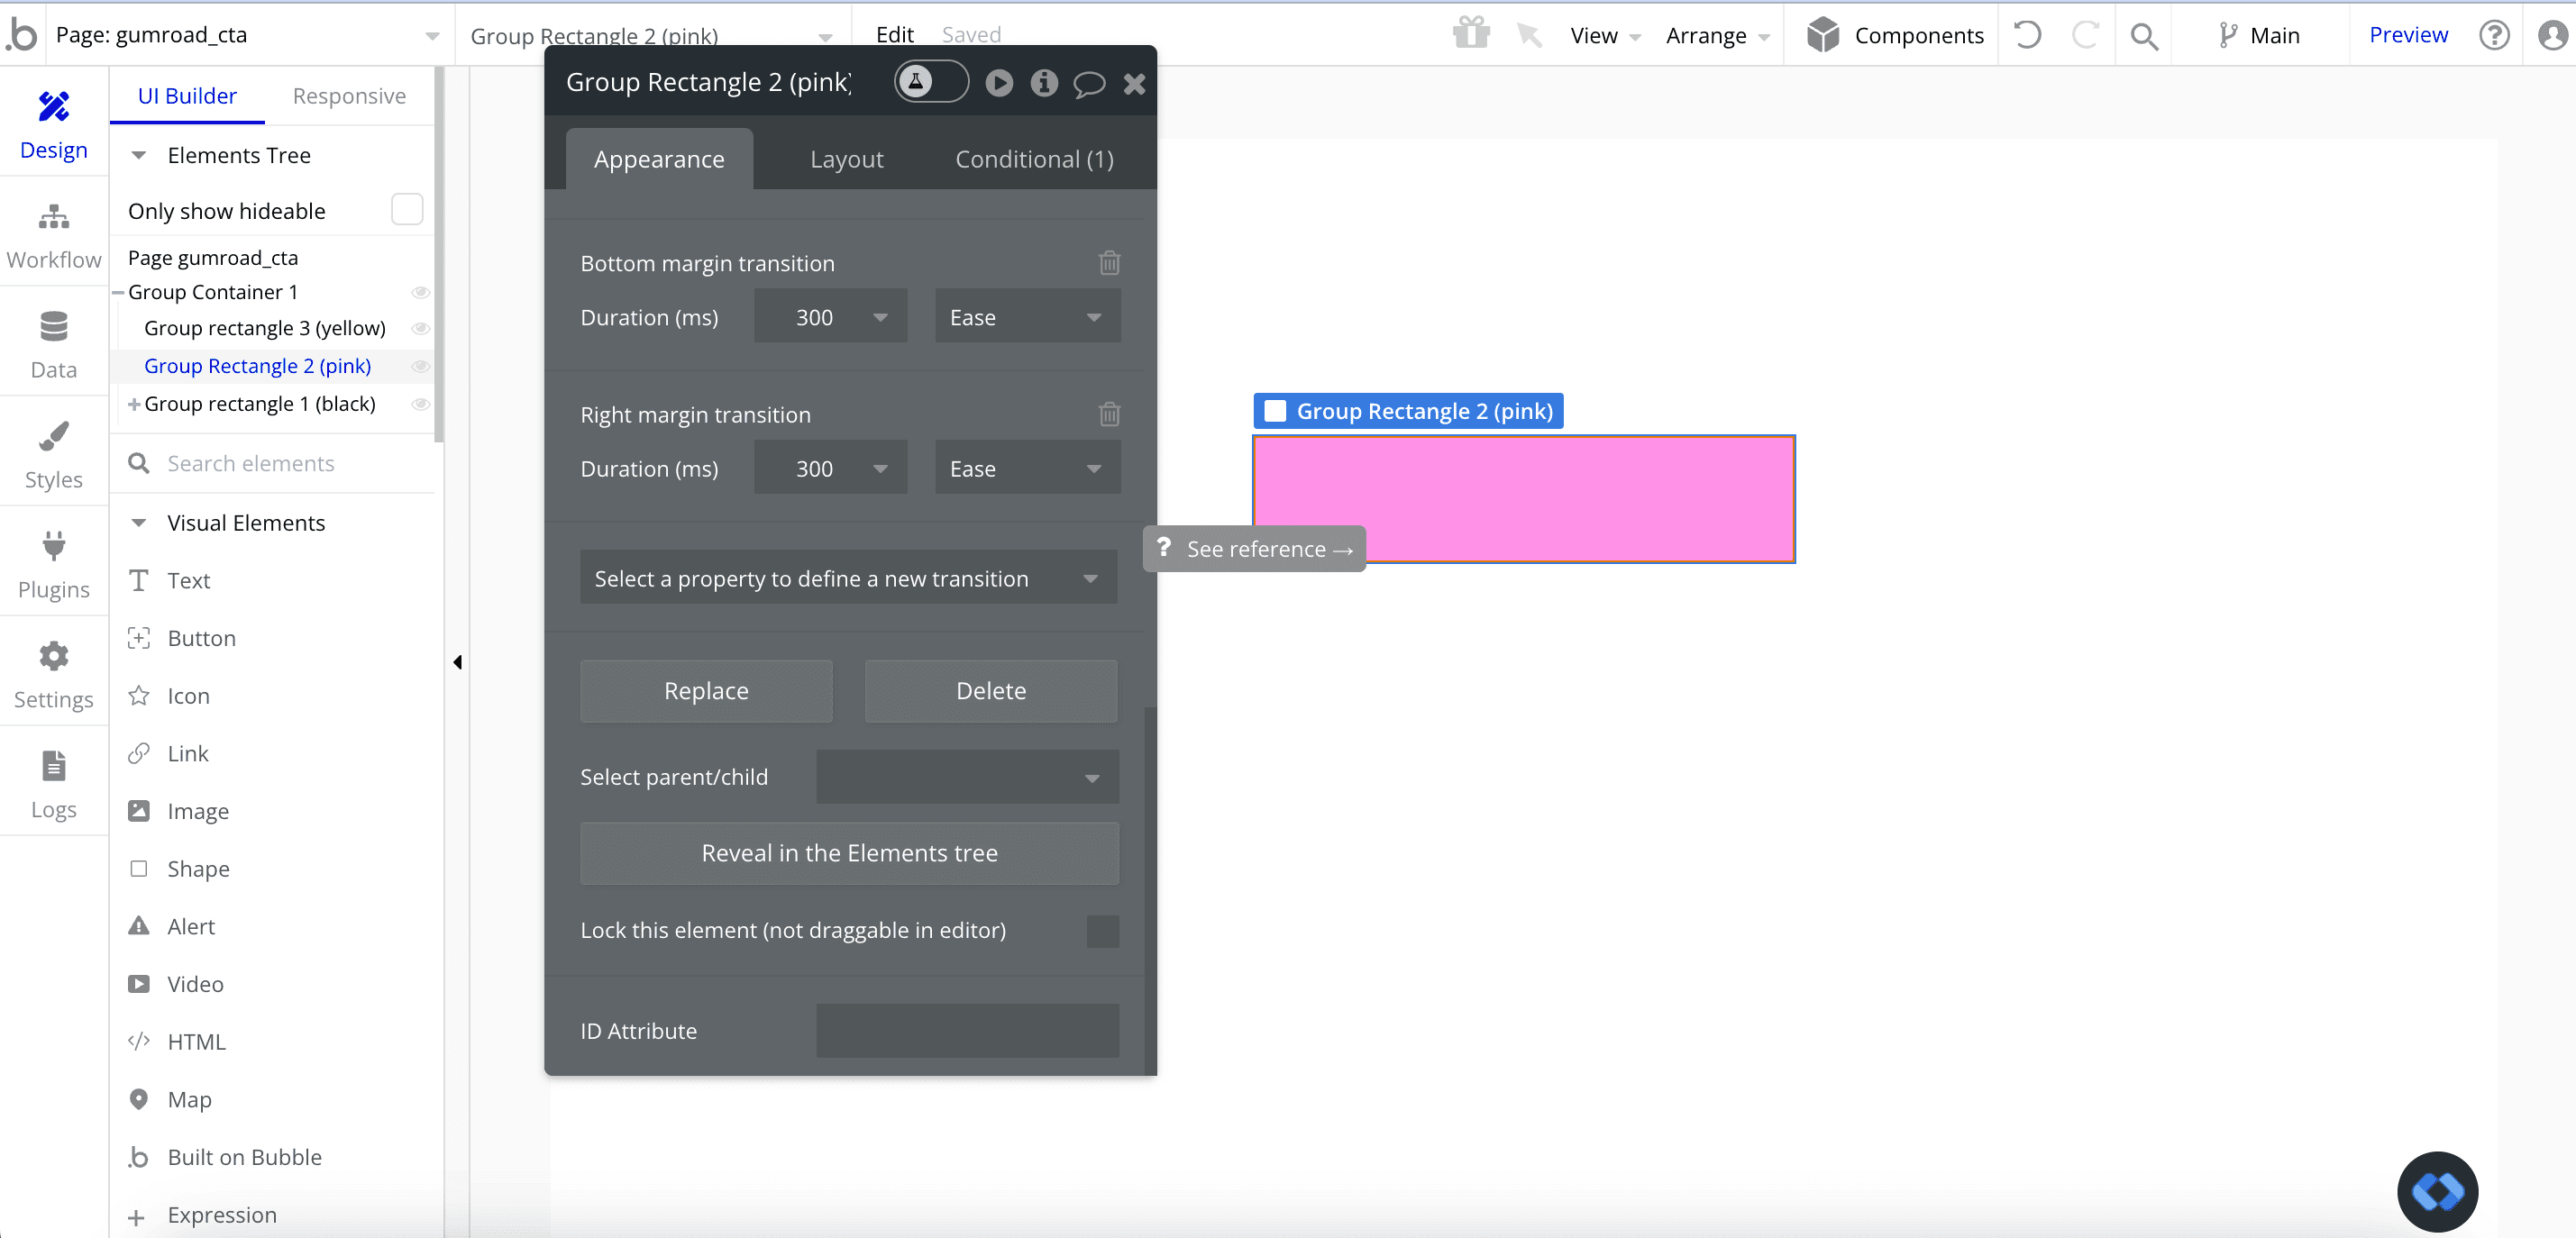
Now, we just need to repeat the operation with our two other rectangles (the yellow and pink ones). You can simply copy and paste the first black rectangle and change its color.
You should obtain this :
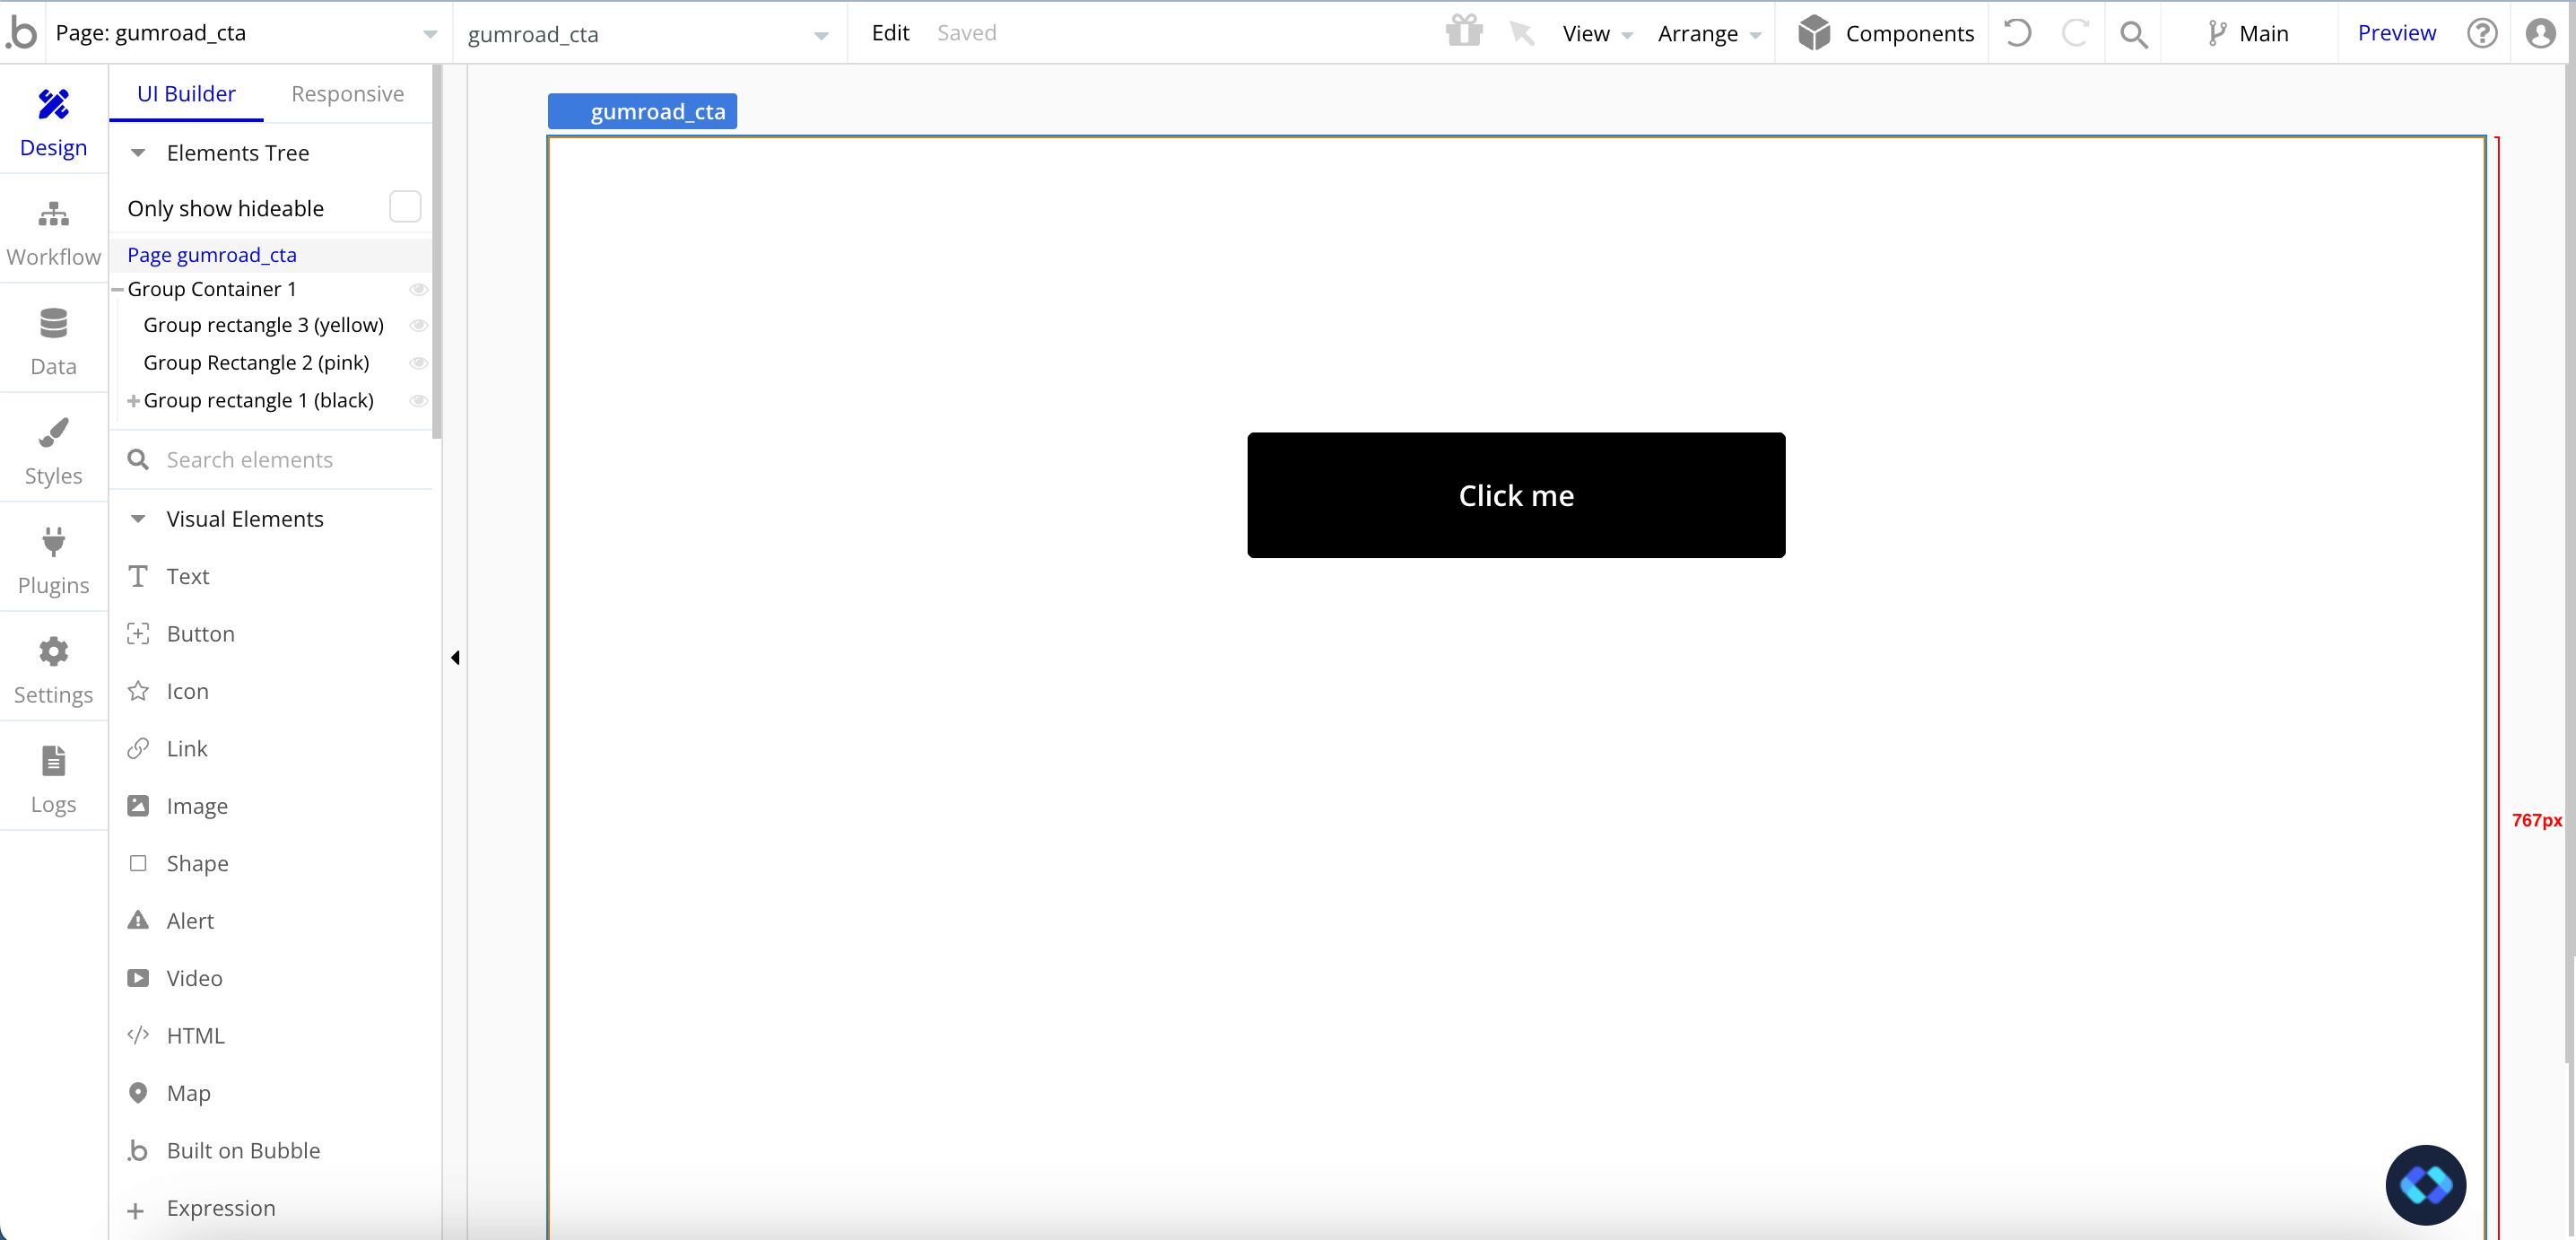
Important : note that the order of the rectangles in your Element Tree is important !
When your group is in Align to Parent, the one at the bottom will be positioned on top of the others, and the one at the top of the element tree will be behind the others.
If you want to re-use Gumroad colors, you can use the following :
Pink : #FF90E7
Yellow : #F0F332
Black : #000000
Animating our elements
Okay, now that we have the design of our elements, we have to animate them when our group is hovered.
To do that, we are going to use two things :
Margin
Transitions
If we take another look at Gumroad’s button, we can see that the black rectangle goes up to and to the left, and the other ones do the same, but don’t go as far as the first one.
To make our groups move, we’ll apply some Bottom Margin and some Right Margin to our groups.
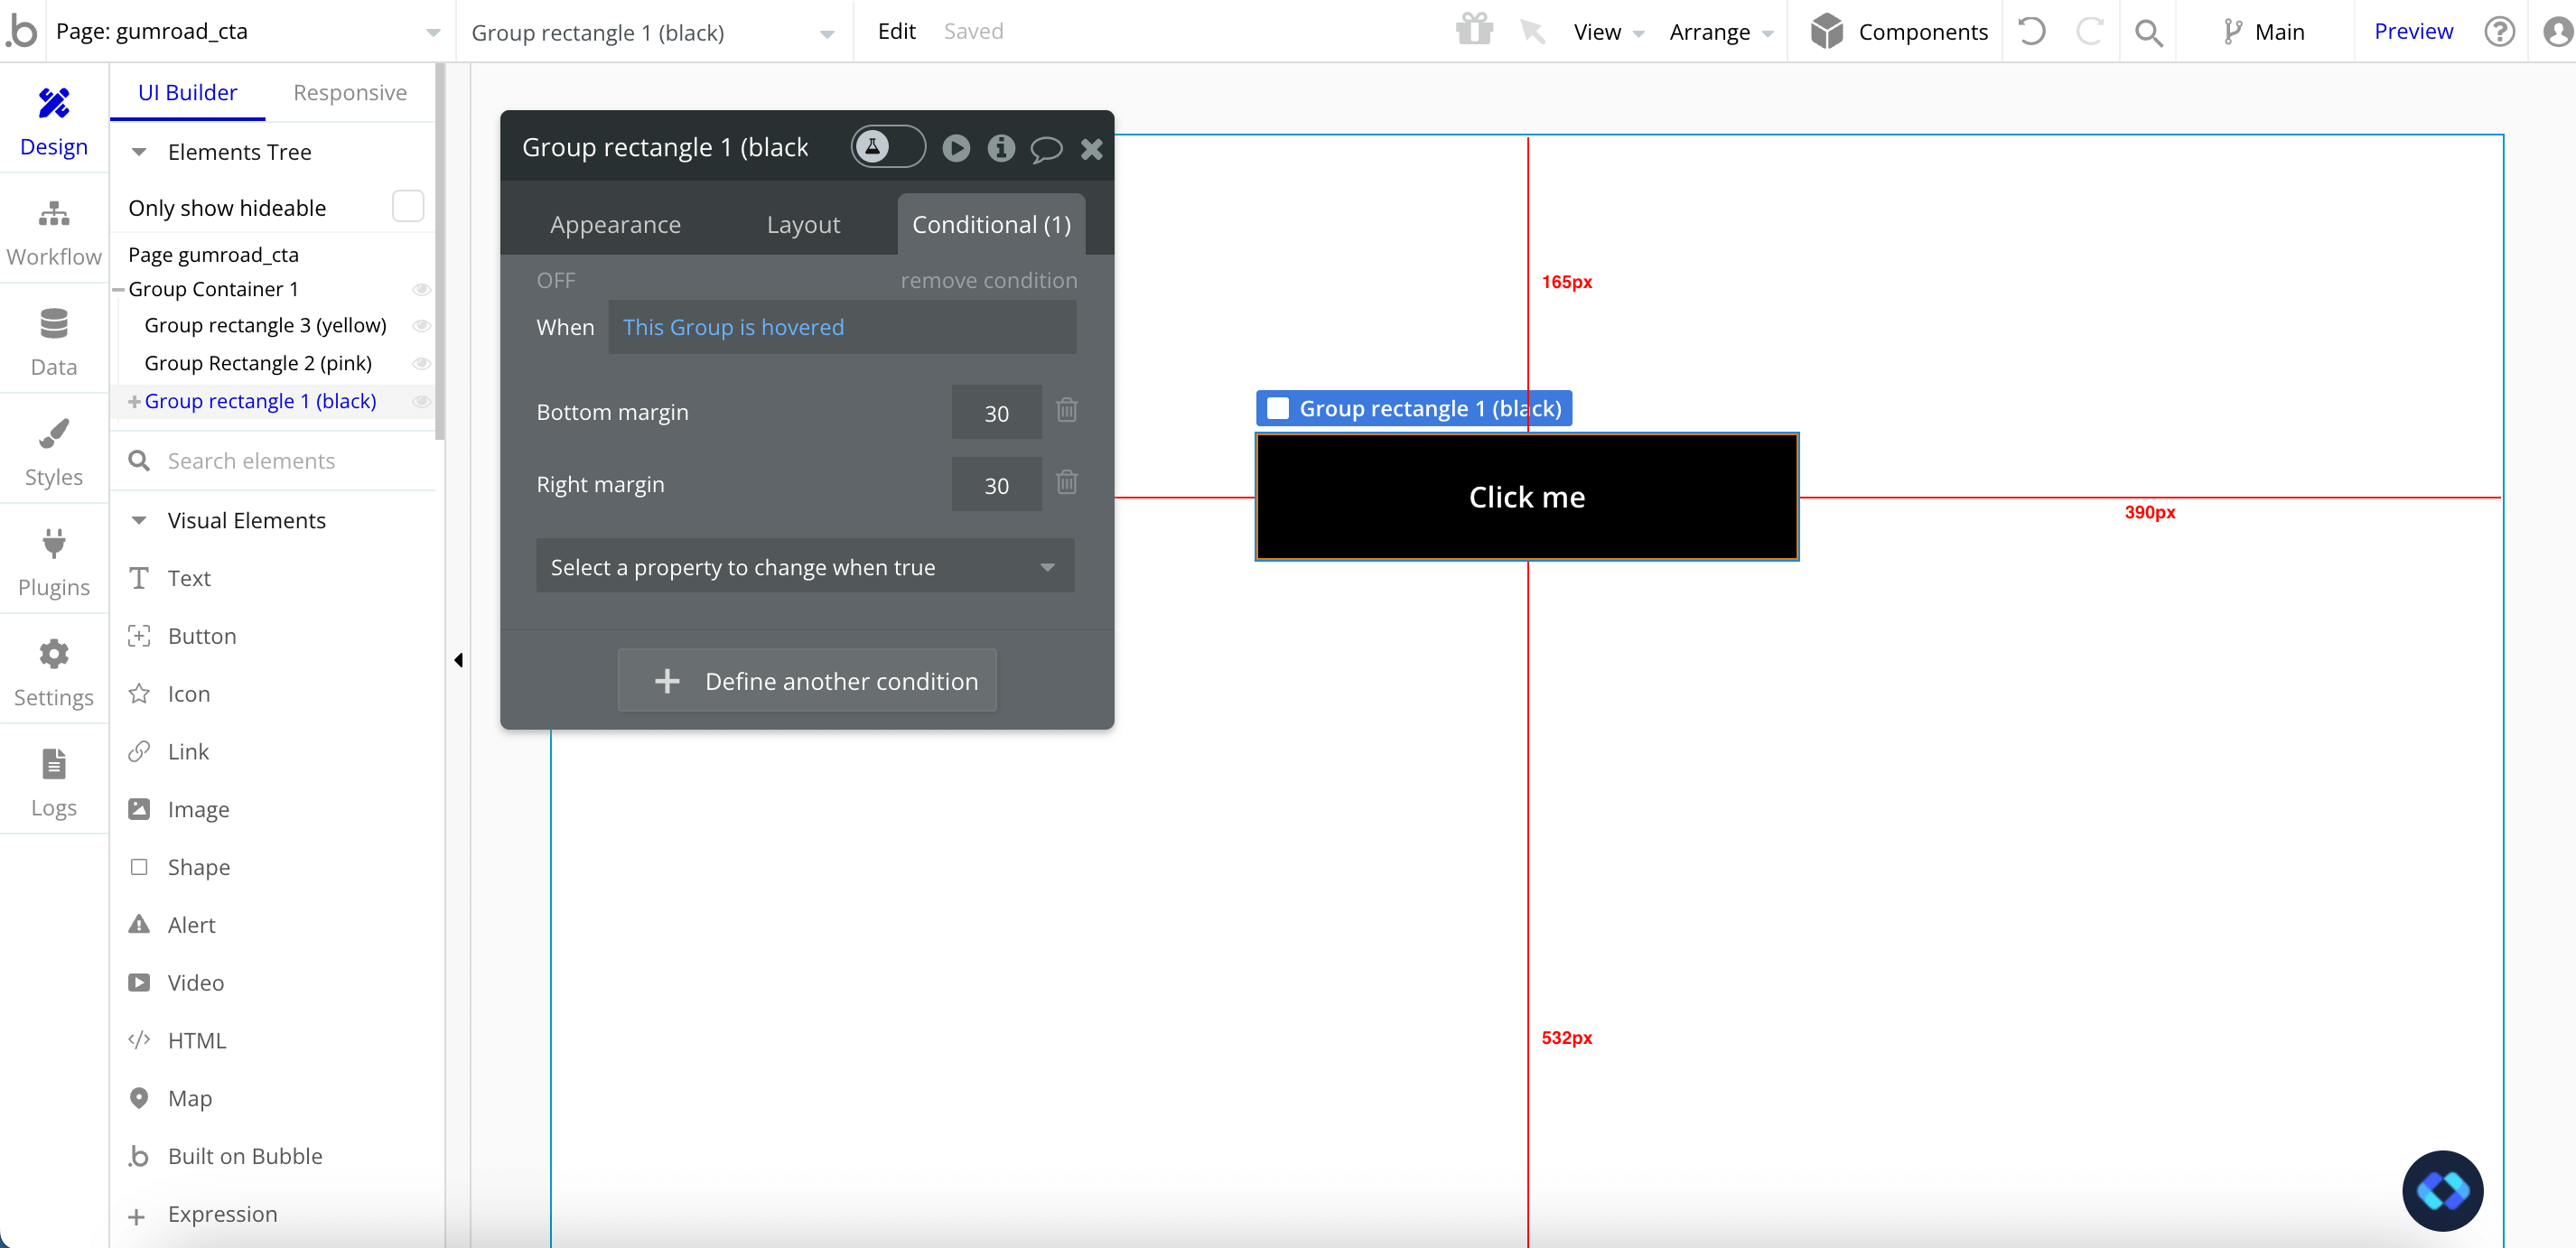
Let’s begin by setting our conditionals :
For all rectangles, the trigger of the conditional will be the Black rectangle being hovered.
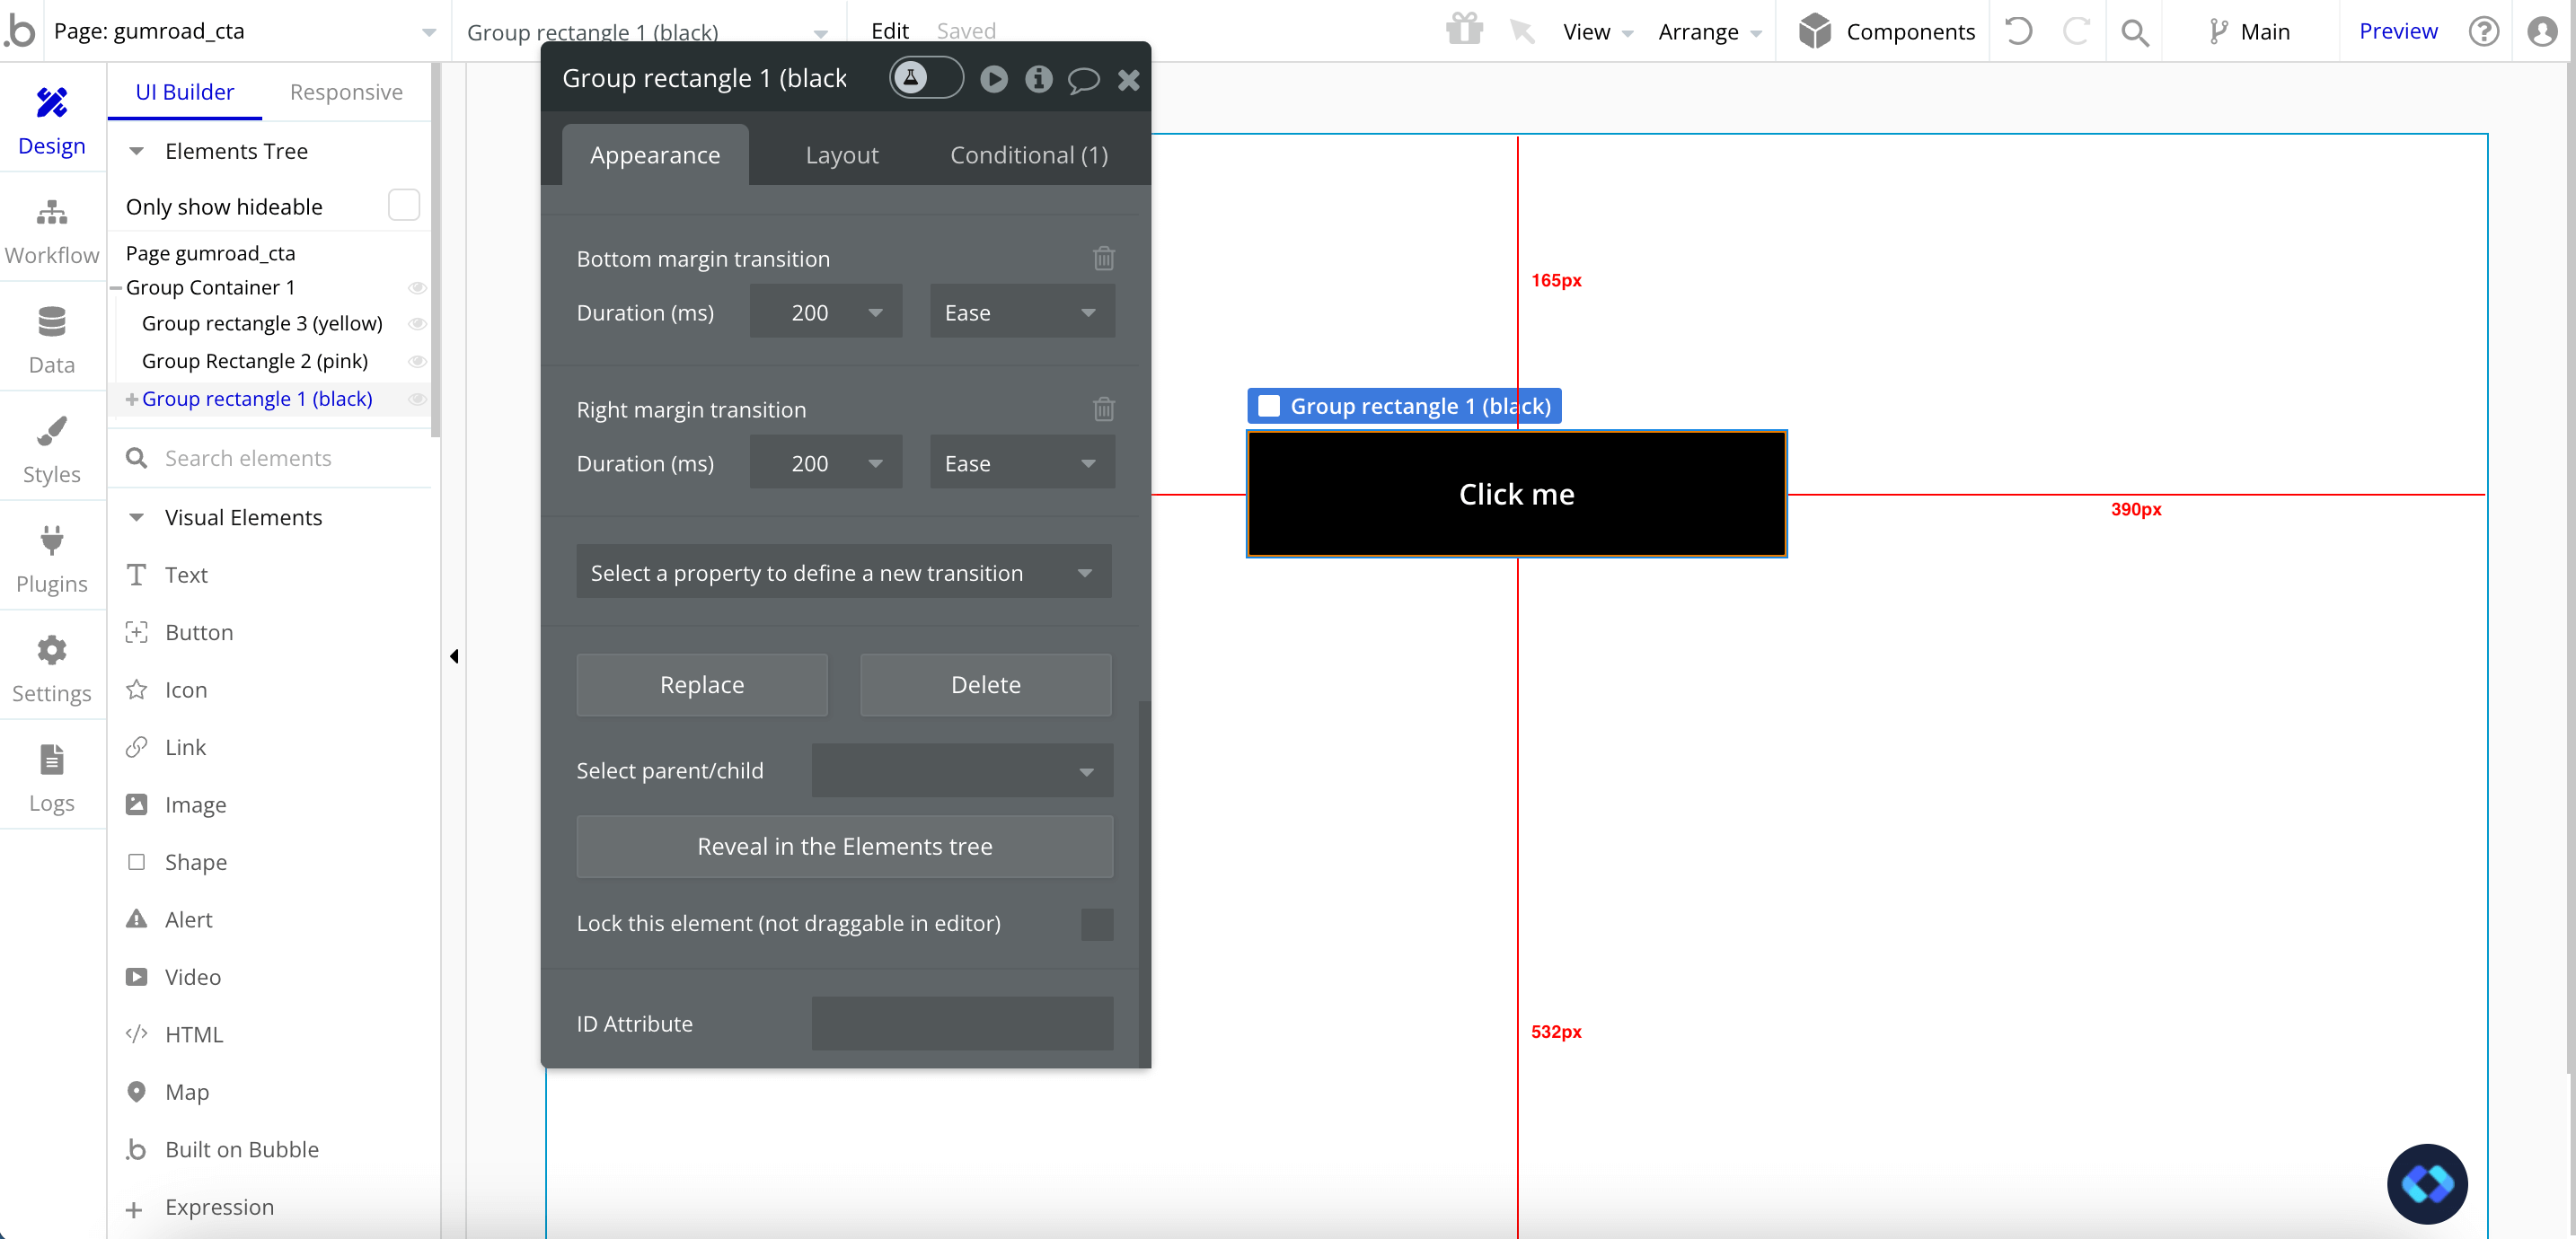
So, for the black rectangle, you’ll have this condition :
And for the middle one, you’ll have this one :
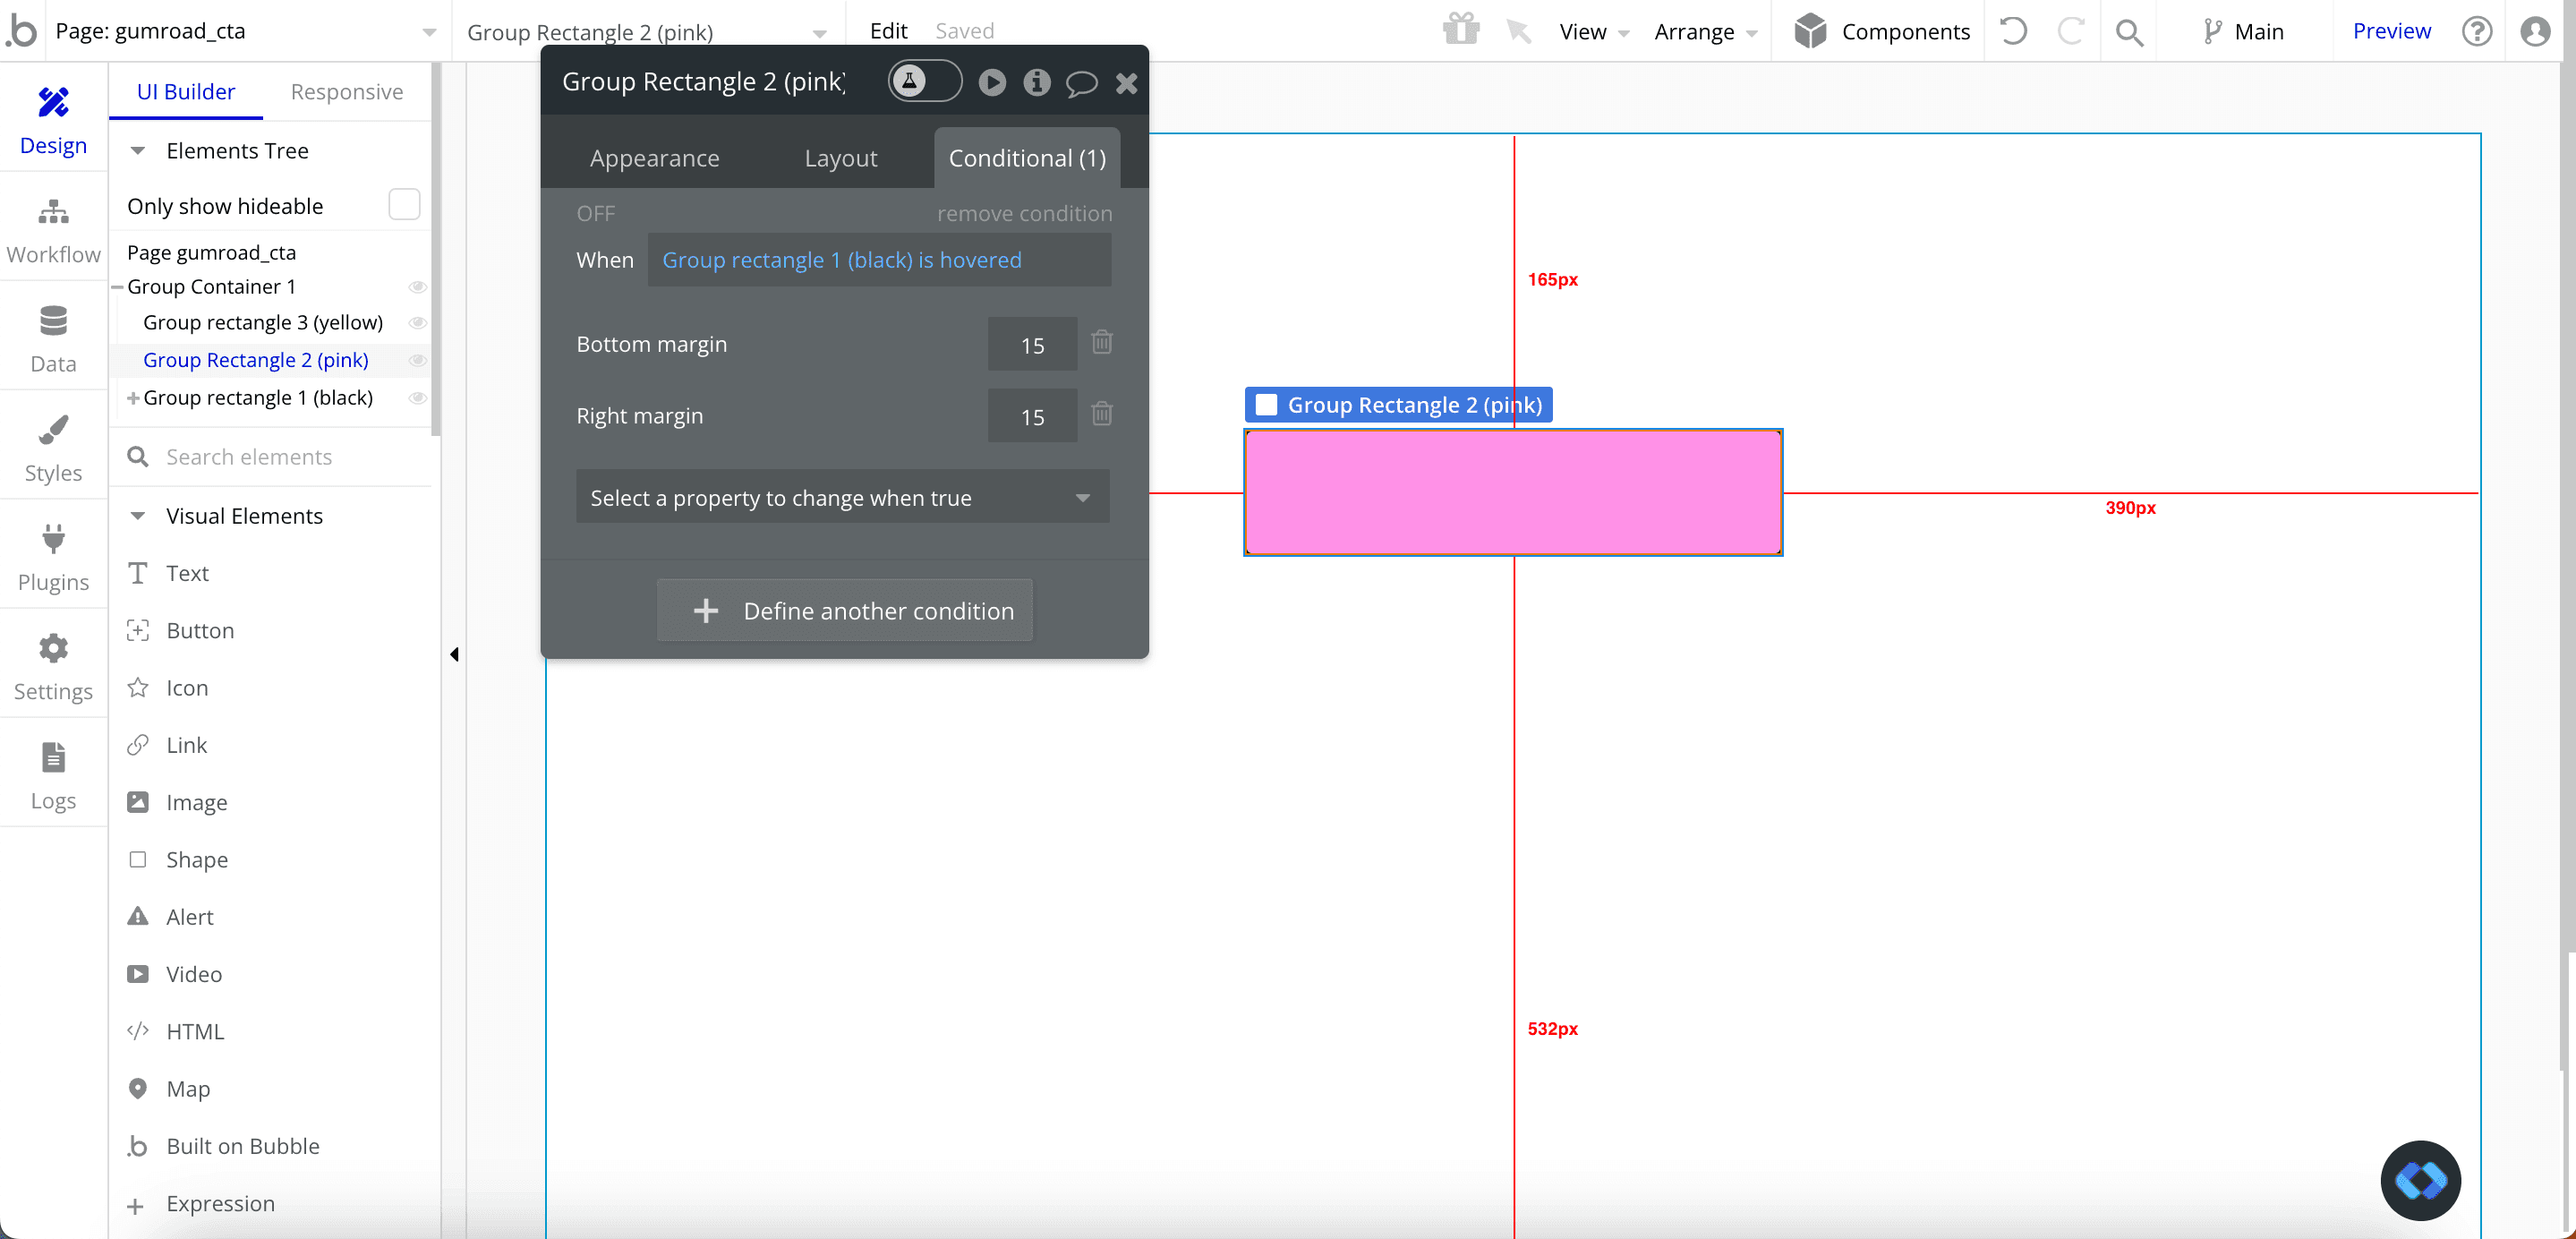
Note that here, I chose not to apply margin to the bottom rectangle, but you can try to add some to spice it up !
Okay, let’s take a look at the result :
That’s nice ! We’ve got the idea, now we just need to make it smoother.
Smoothing it up
When comparing our button to Gumroad’s button, we can see that we lack smoothness. Our button’s motion is not progressive.
Thankfully, Bubble has a built-in functionality to handle that : Transitions
Basically, they are CSS Transitions that will animate a change of property.
To apply them, simply select your group, select the appropriate property (in our case, we’ll select Bottom Margin and Right Margin) and set a delay.
For our black rectangle, you should have something like this :
And for our pink rectangle :
Since I didn’t apply margin to my Yellow rectangle, I do not need to set a transition. But if you did, don’t forget to set it on it as well !
I’ve found that 300ms of delay for the black rectangle and 200ms for the Pink one give a good result, but feel free to test some other delay to find the right one !
Let’s now take a look at the result :
Nice ! We now got something very close to Gumroad’s CTA.
We can finish styling it up by adding some black borders with a 2px width to our rectangles…
And there we are !
Thomas Couderq
Founder @ Nocodable
I've been building with Bubble for more than four years now. I've launched several projects (with more or less success). I'm passionate about no code and UI Design, which led me to founding Nocodable Components to help founders and professional Bubble developers build faster on Bubble.


Blog
Continue reading!
Check out our other tutorials to continue improving your Bubble skills!