How to make a sticky group in Bubble ?
Learn to create a sticky group in Bubble: Step-by-step guide for a seamless, fixed-scroll feature.

Thomas Couderq
16 Jan 2025


Sticky groups are a great addition to any design.
They enable you to make an element "stick" into a group and when used well, they really add an amazing touch to your Bubble app.
On top of that, they make for a great user experience, as they help keeping elements like a button in reach for your user.
In this article, you will learn how to create this type of sticky section in Bubble under 2 minutes, and without any plugin !
To go further, you can also read our article on how to create a sticky header in Bubble.
Step 1 : Building our groups in Bubble
Let's start by creating our groups. In this example, we are going to create the following feature section (which is available on Nocodable Components).
So let's copy this element and paste it into our app to get started in no time.
You can preview this components here : Feature Section 9 - Nocodable Components
This elements has the following structure :
The container's layout is set to "Row"
Inside the container, there is one container on the left that contains a CTA Button, and one other container on the right that contains all the cards presenting the features.
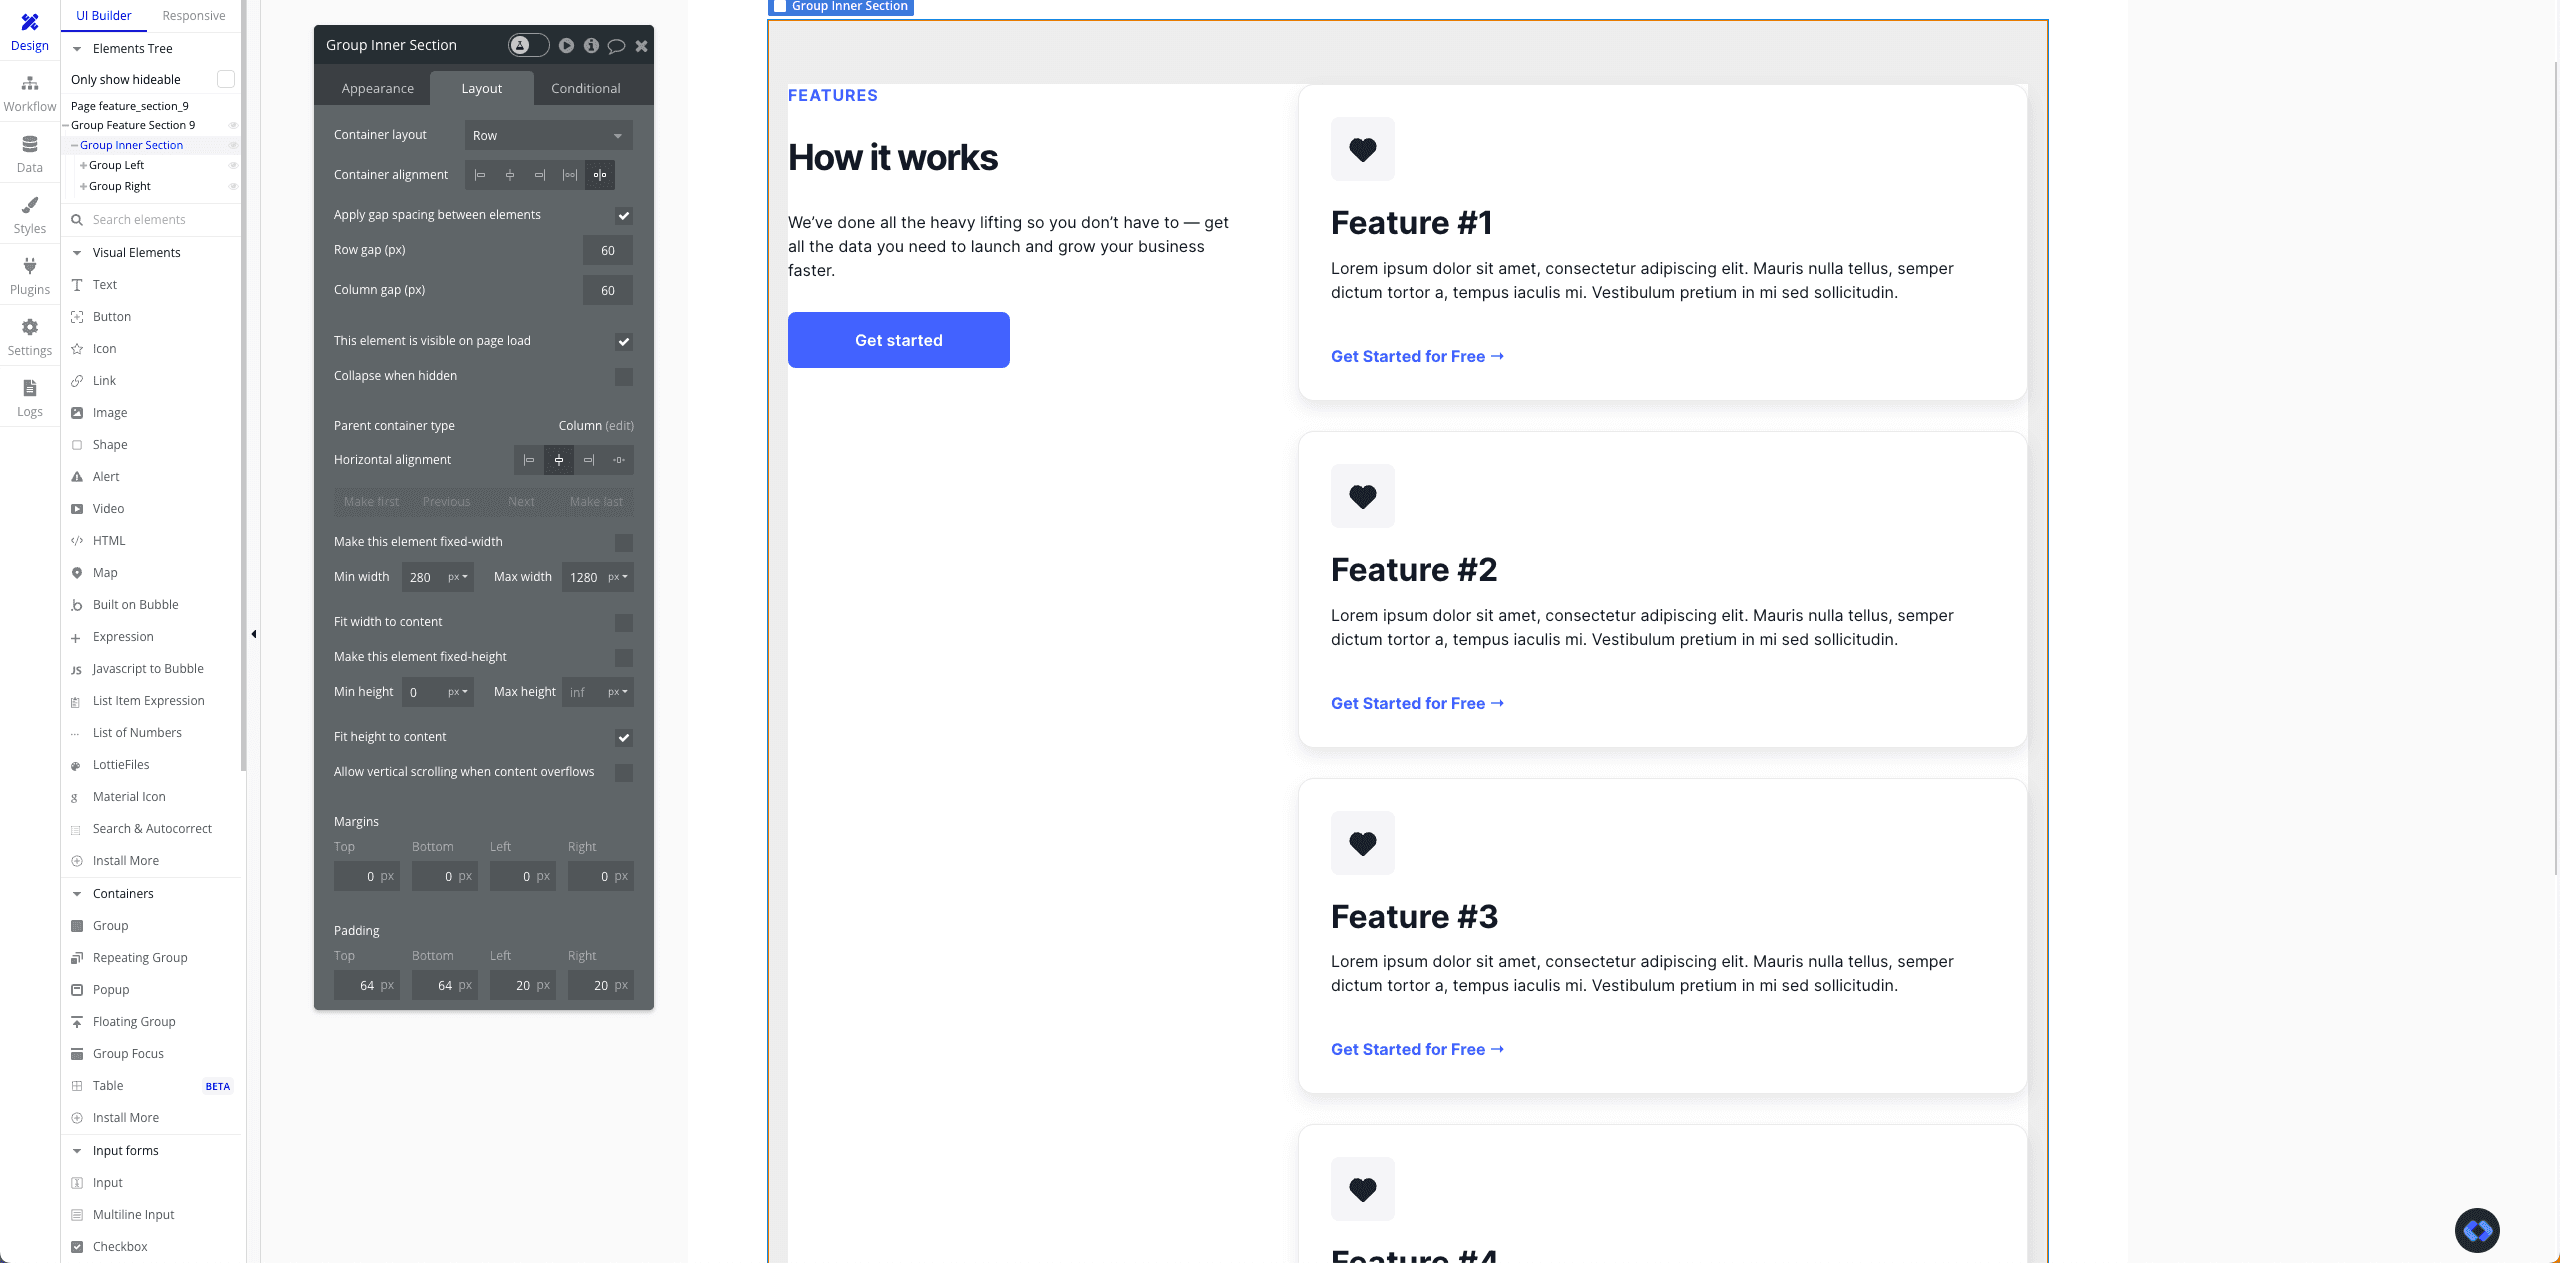
The groups "Left" and "Right" are simple groups, nothing very special about them.
Related ressource you can read: The ultimate guide to Bubble.io responsive design
Step 2 : Exposing HTML ID attributes for our Sticky Group
To continue, it's essential to verify that the feature to reveal element IDs is activated in your application.
We've discussed this in previous tutorials, but let's go over it once more:
To activate this feature, navigate to settings, then select General. Here, look for the option labeled "Expose the option to add an ID attribute to HTML elements."
This will give the ability to set a custom HTML ID to our elements, to help us target is with some code in an HTML Element later on.

Once you've checked this box, you will see a new input into your element's Appearance panel :

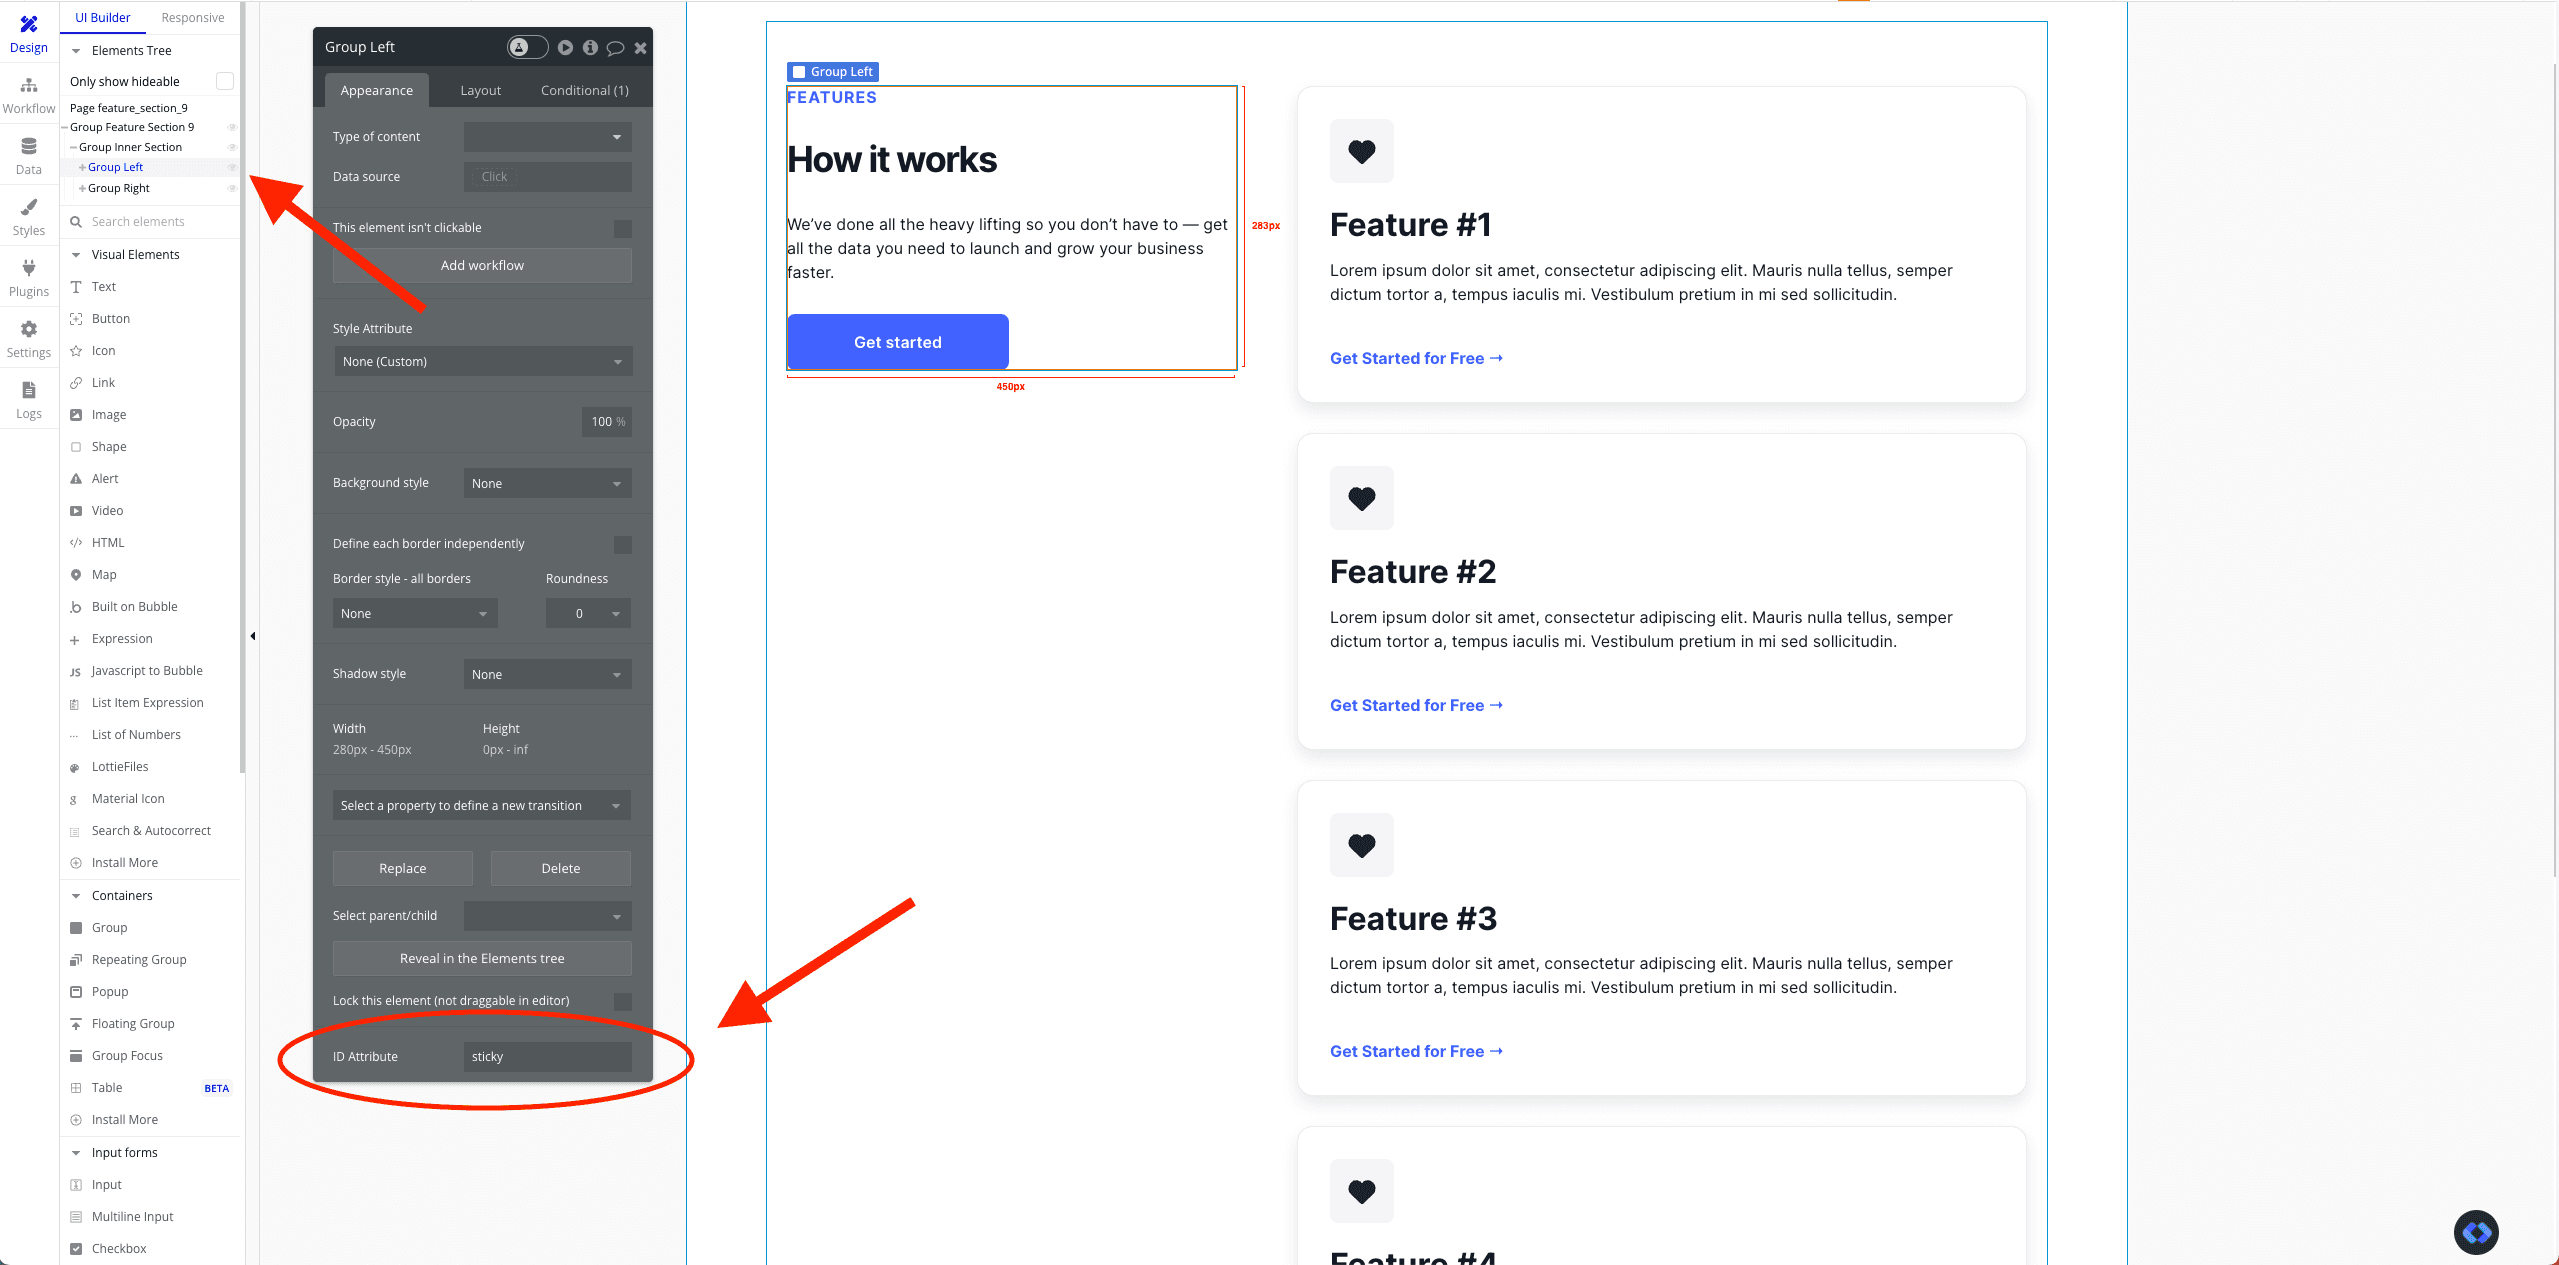
Step 3 : Assigning an ID to our Sticky Group
Now, go ahead and give an ID to the group your want to stick.
In our example, the ID of our group is "sticky" :
Step 4 : Integrating HTML Code for Effective Sticky Groups in Bubble.io
The final step of our tutorial is to add this code within our page :
Important note : If you did not set "sticky" as your group's ID Attribute, remember to also change it within the code (replace #sticky by #your-id).
By default, we set the sticky margin to 40px in our code, but feel free to modify it to find the one that suits your use case and your app design!
How to add the HTML Code to your app ?
To add this code to your app you can :
Paste it within in an HTML element that you will place onto your page
Paste it within the Page Header
Paste in the header of your app (Settings --> SEO/Metatags --> Script/Meta tags in header)
Conclusion
There you go !
You should now have this result (or similar) within your app :
If you want to re-use the same code for another element, you can simply change the other elements ID Attribute to match the one in the HTML Code.
If you want to re-use the same element I've show in the tutorial, it is available on Nocodable Components.

Thomas Couderq
Founder @ Nocodable
I've been building with Bubble for more than four years now. I've launched several projects (with more or less success). I'm passionate about no code and UI Design, which led me to founding Nocodable Components to help founders and professional Bubble developers build faster on Bubble.


Blog
Continue reading!
Check out our other tutorials to continue improving your Bubble skills!