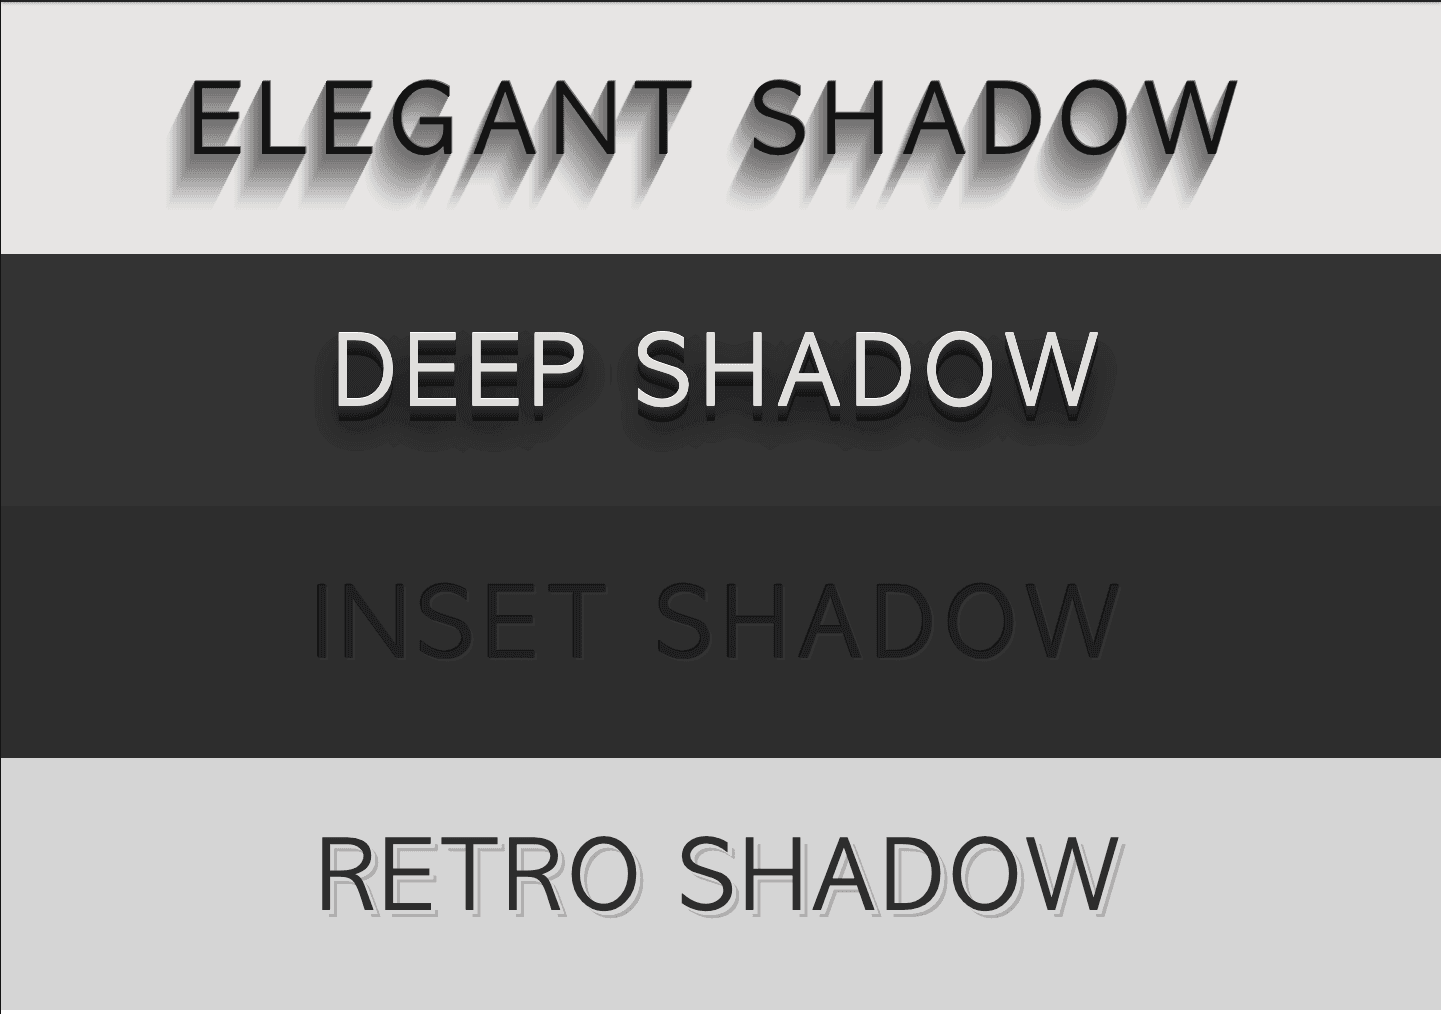
You know shadows, right ?
They are a simple, yet very important addition to any website design.
They give a feeling of depth to your elements, and when used right, then really take your design to the next level of professionalism.
Applying shadows to a group like a card in Bubble is pretty straightforward. You use the shadow property of the element.
However, on a text, this is not so simple.
This is due to the fact that Bubble gives you the ability to add Box Shadow (the box being the container of your element).
In this element, we’re going to see how you can add shadows to your test, to elevate it, and have a result.
To go further, you can also read our article on how to change text highlight color in Bubble.
Step 1 : Building your page
If you haven’t done it already, start by building your page.
In this example, we are going to use this Hero Section from Nocodable Components.

Our goal is to enhance this Hero Section with some Text Shadow, so let’s get started.
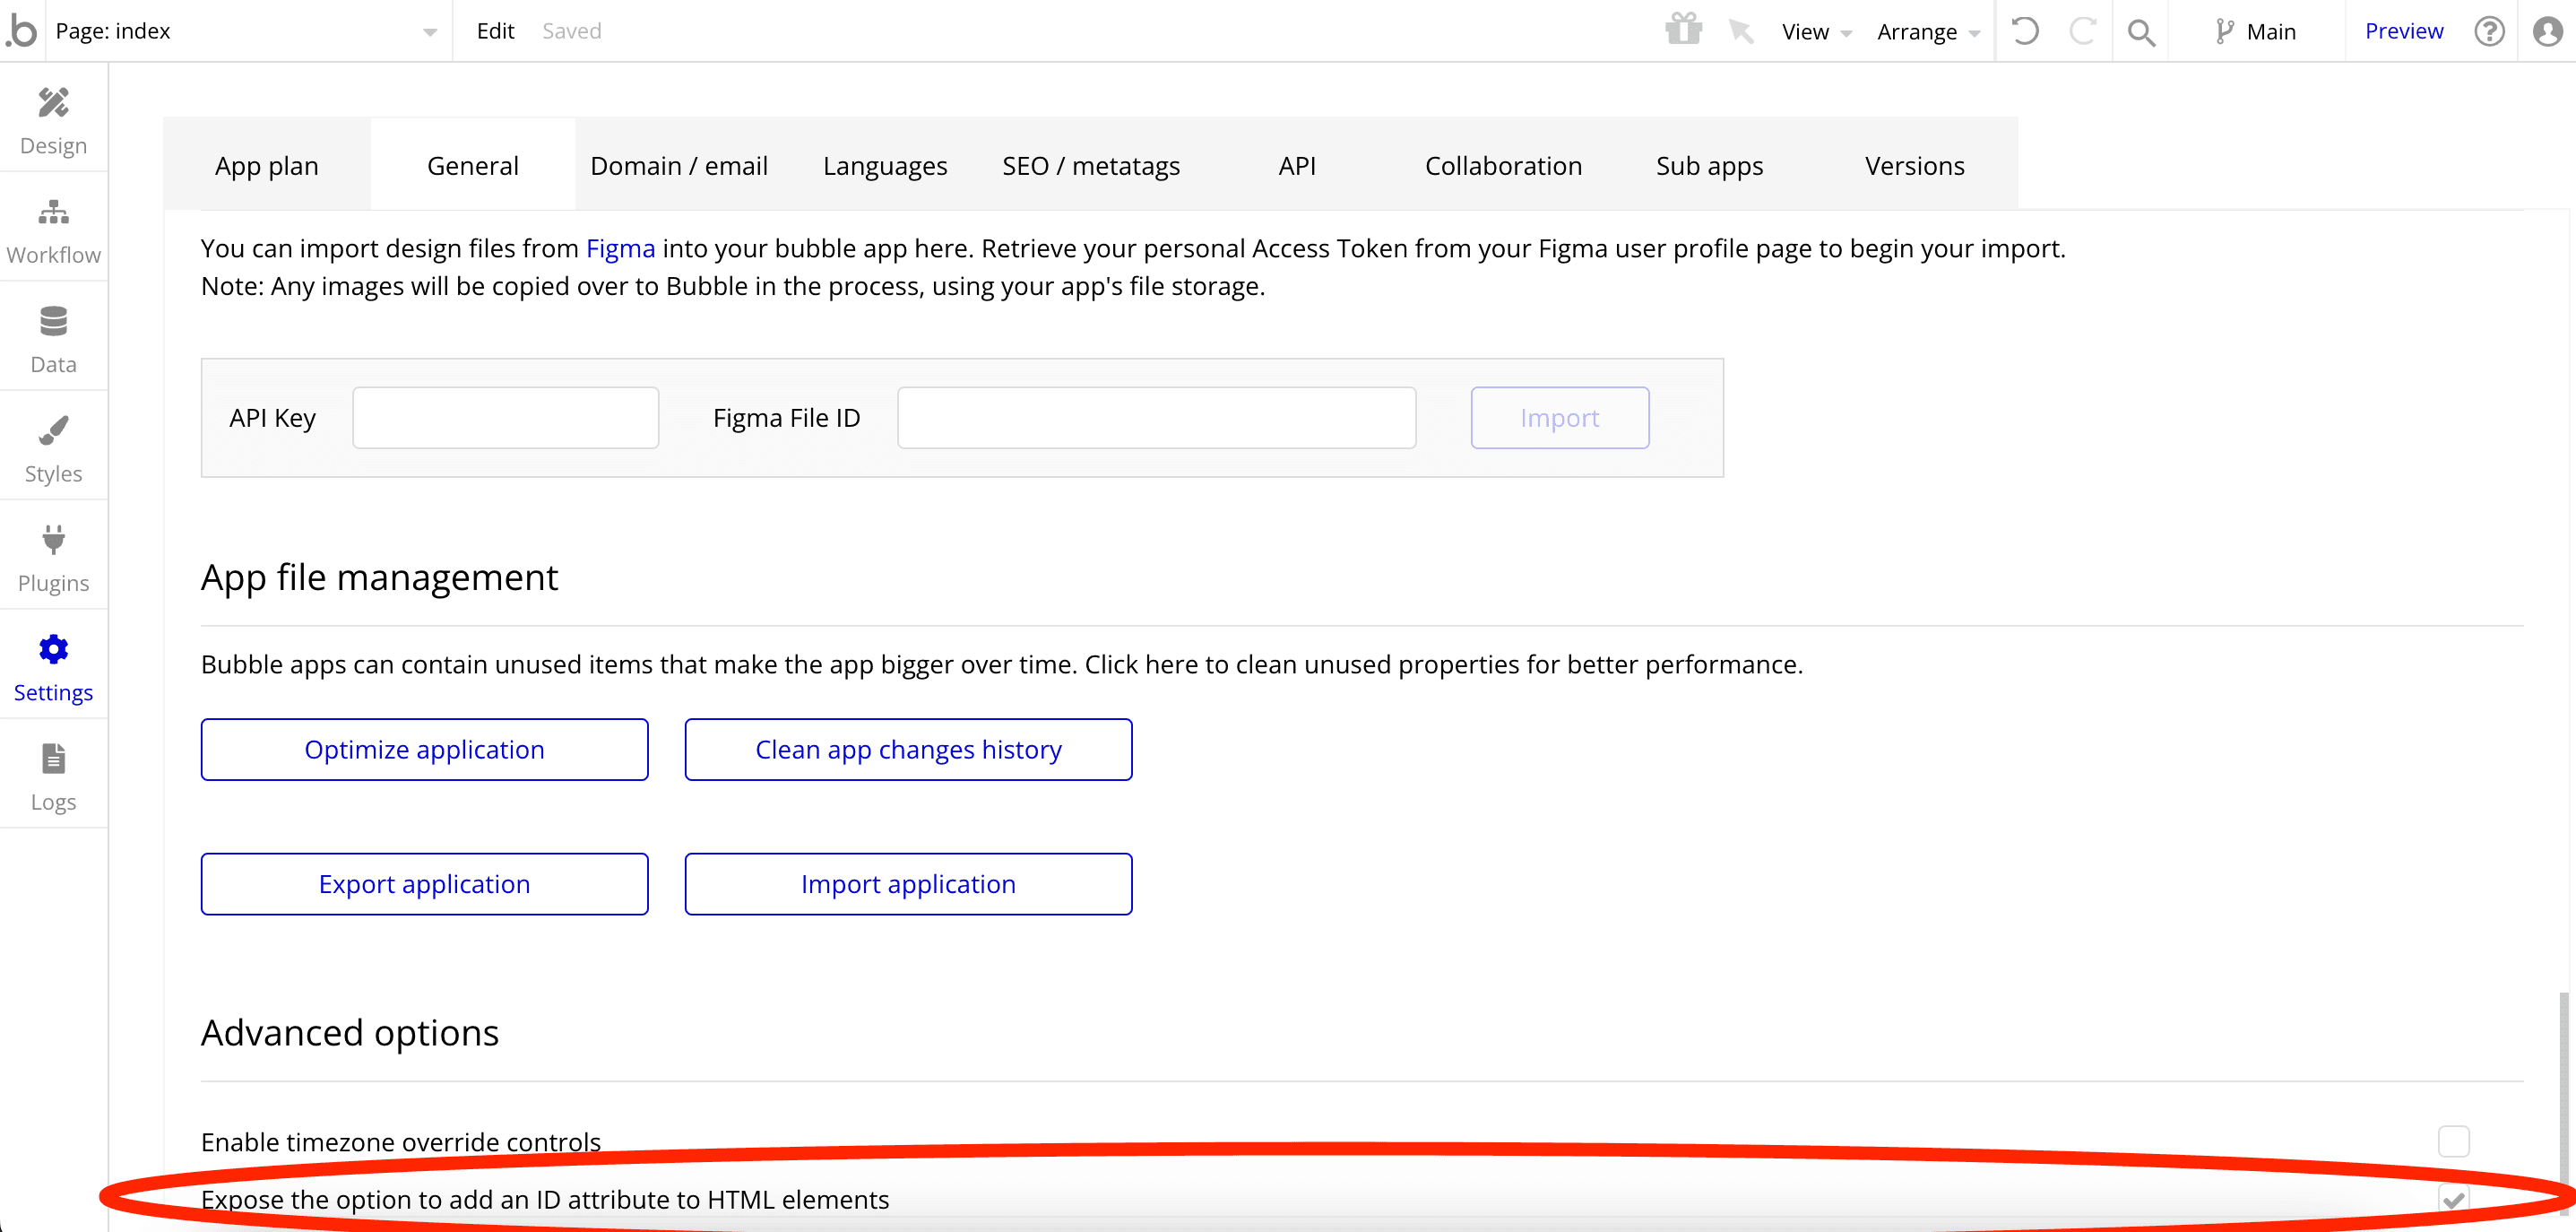
Step 2 : Exposing HTML ID Attributes
If you’ve already read some of our previous articles, you know the drill.
If not, you need to read to part for before going to the next step.
To proceed, it's crucial to ensure that the element ID reveal function is enabled in your application.
To enable this feature, go to the settings and choose 'General'. Within this section, find and select the option named "Expose the option to add an ID attribute to HTML elements."
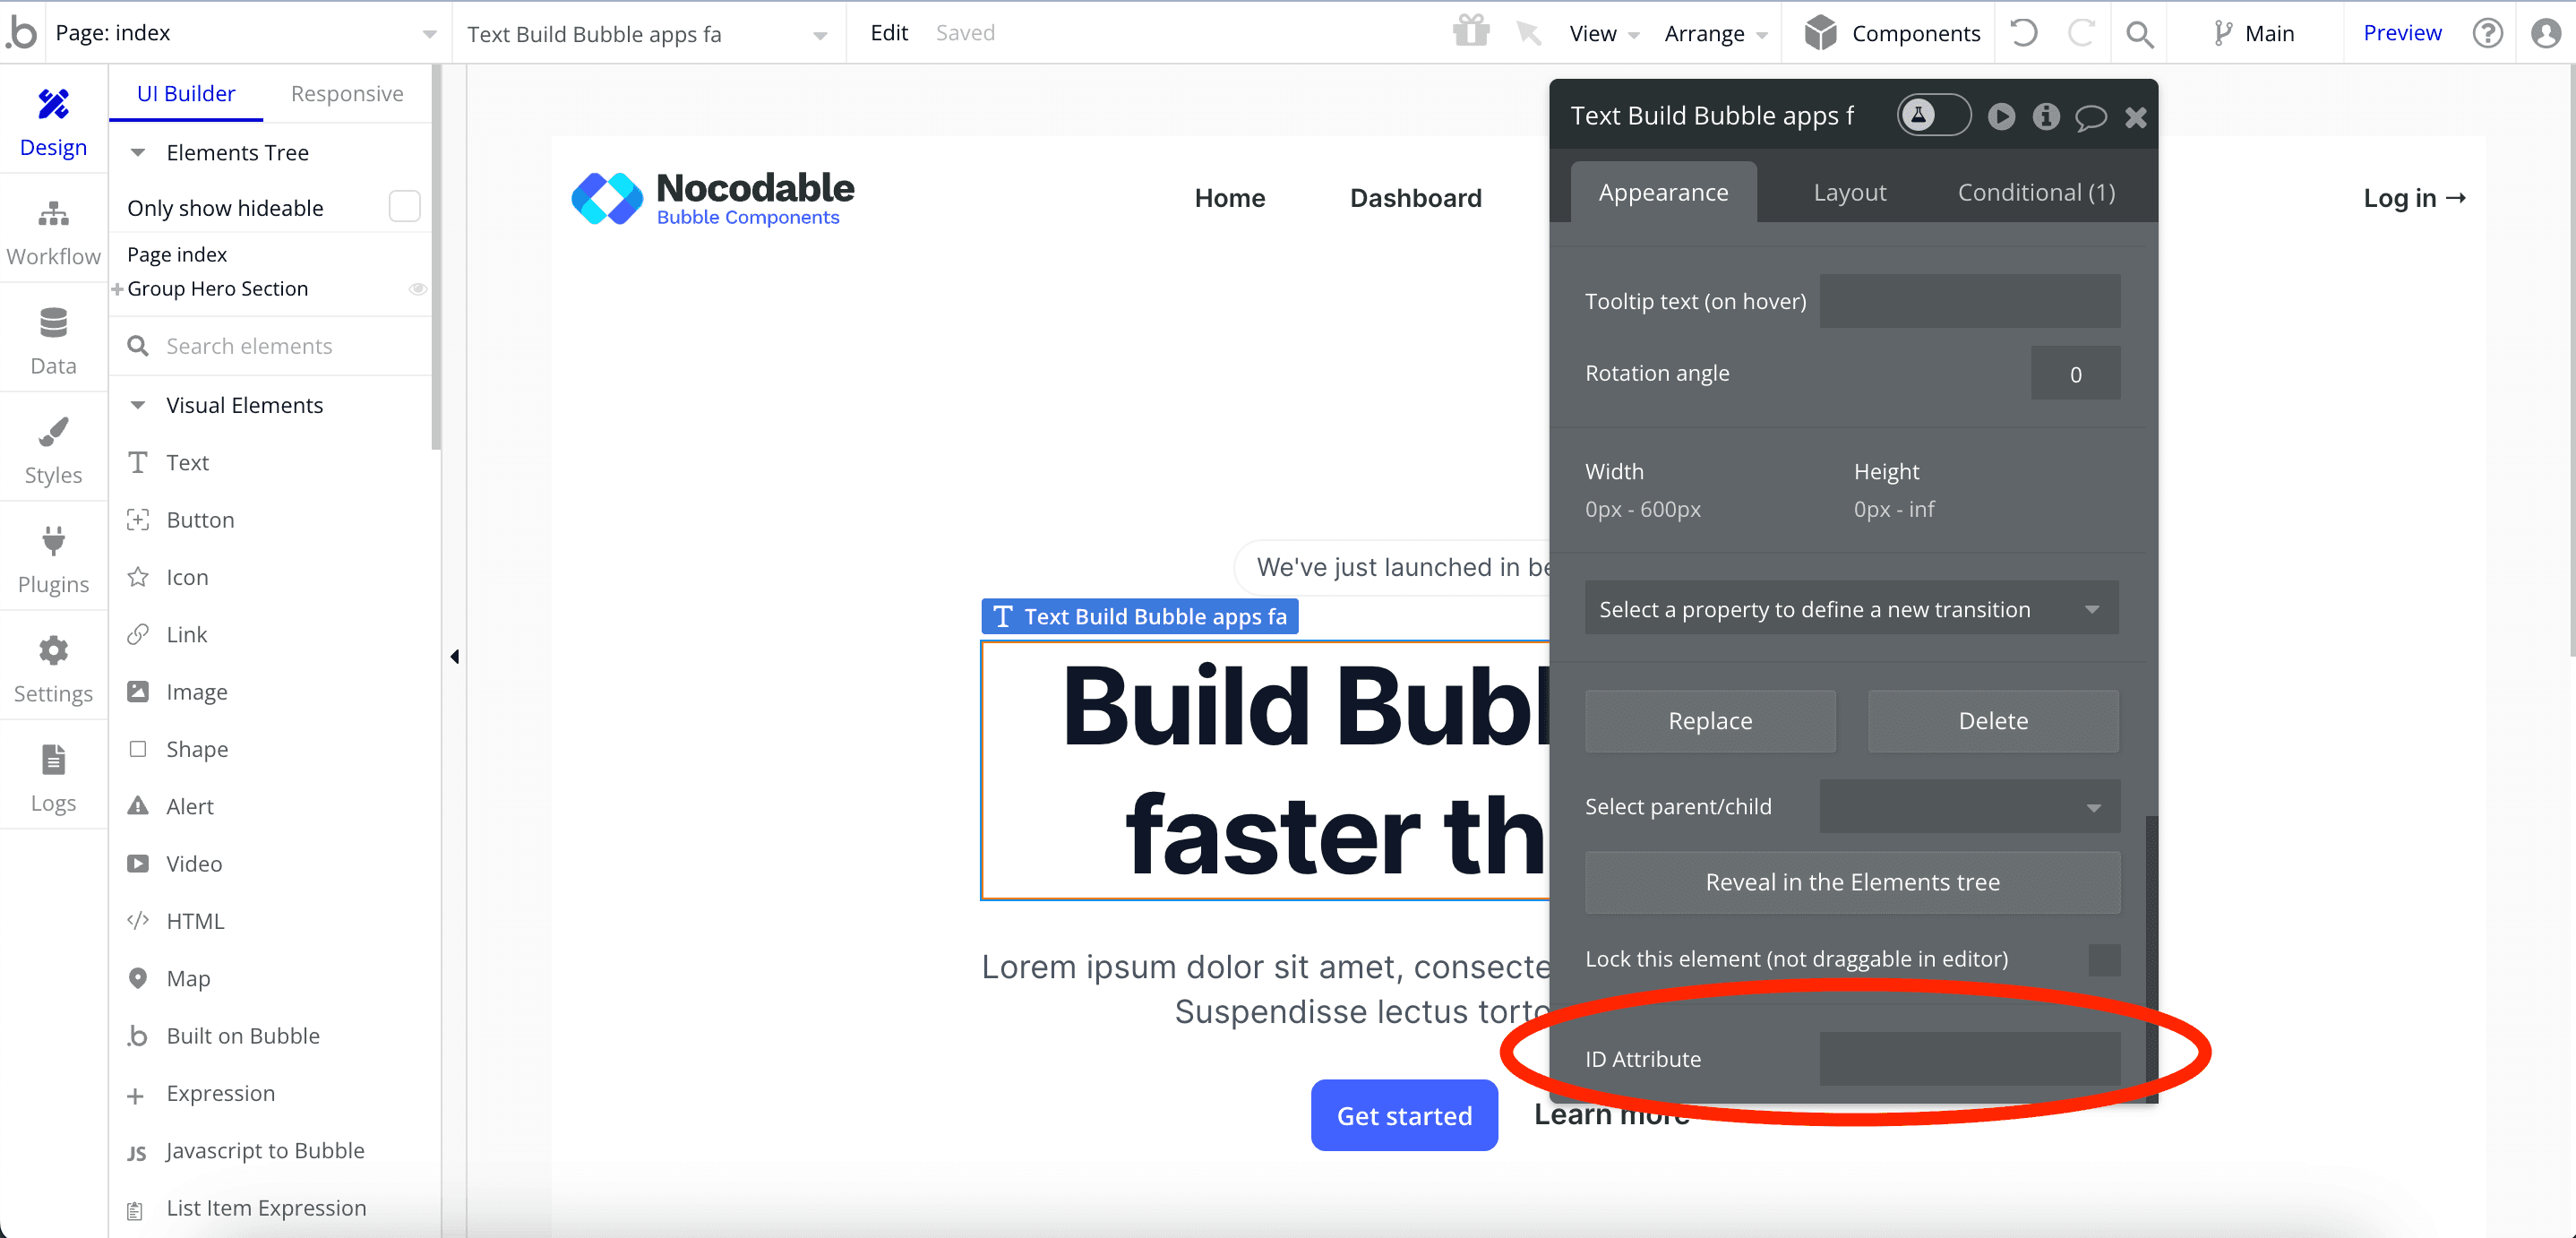
After you have activated this option, you should see this new input on the property panel of every elements :
Step 3 : Install the Classify Plugin (free)
For this effect, we’re going to need a little bit of CSS. Nothing too extreme, but we still need it.
So go ahead and install Classify onto your Bubble app.
You can find the plugin here. https://bubble.io/plugin/classify-1568299250417x684448291308175400
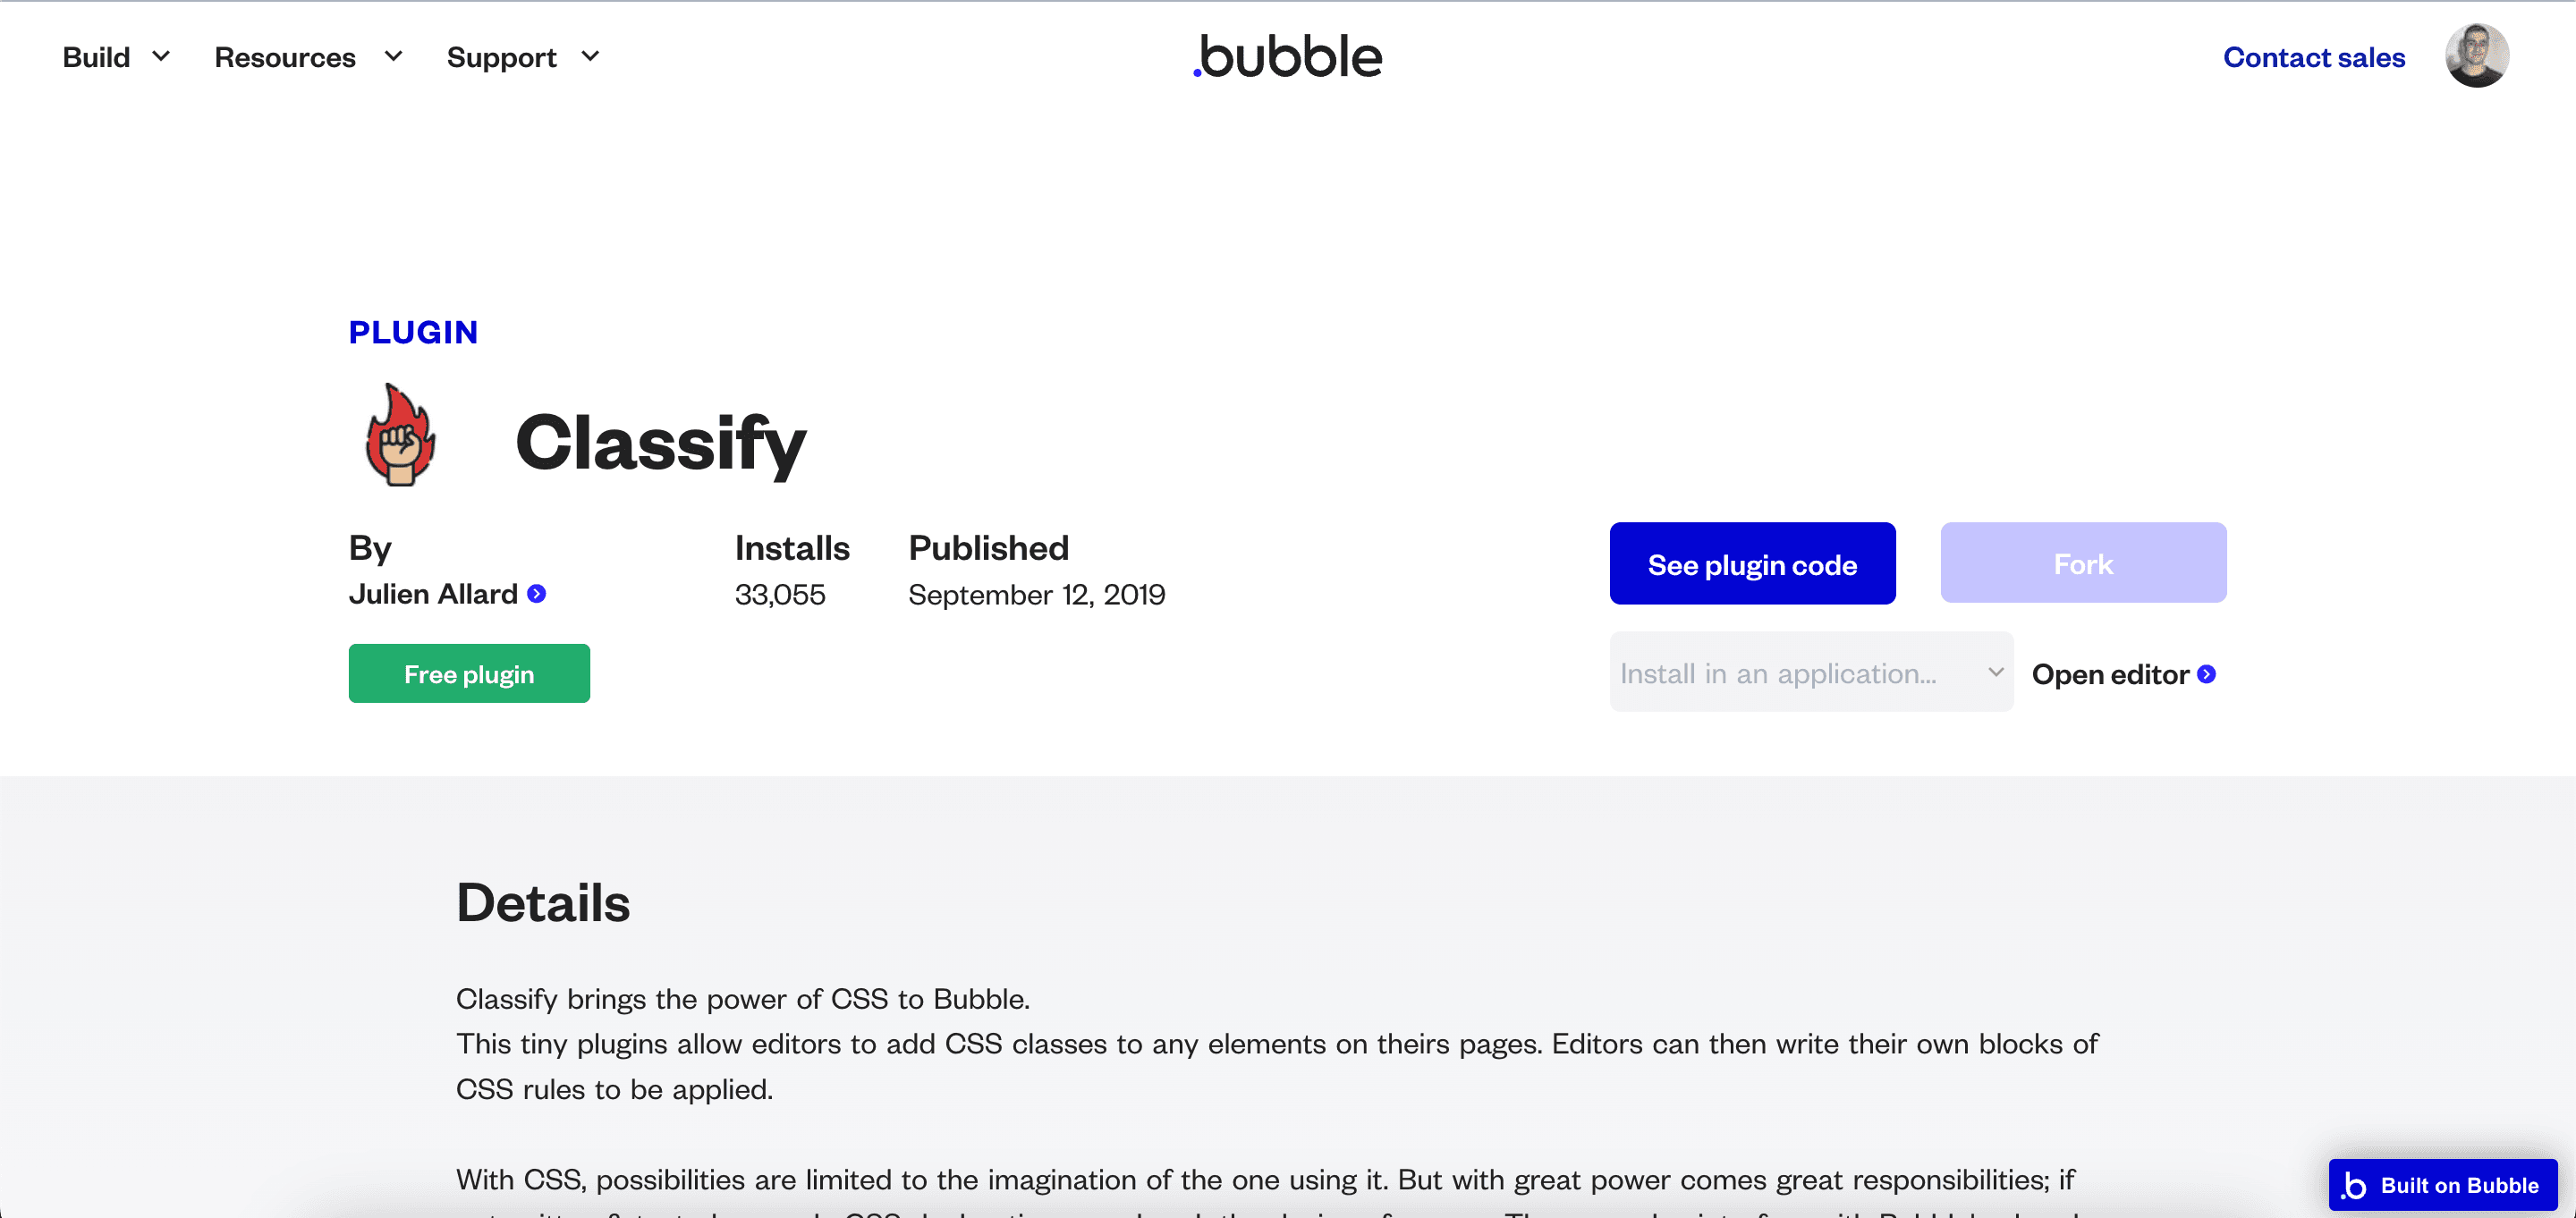
It is a completely free plugin that gives you the possibility to add a CSS Class to any element of your app, which in turn gives us the possibility to target it with CSS Code.
Step 4 : Giving a CSS Class to our text elements
Okay, we only one more step to finish preparing our text elements to be shadowed.
Let’s give a CSS Class.
To do this, we are going to use a Classify Command.
In short, what it does is simply telling Classify to add a CSS Class to our element, nothing too fancy.
To do that, simply paste the following code into the HTML ID Attributes of your element :
{addClass: "shadow-text"}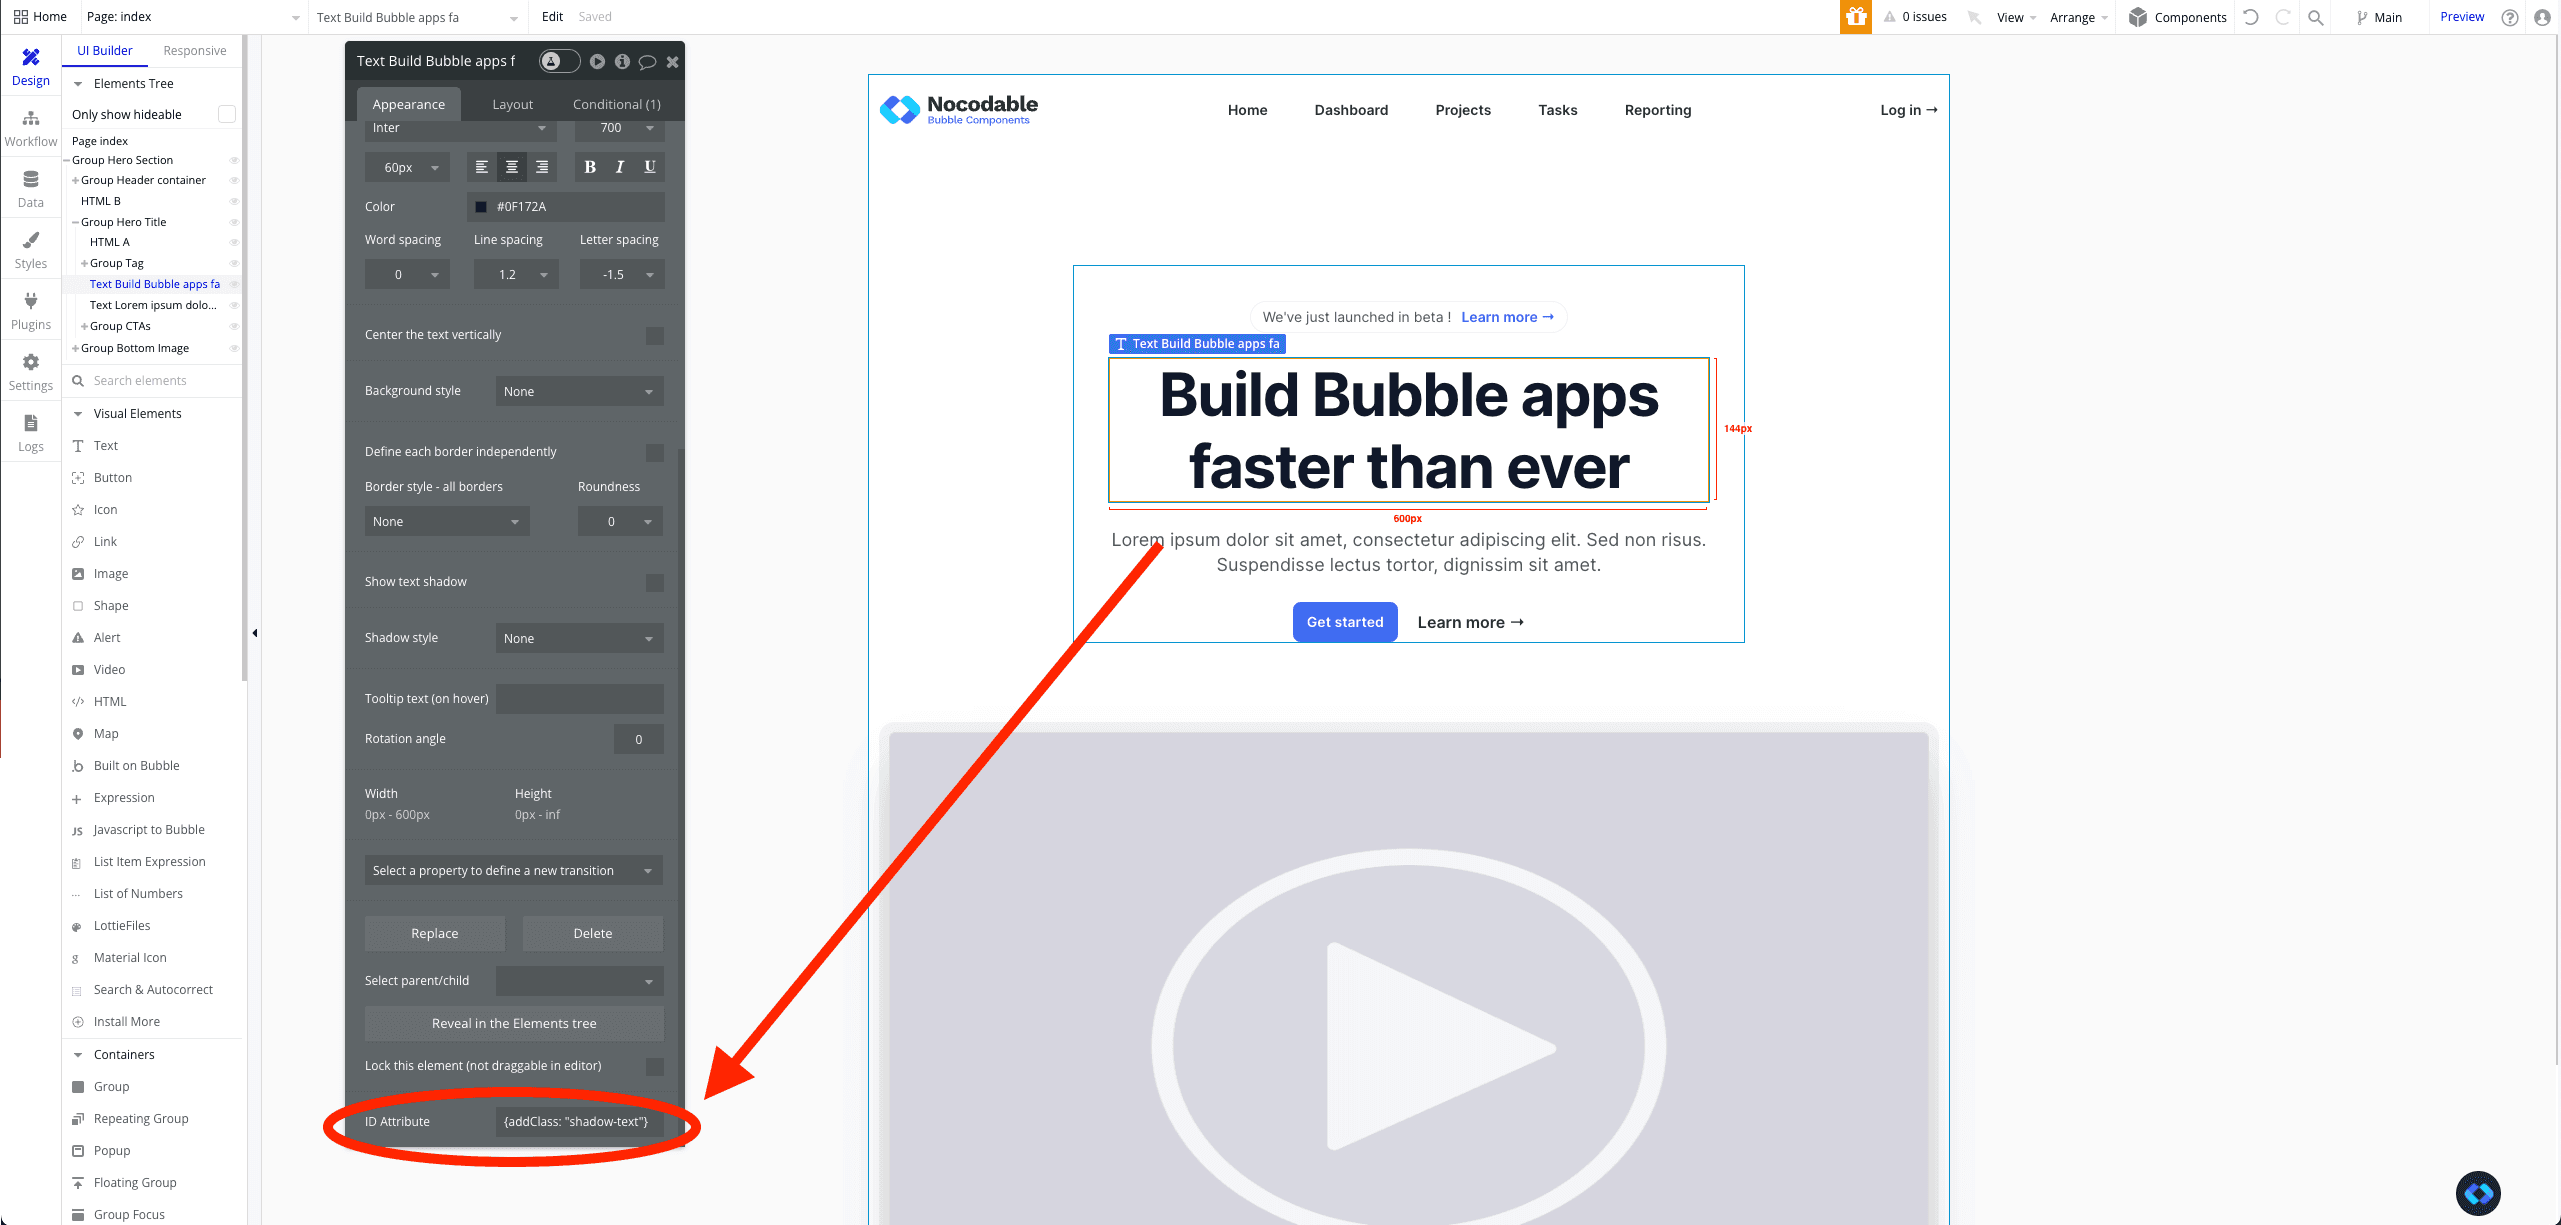
By default, I’ve set the class name to « shadow-text », but feel free to replace it with any value. Just make sure to remember it for the next step.
Step 5 : Inserting our CSS Code into our app.
Now the final step is to create our shadow.
And to do this, we’ll use some simple CSS, and a bit of help from a CSS Text Shadow Generator.
This will help us find the perfect shadow, without having to change the values manually.
You can use this one for example. https://www.cssportal.com/css3-text-shadow-generator/
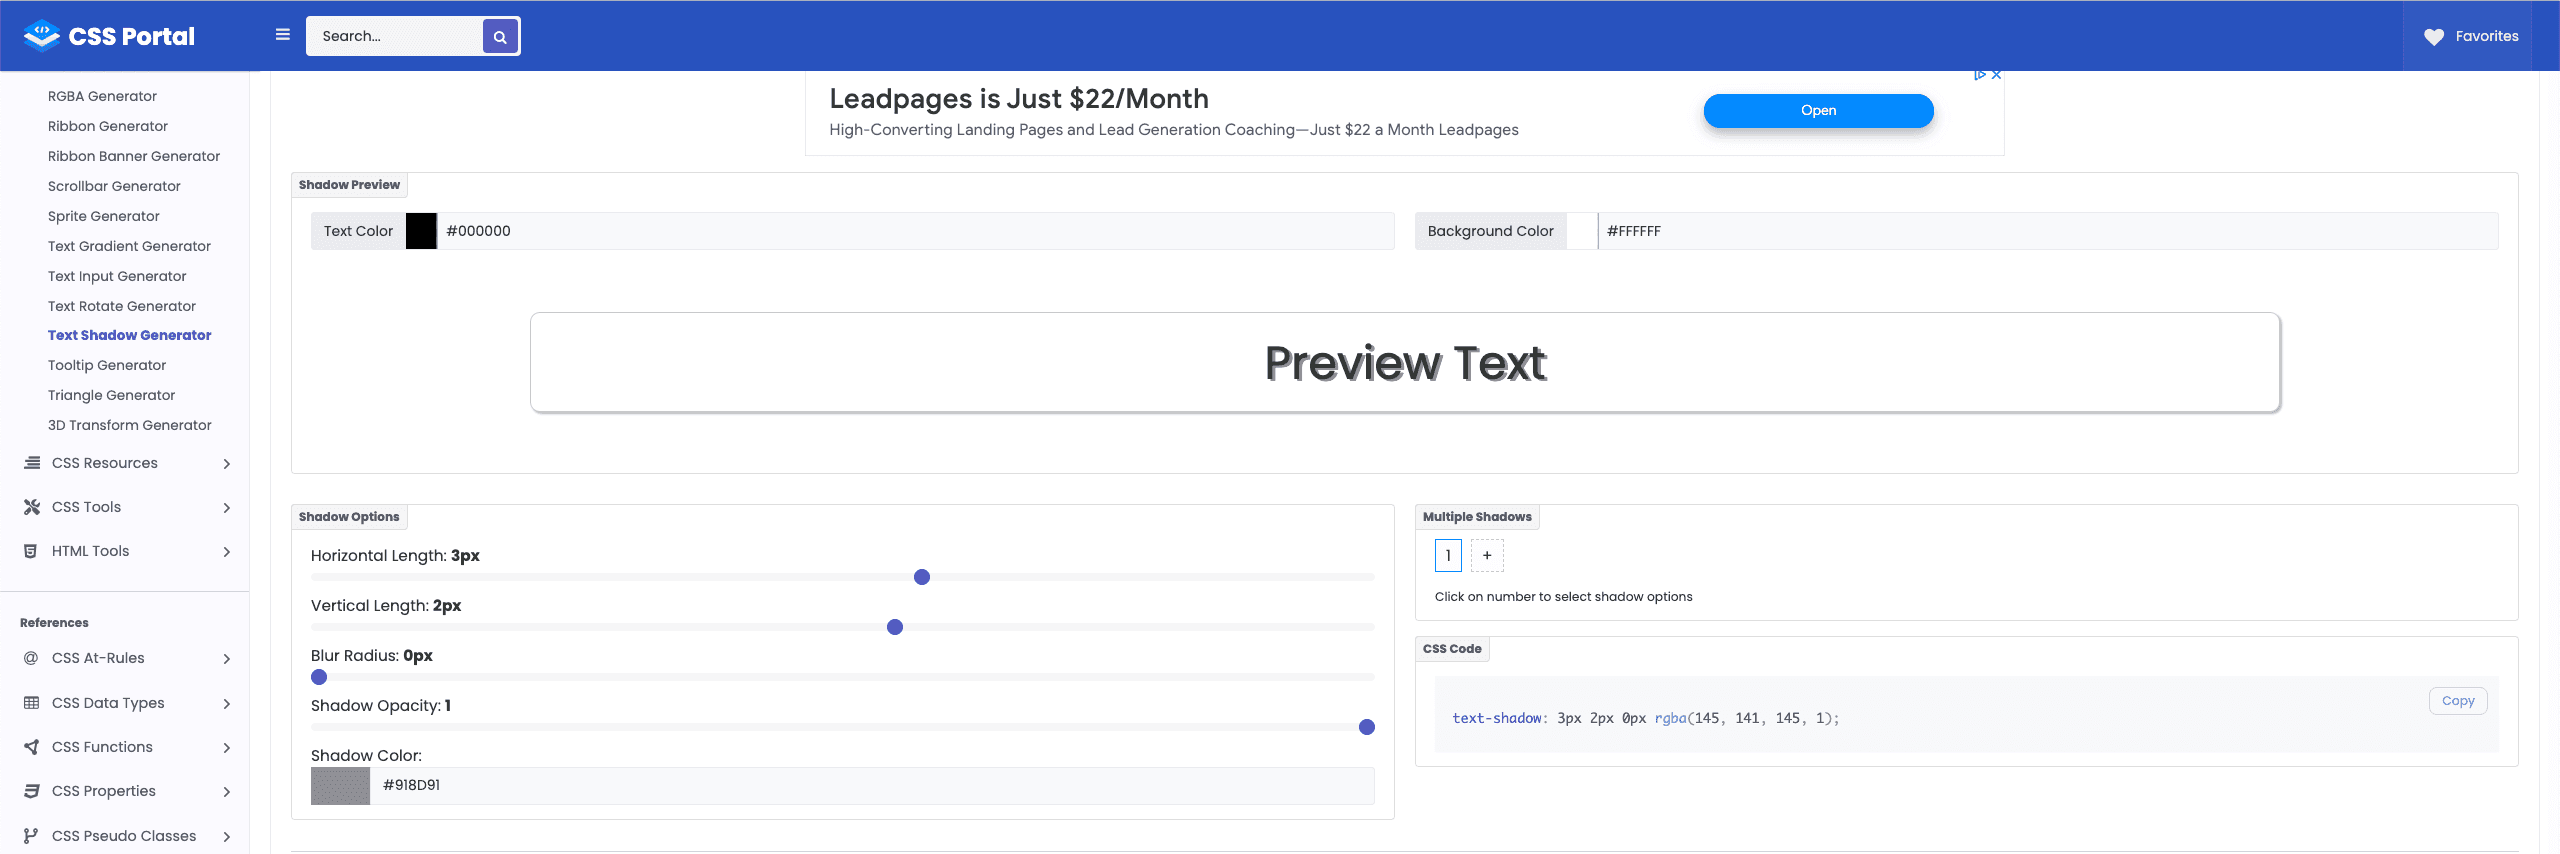
When you’ve found the shadow that suits you, simply copy the CSS Code from the right of the screen and paste it within the following code :
<style>
.shadow-text {
    YOUR-CSS-CODE
</style>
For example, I cam up with the following code :
<style>
.shadow-text {
    text-shadow: 3px 2px 0px rgba(145, 141, 145, 1);
</style>
Once you have your code ready to use, you have several ways to add this code to your app.
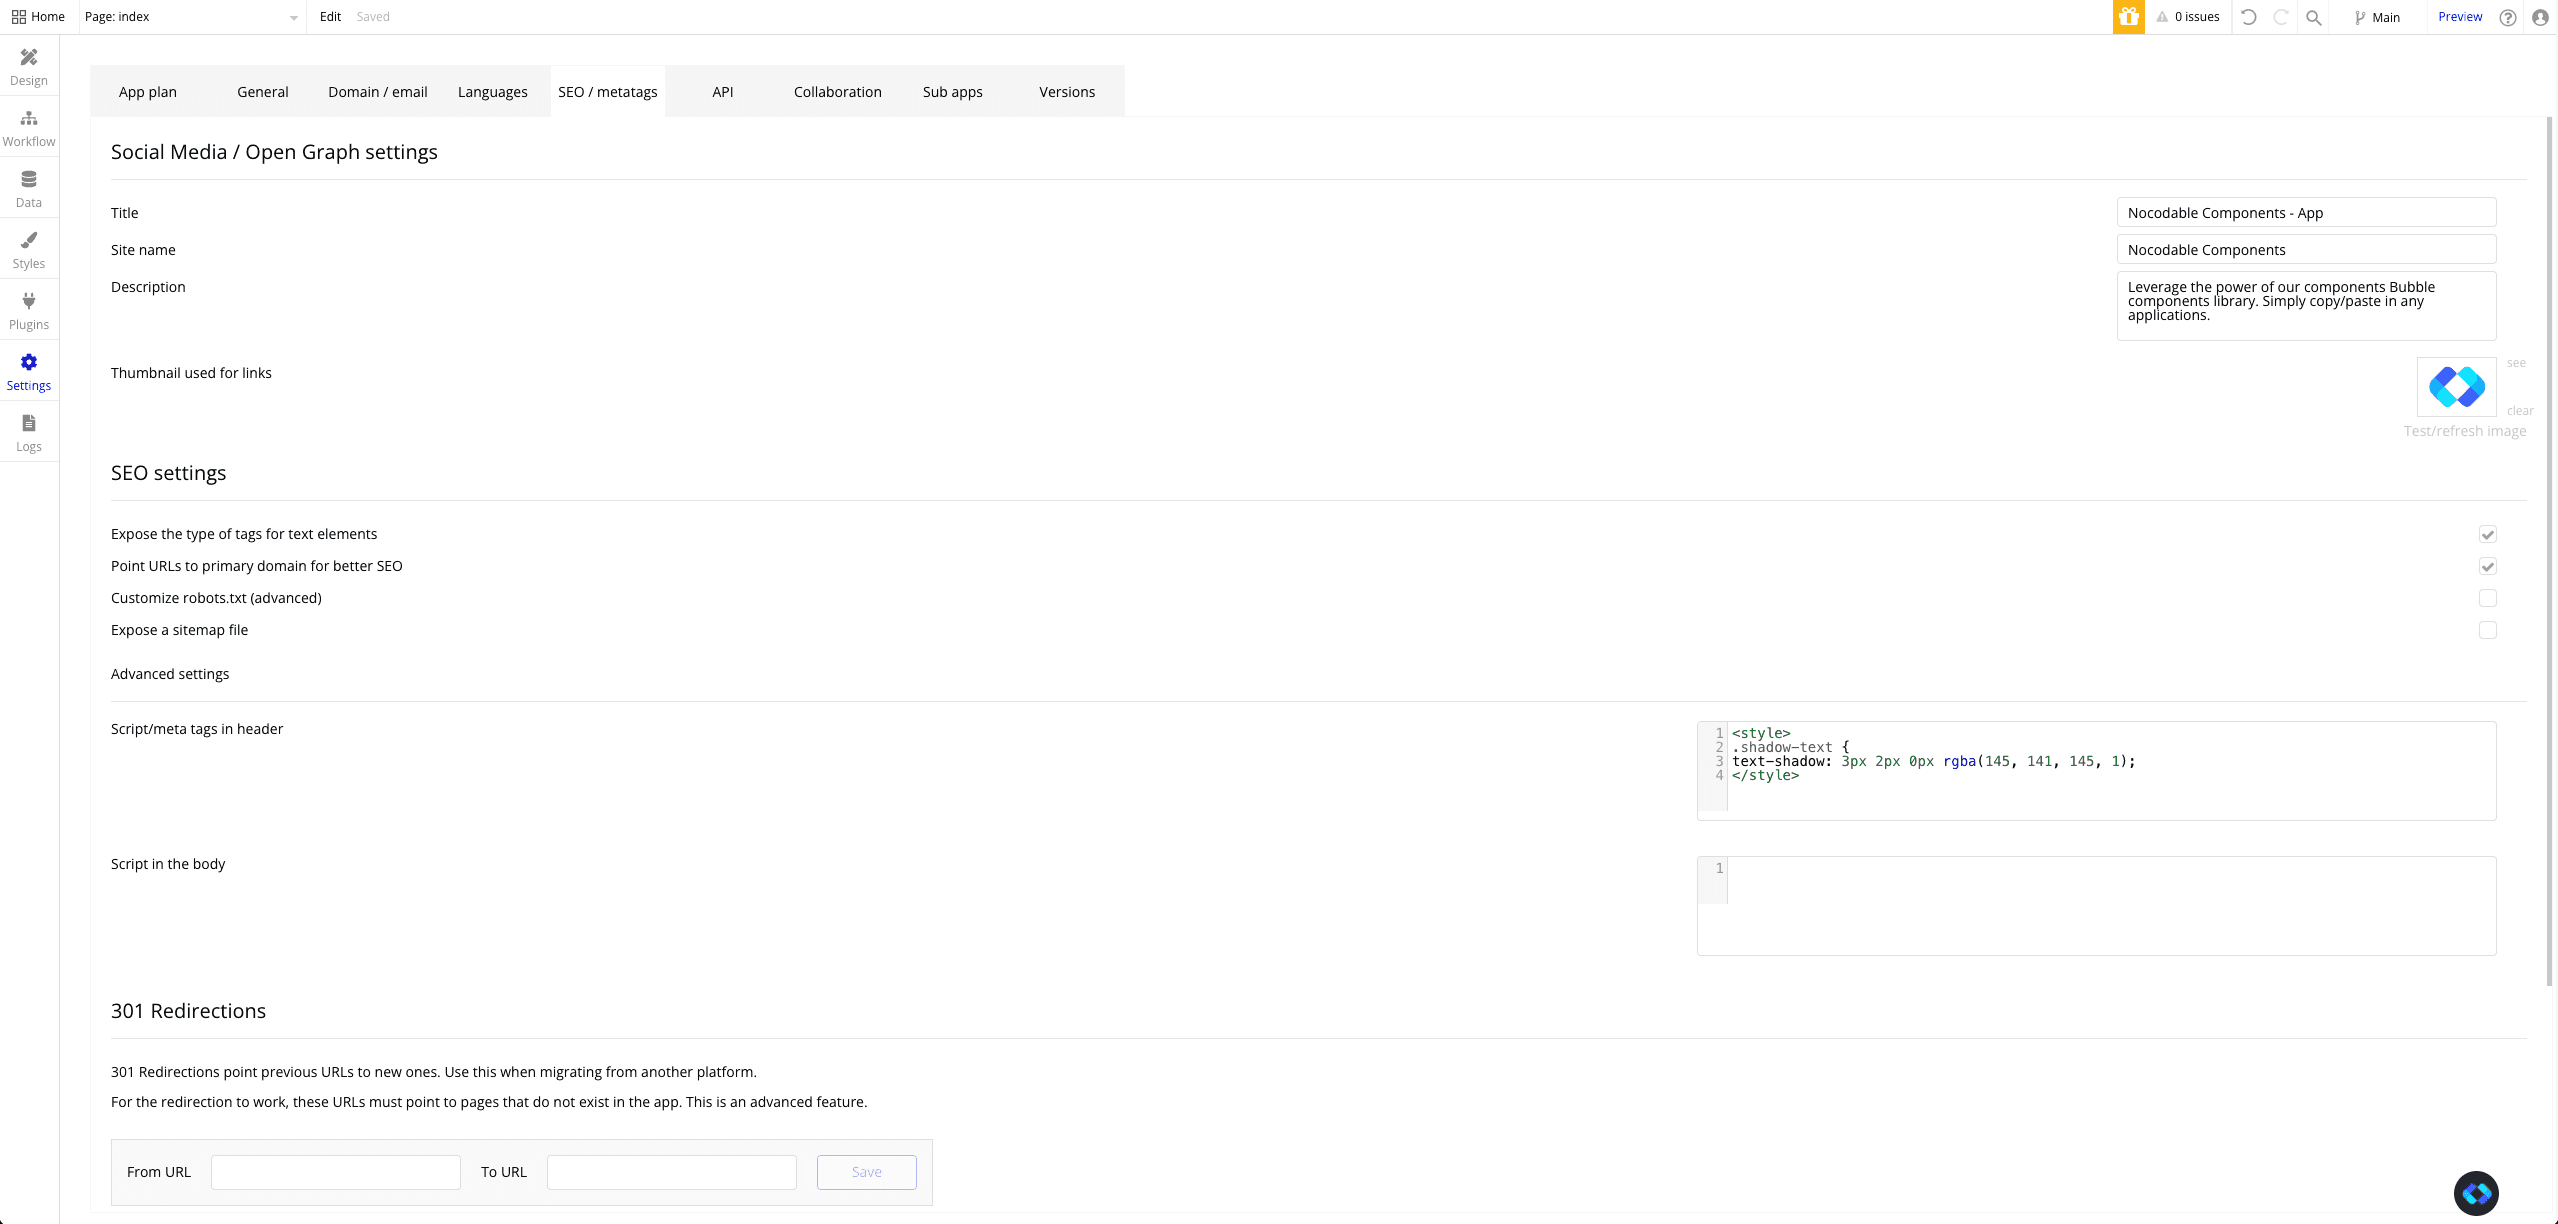
1. Insert it into your app Global Header
This is useful if you are going to use this Text Shadows in multiple pages of your app.
To do this, simply go to Settings —> SEO/Metatags —> and paste your code within the « Script/meta tags in header » section
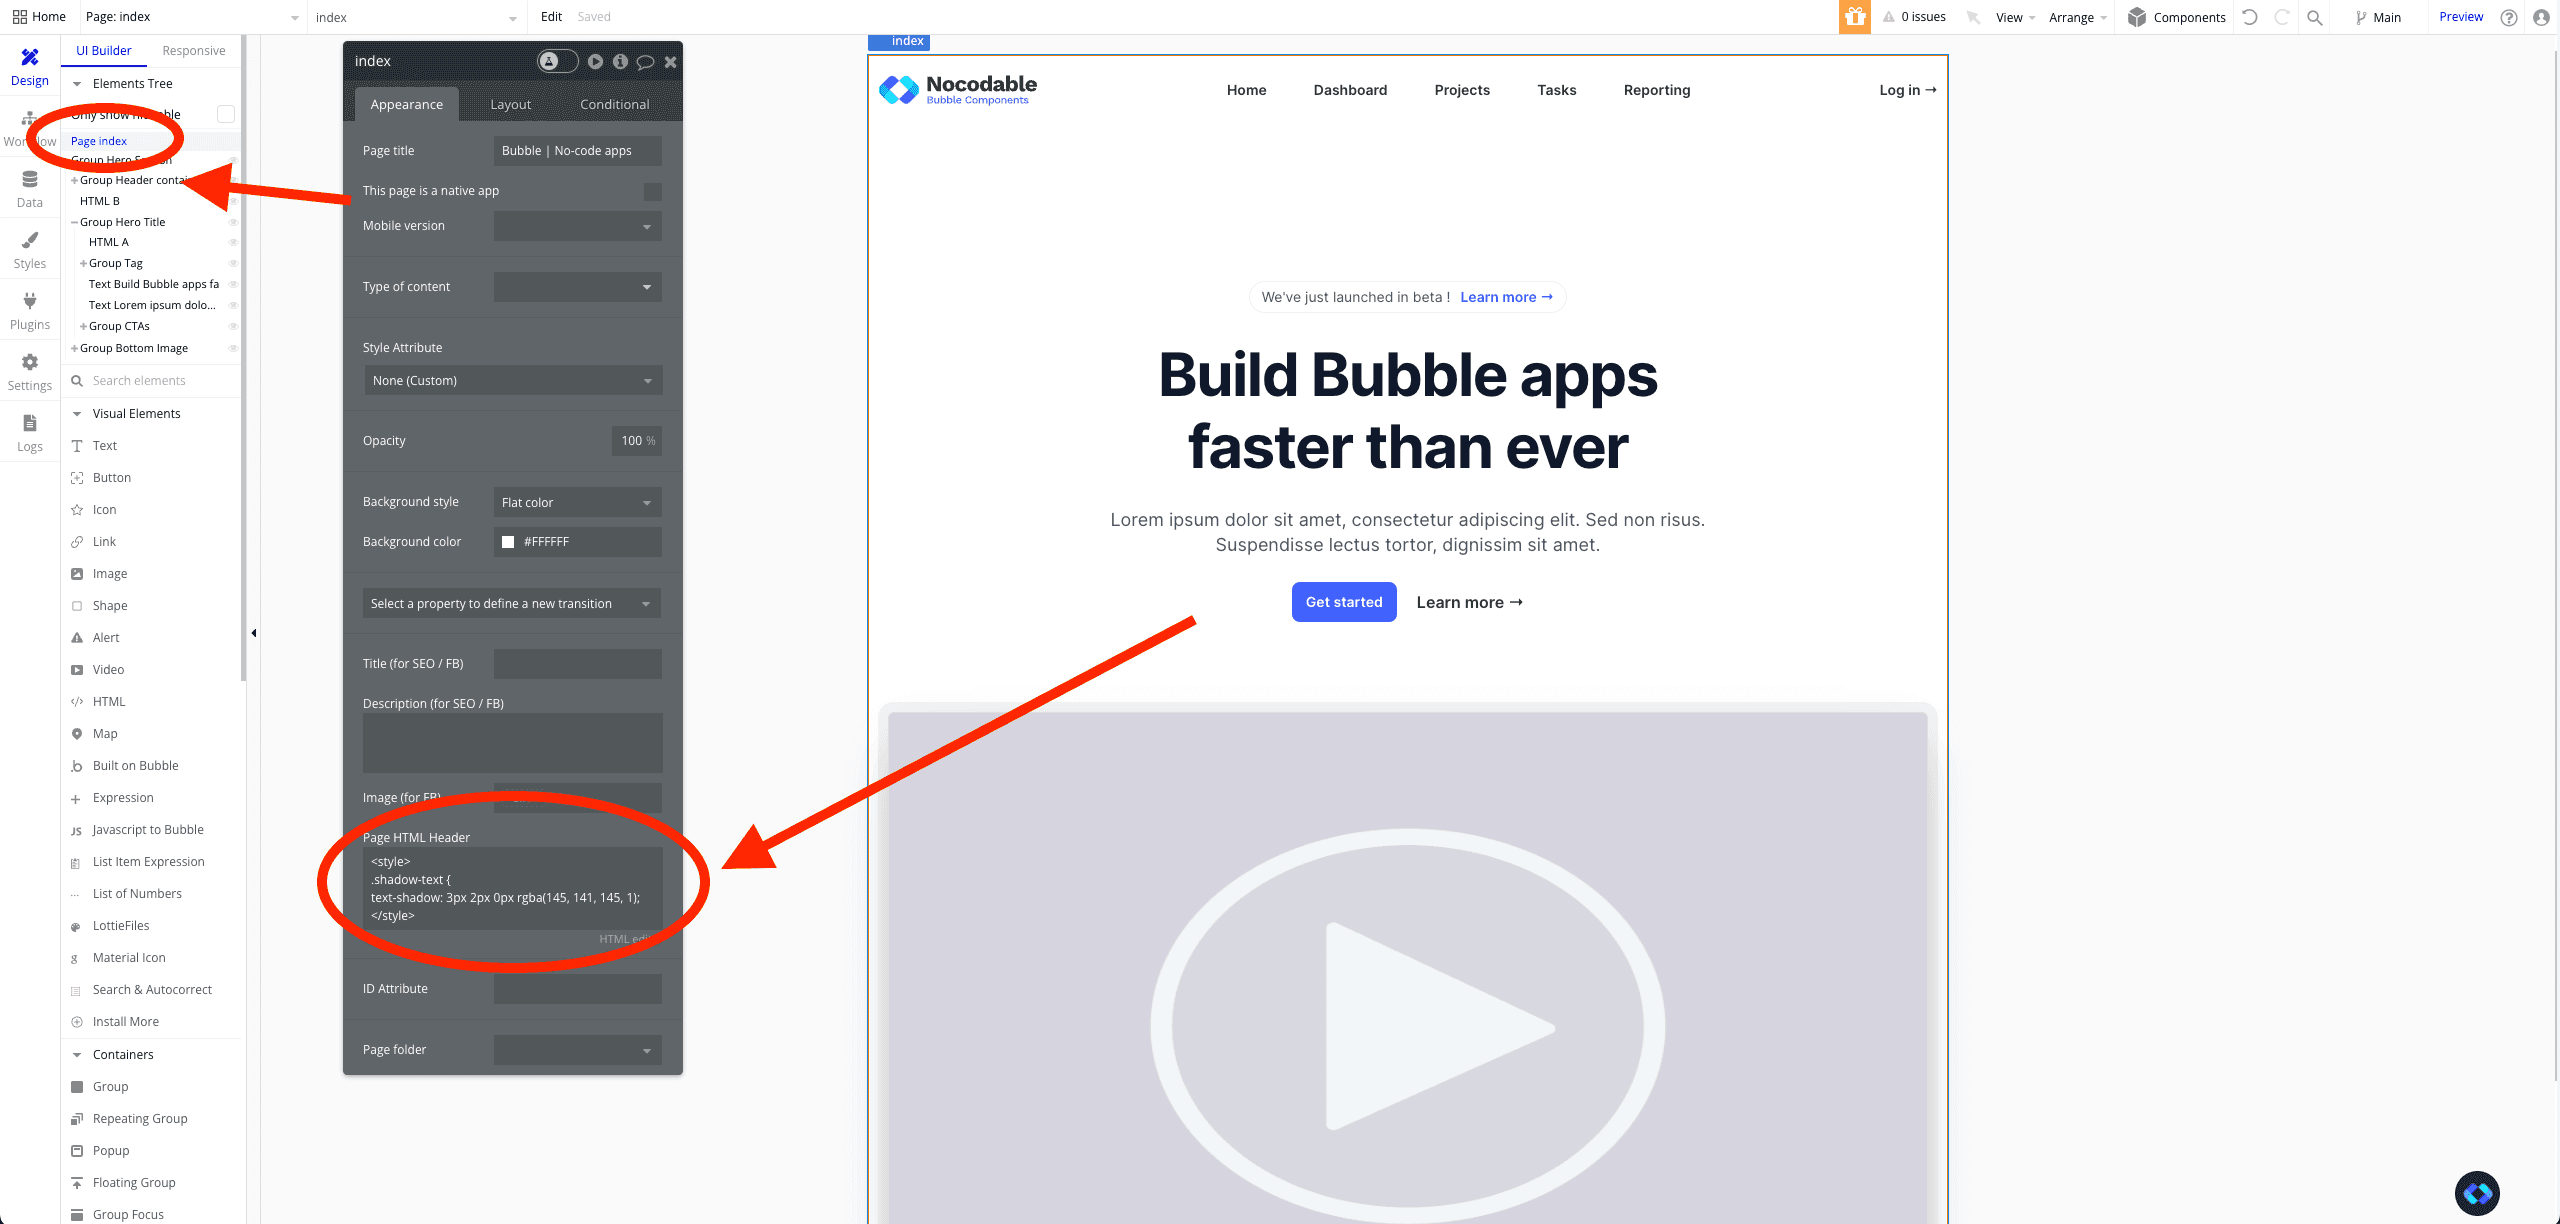
2. Insert it within your page header
This method is the one you should choose if you need to add this Text Shadow only on some specific pages.
To do this, simply access your page property panel (by clicking it in the elements tree) and paste your code into the HTML Header section.
Now, regardless of the method you chose, you simply need to hit « Preview » and you will see your text shadow !
Note that the most difficult part is not to add the shadow to your app, but to find a nice looking one ! So keep on trying :)

Thomas Couderq
Founder @ Nocodable
I've been building with Bubble for more than four years now. I've launched several projects (with more or less success). I'm passionate about no code and UI Design, which led me to founding Nocodable Components to help founders and professional Bubble developers build faster on Bubble.
Find me on Linkedin