Having a Sticky Header in your bubble.io app is a great way to improve your User Experience as well as the conversion rate.
With this, a user scrolling on your website always have your header in sight, which not only facilitate the navigation but also increase your CTR (Click Through Rate) if you have a CTA in your header.
In Bubble.io, creating a Sticky Header can be done pretty easily, and I'm going to show you how.
What is a Sticky Header ?
First thing first, let's define what is a Sticky Header and whats it looks like.
A Sticky Header is a type of header that DO NOT scroll with the page.
Instead of a classic header that disappears from your screen when you scroll down, a Sticky Header stays visible at the top of your page no matter how far you scroll.
An example of a classic header (non sticky)
An example of a Sticky Header in Bubble.io
To go further, you can also read our article on how to make a sticky group in Bubble.
How to Create a Sticky Header in Bubble.io ?
The best and easiest method to create a Sticky Header in Bubble is to use a Floating Group.
As it's name indicates, this group is a type of container that has the ability to float above (or under) the other elements of the page.
And if you take a closer look, this is exactly what we want to achieve in our case.
So let's go ahead and create our Header in Bubble.

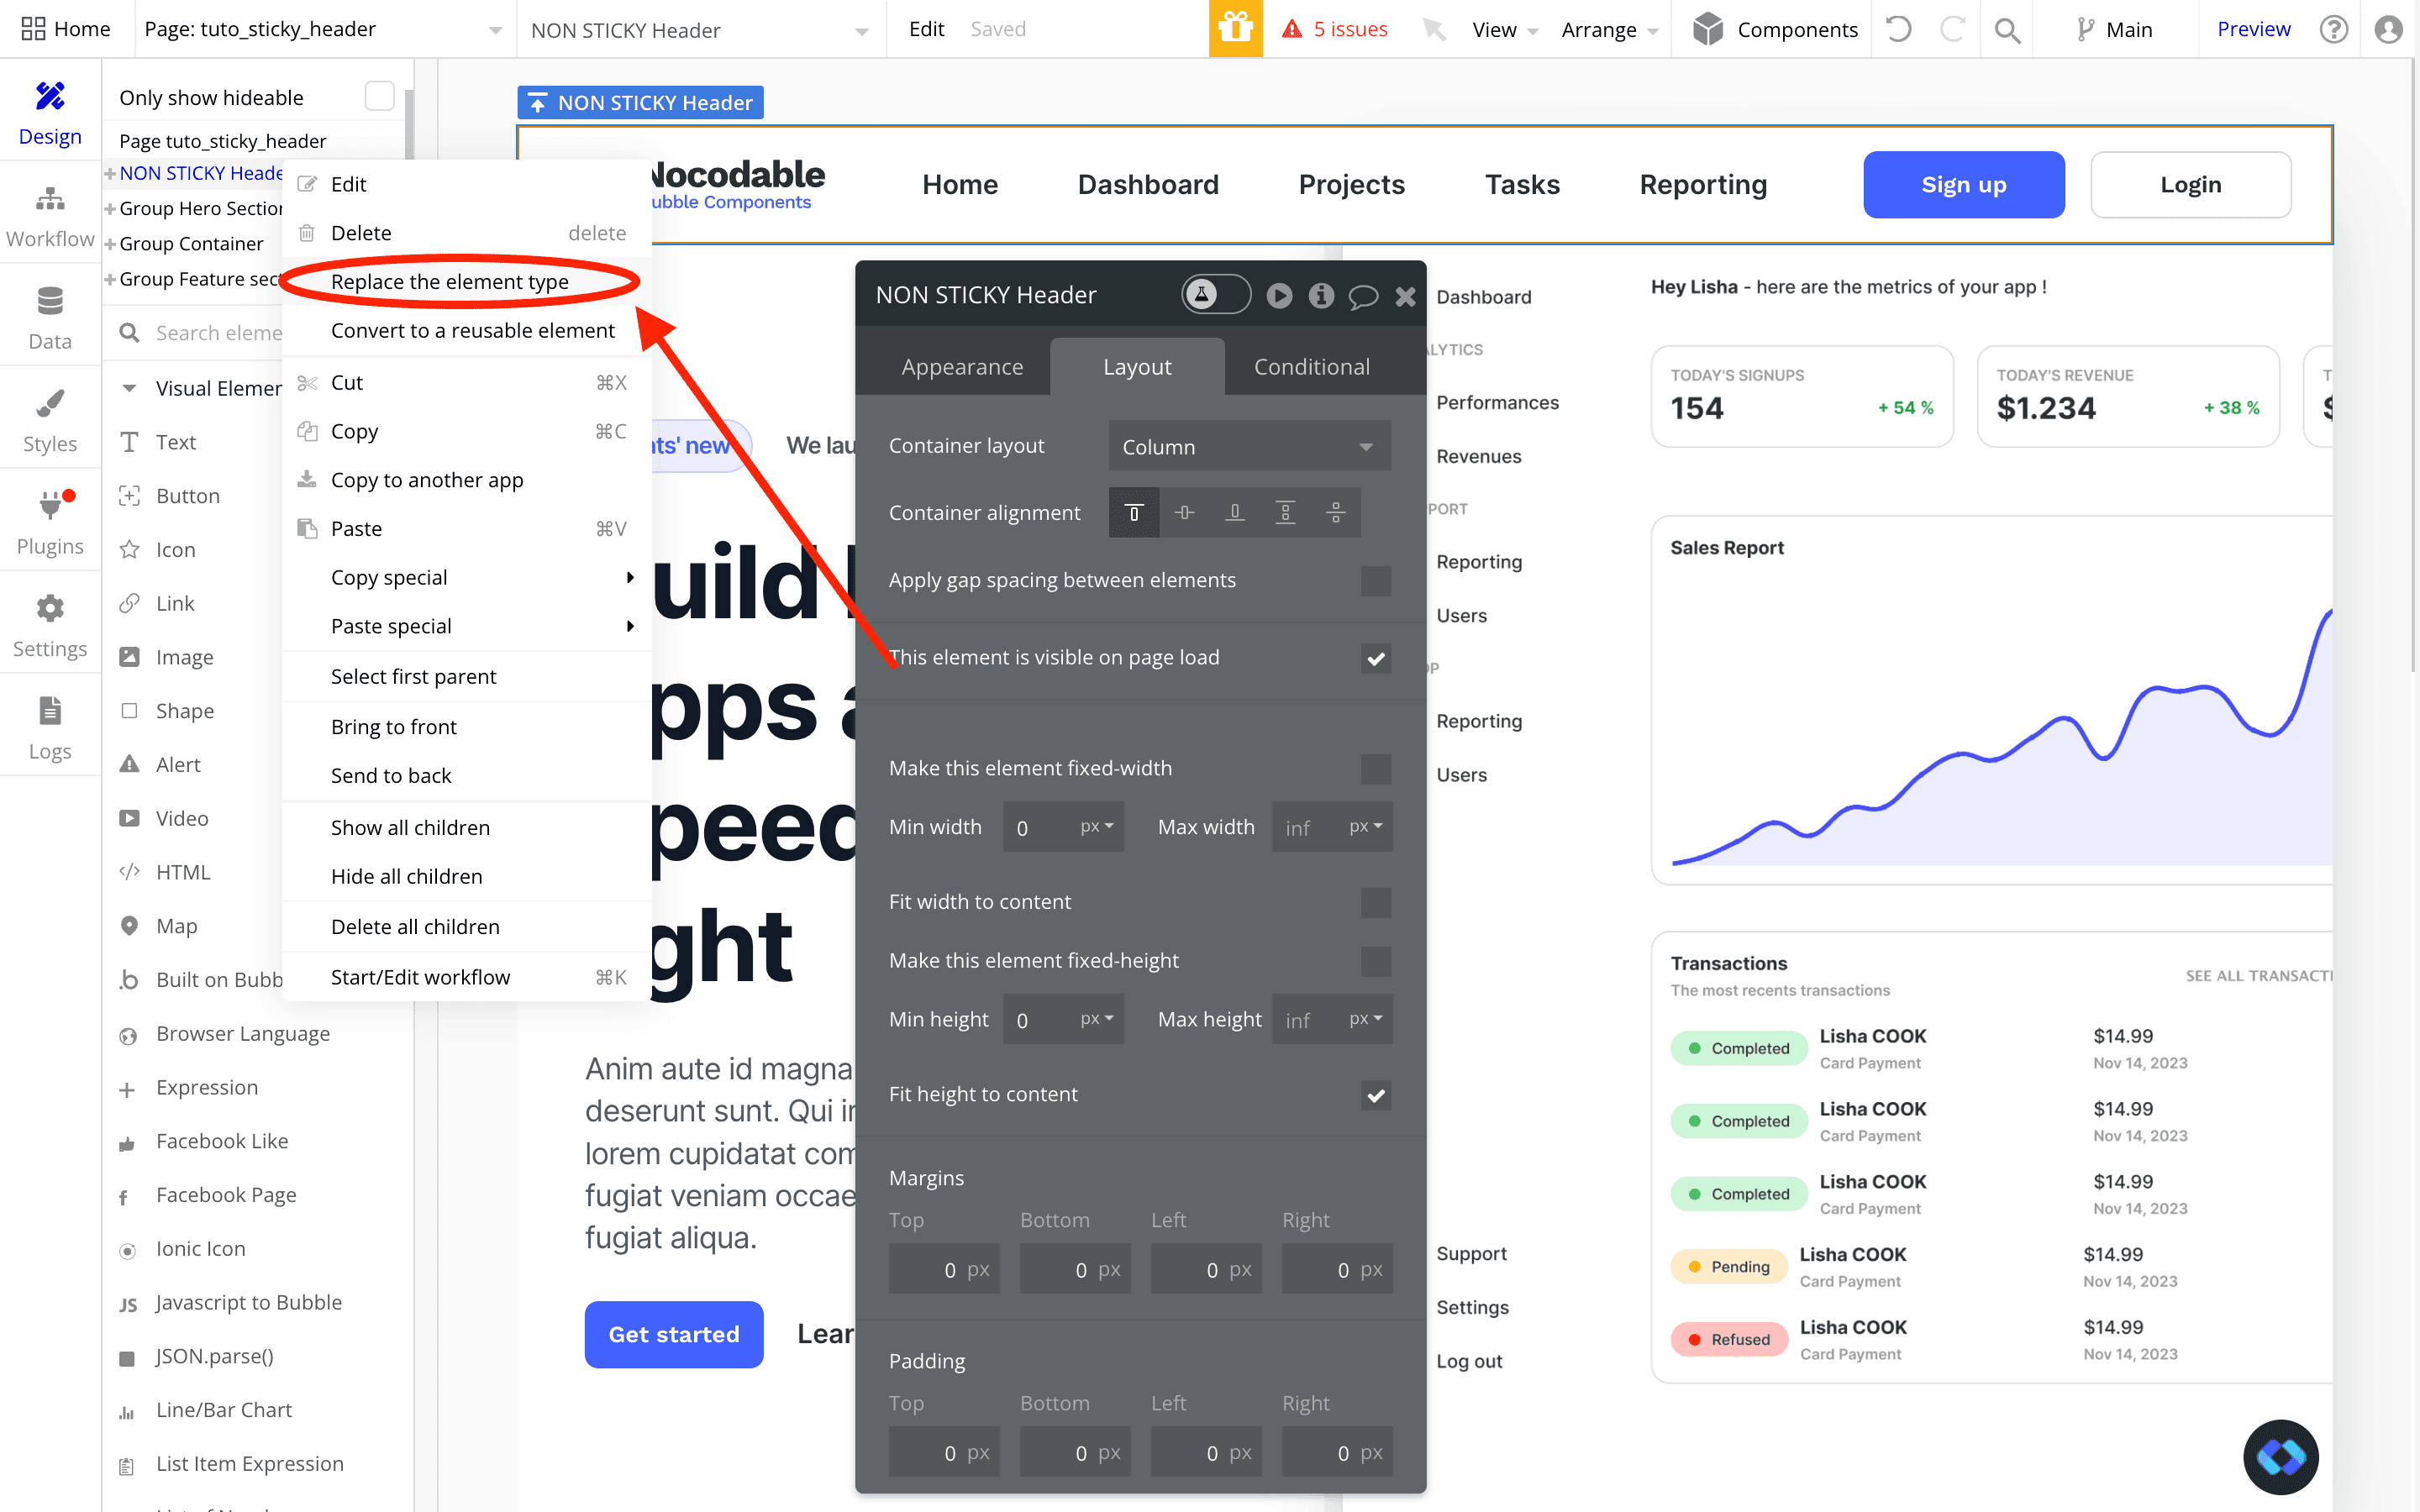
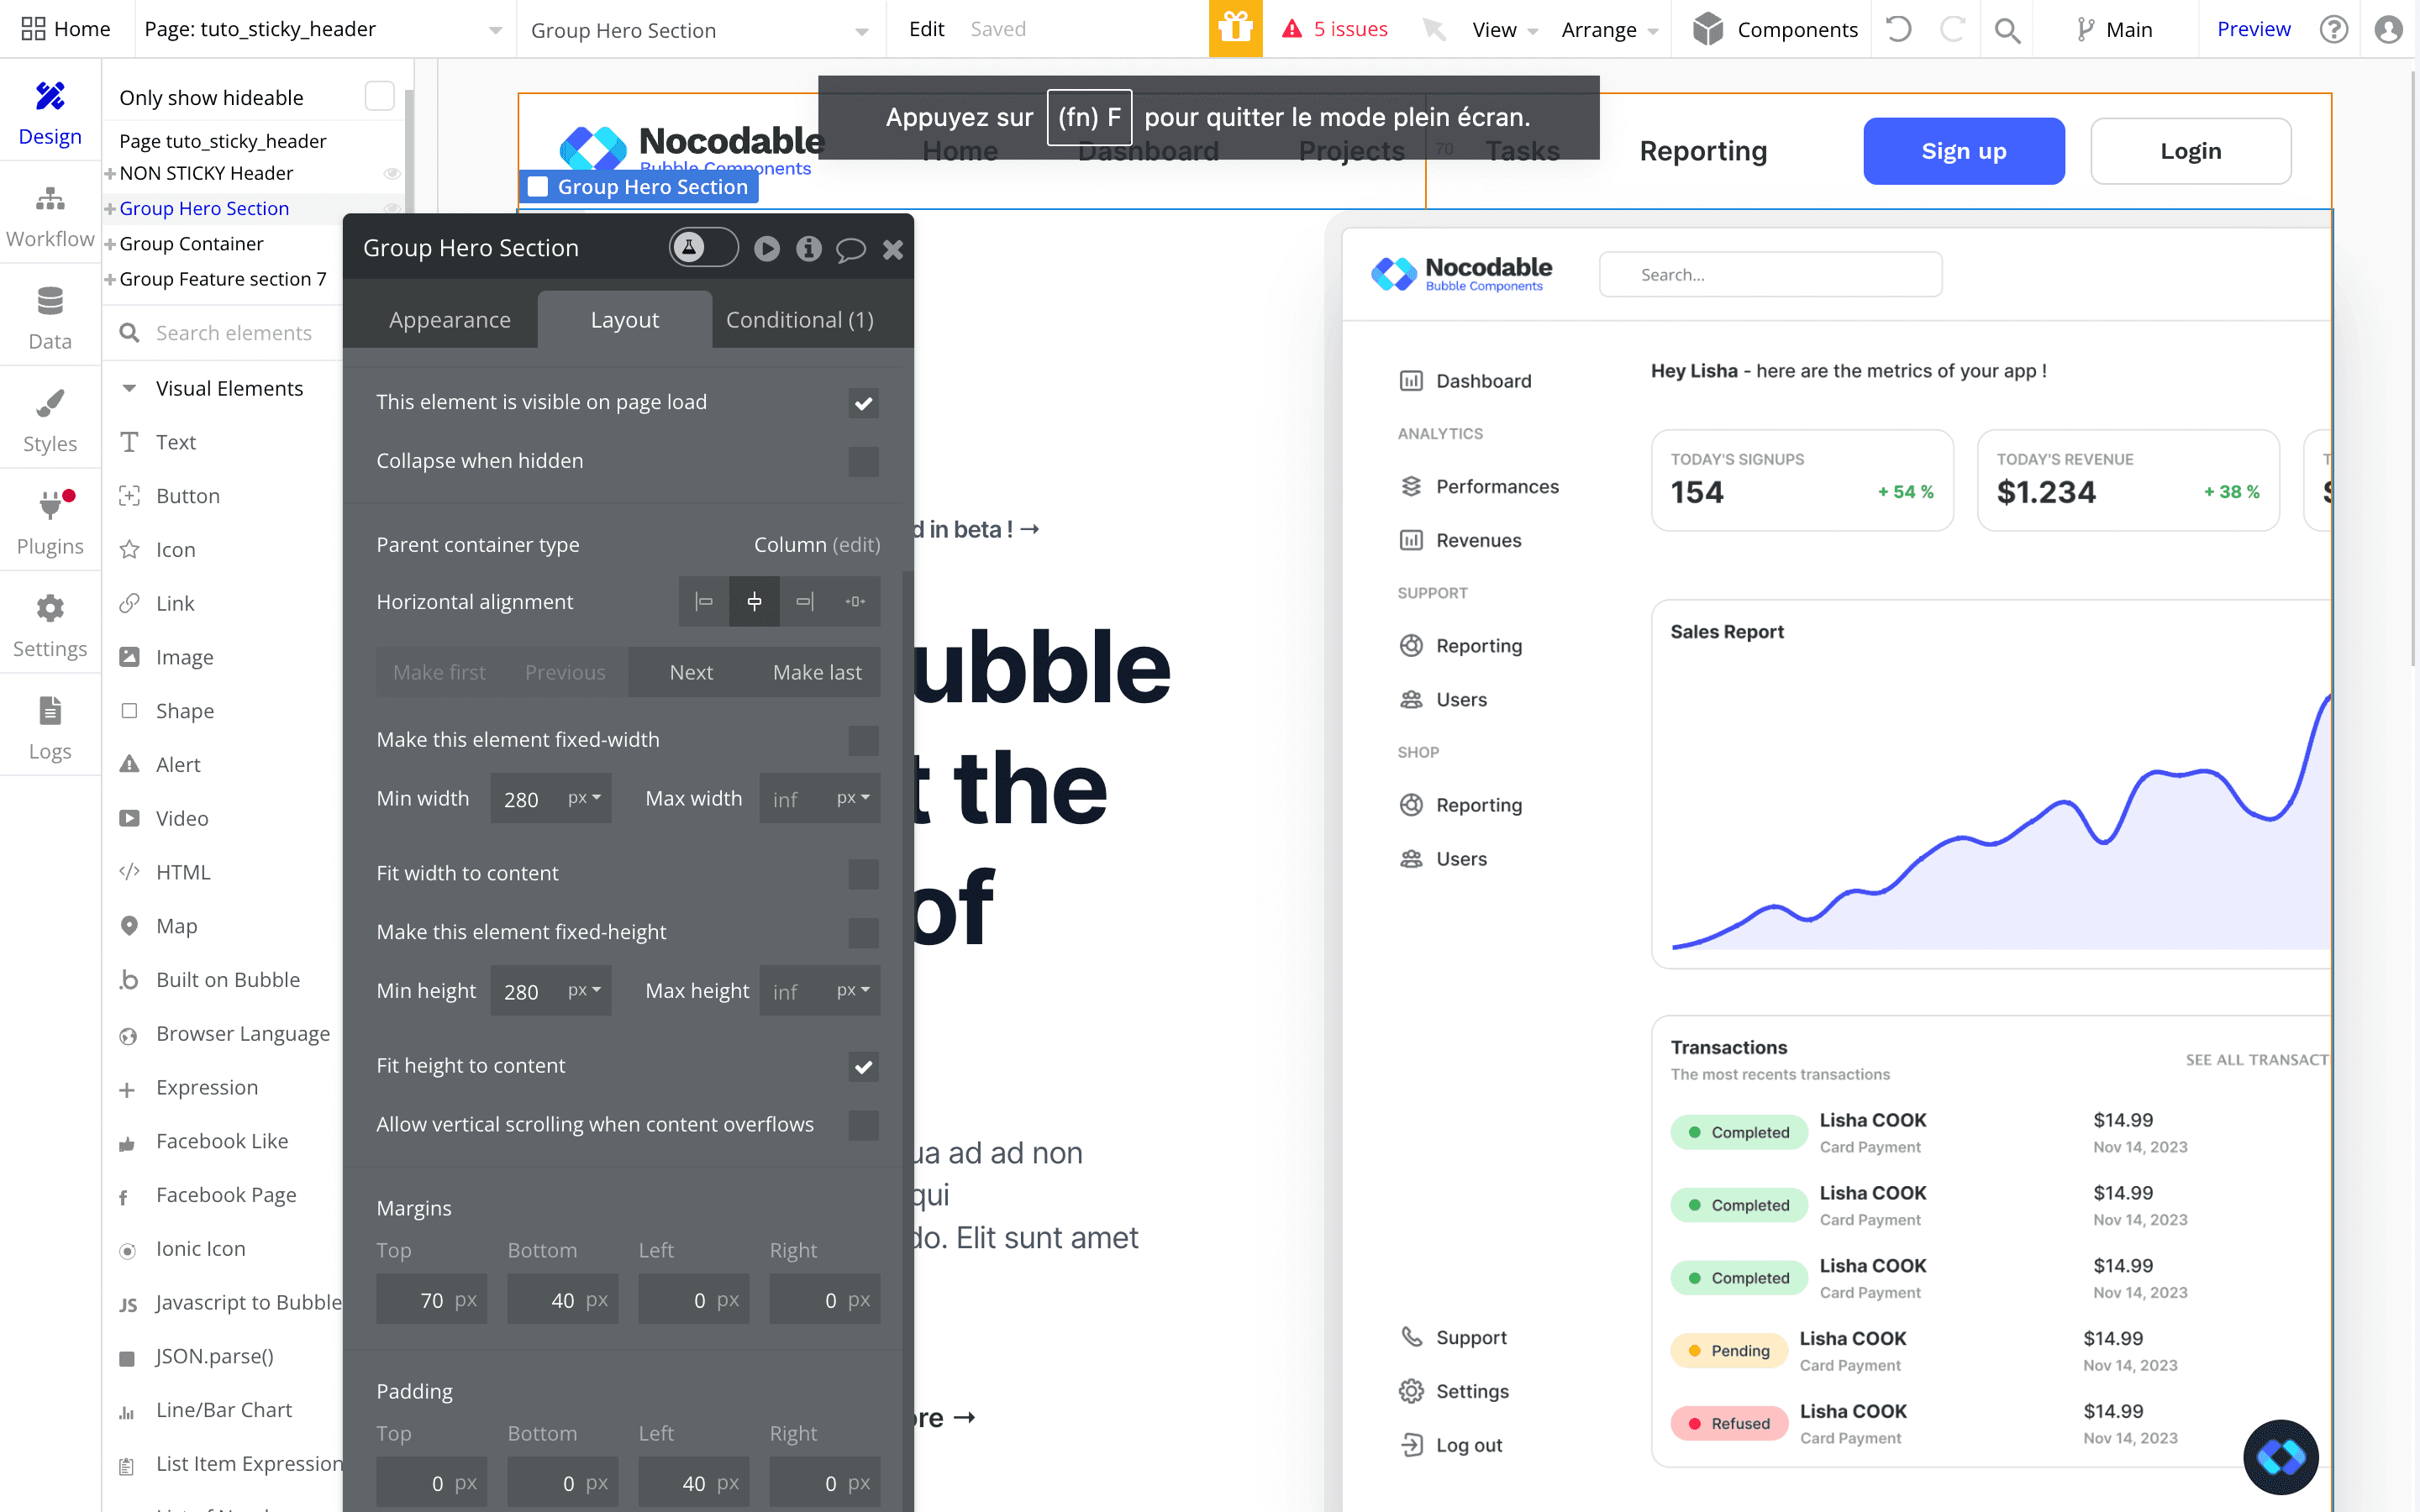
As you can see in the screenshot above, our header is currently "non sticky".
This is because our element is of type "Group" and therefore do not float above the other elements.
Let's correct that and Right-Click the element, click "Replace the element type" and select "Floating Group".
Of course, if you haven't built your Header yet, you can simply drag & drop a Floating Group element on your page and build your header inside it.
This is simply to show that you can convert a classic header into a Sticky Header !
By default, it should already by aligned to Top, but if it's not don't forget to modify it :
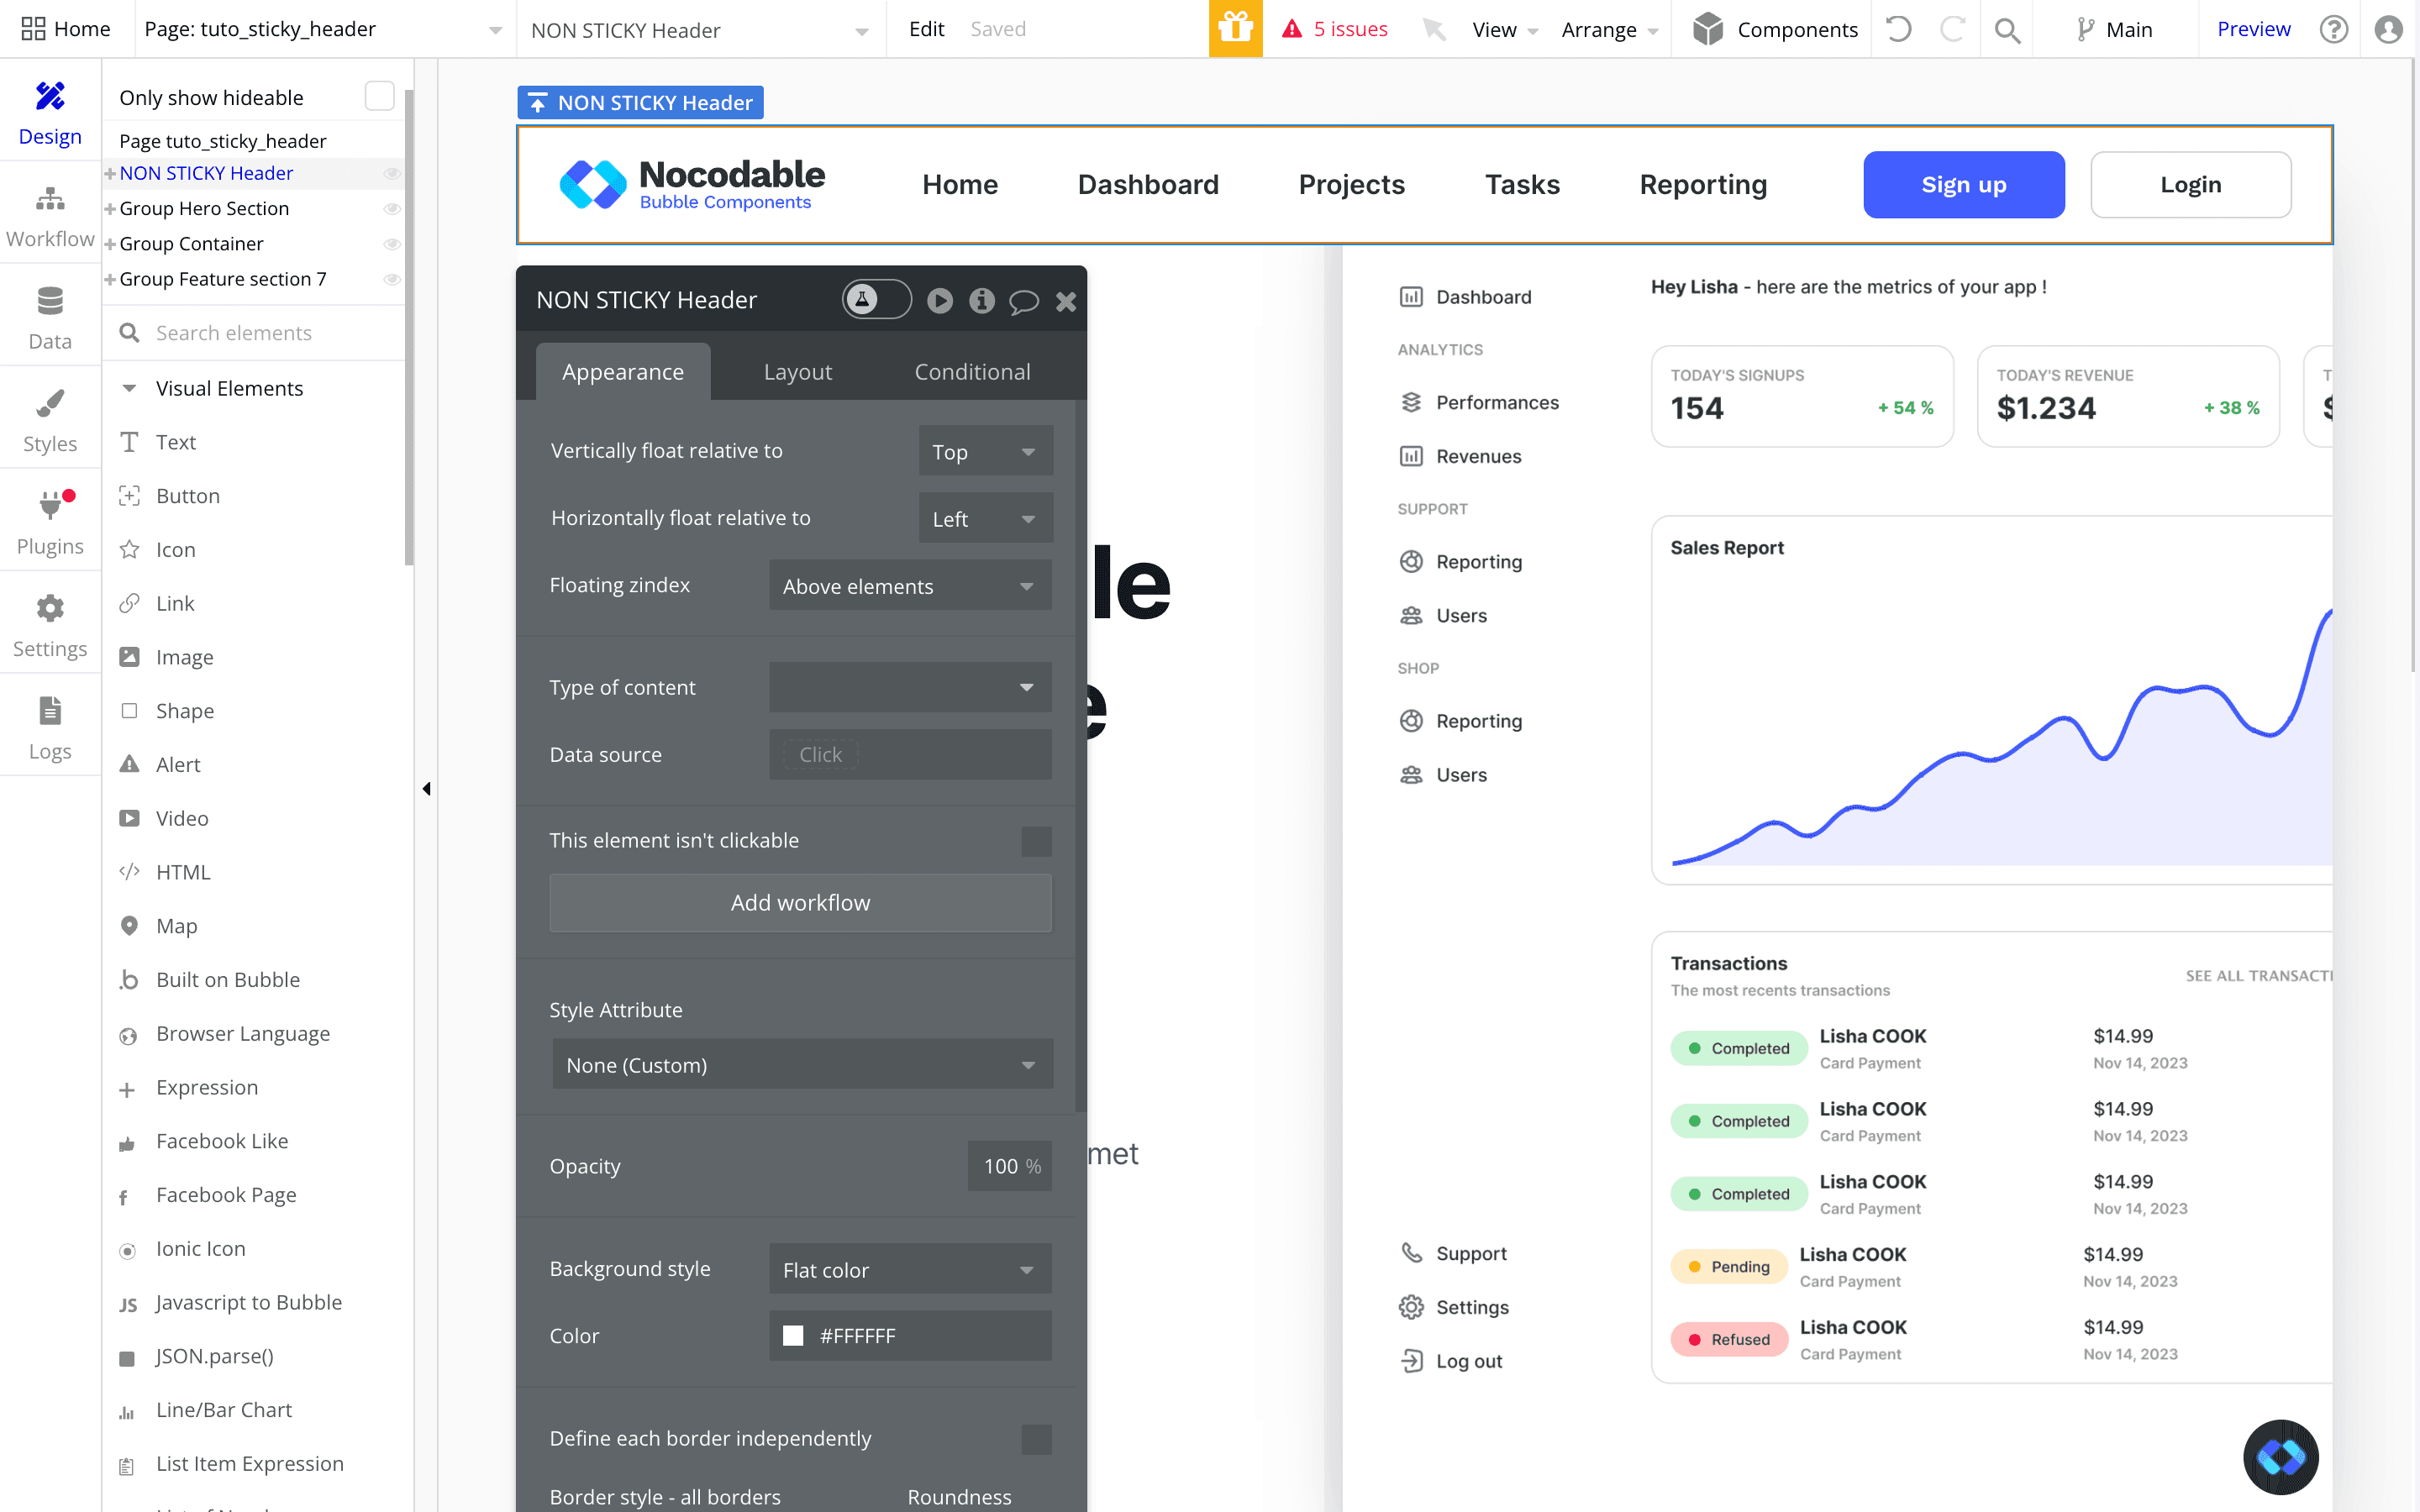
Now if you preview the page you can see that the element should float above your other element.
Don't forget to set a Background color for your header in order to avoid it being mixed up with the elements beneath it, and more importantly, don't forget to add a Top Margin to the element directly under your Header.
In my case, a Top Margin of 70px is working perfectly well, but feel free to adapt this value to your specific use case !
And there you go !
You've made an amazing Sticky Header for you Bubble.io application.


Thomas Couderq
Founder @ Nocodable
I've been building with Bubble for more than four years now. I've launched several projects (with more or less success). I'm passionate about no code and UI Design, which led me to founding Nocodable Components to help founders and professional Bubble developers build faster on Bubble.
Find me on Linkedin