Blurring elements in an application is a great easily understandable way to indicate the user that an information is not available to him.
It can be a great way indication to show him that this information isn't available on a certain plan, but that it can be accessed by upgrading to a different plan.
In this article, we are going to see how you can blur elements like Text and Images easily in just a few minutes.
And if you want to keep going further in Bubble, you can check our article on how to recteate Gumroad's button in Bubble.
Step 1 : Building our interface
Let's start with the obvious :
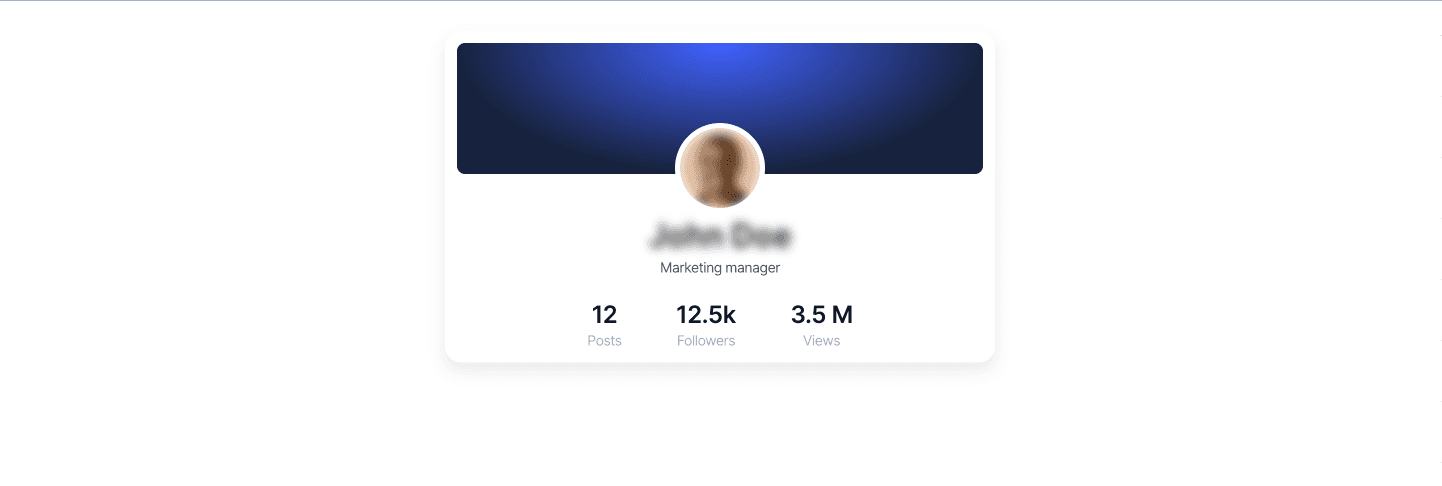
If you haven't already, start by building your interface, as well as the elements you want to blur.
To save time, I've picked up the profile card below on Nocodable Components, so I simply have to copy and paste it into my app.

Step 2 : Exposing our Elements HTML ID
If it's not your first tutorial on Nocodable, you probably already made this step. But if not, you need to do the following :
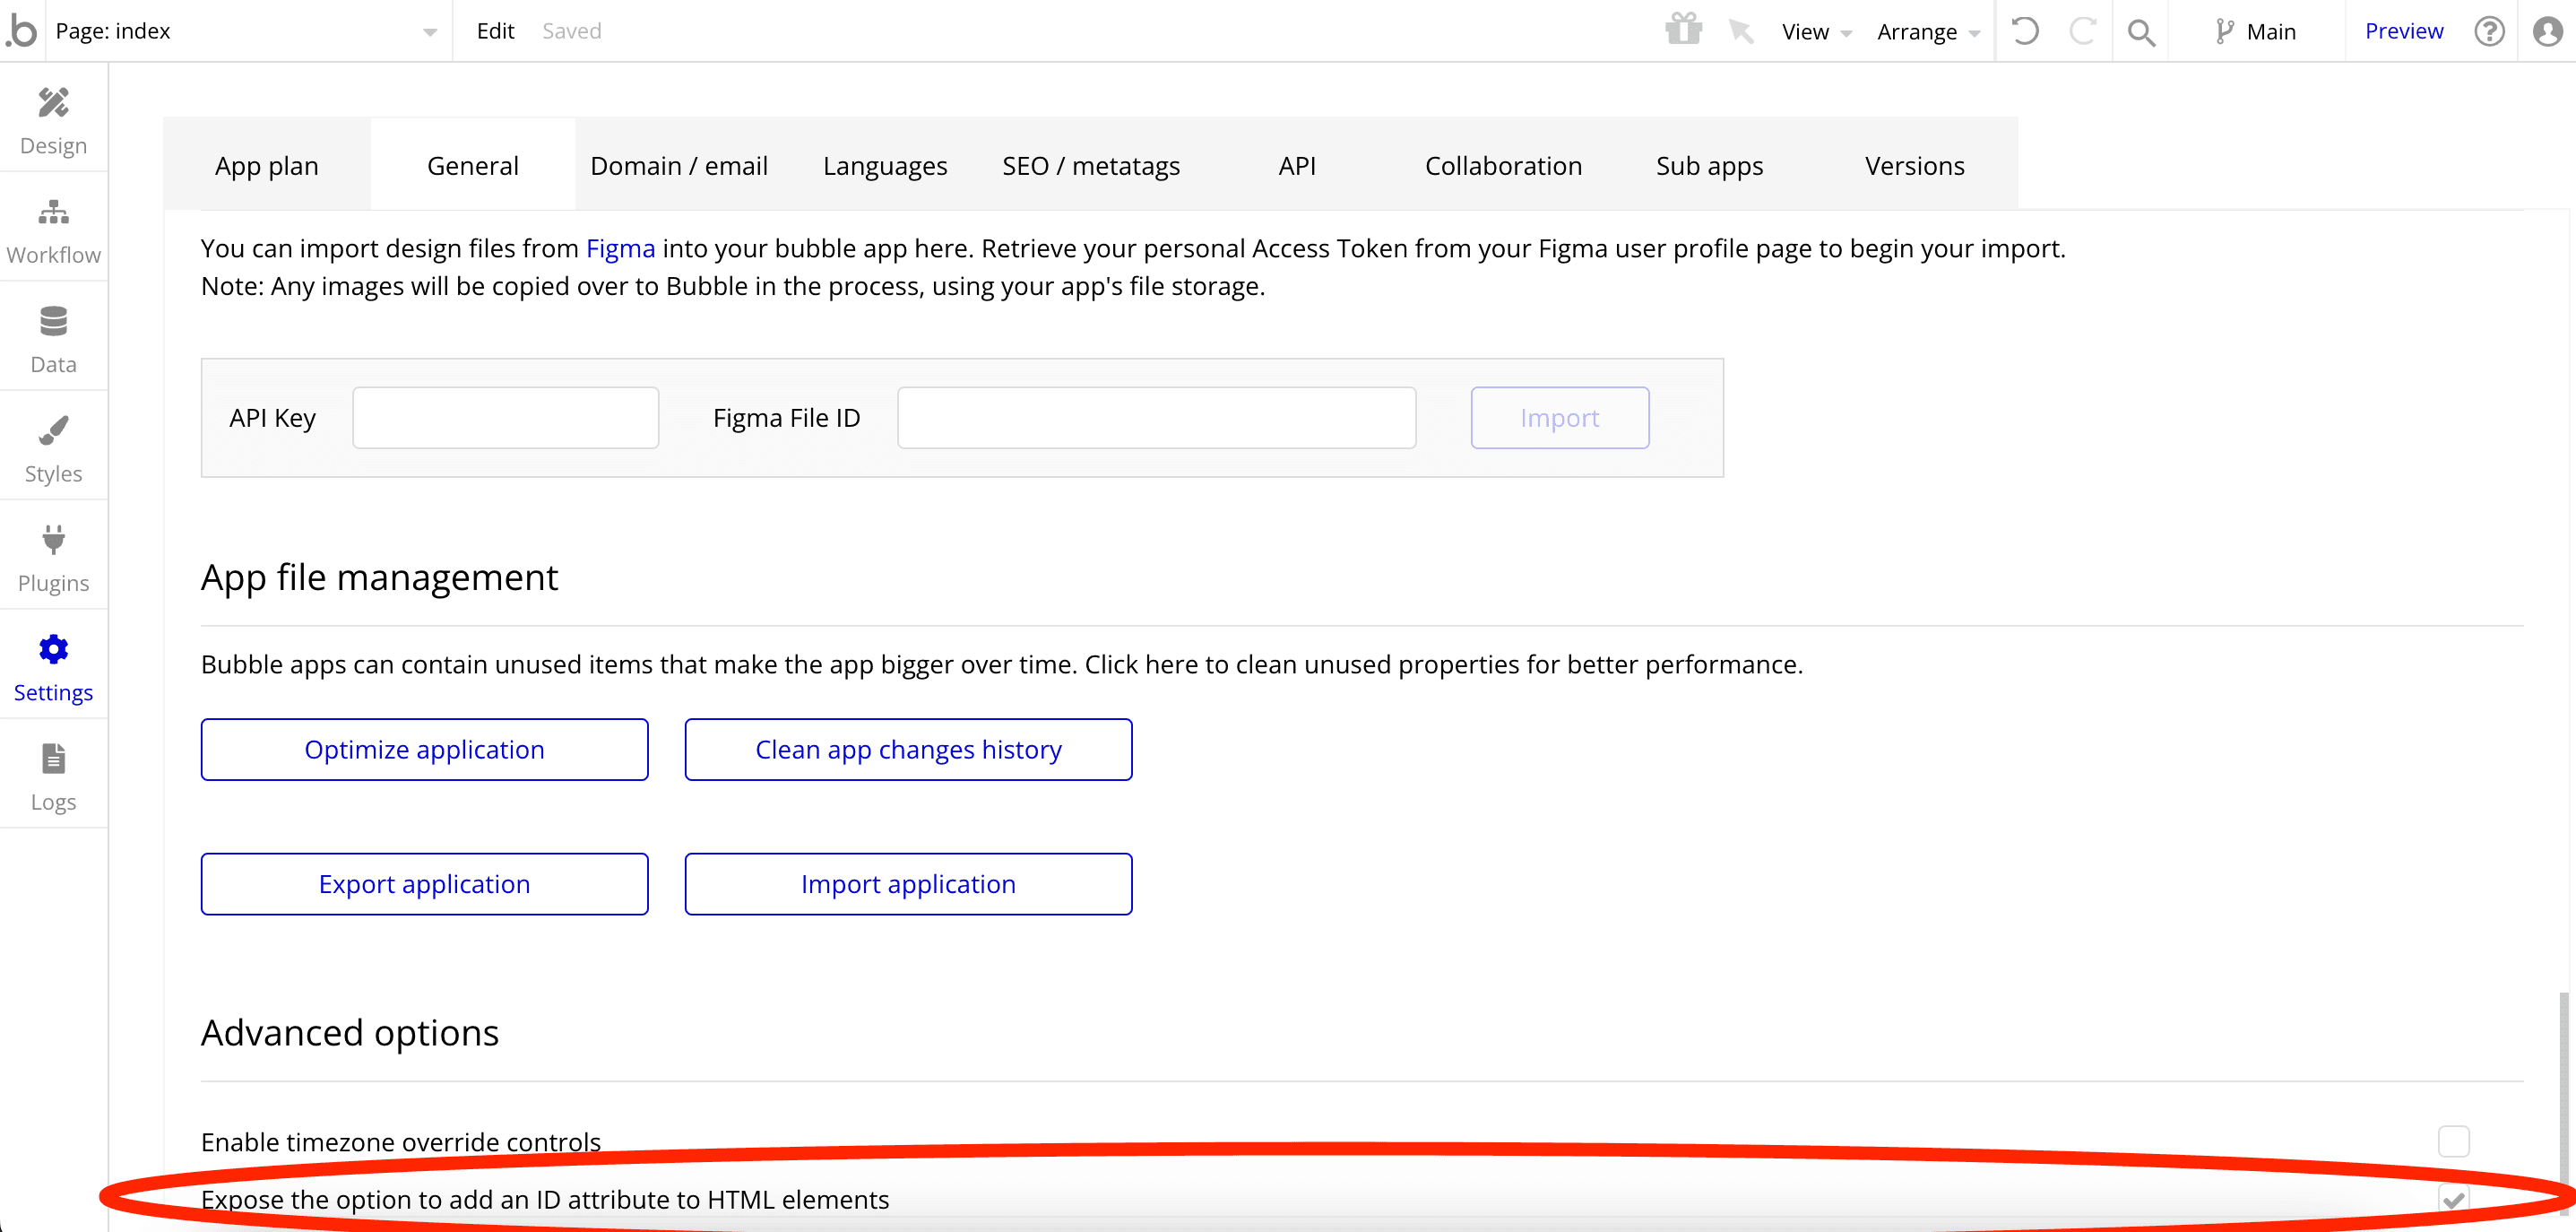
Head over to your app's Settings and go to the General Tab. At the bottom of this page, you'll see an option named "Expose the option to add an ID attribute to HTML elements".
If this option is not checked, check it !
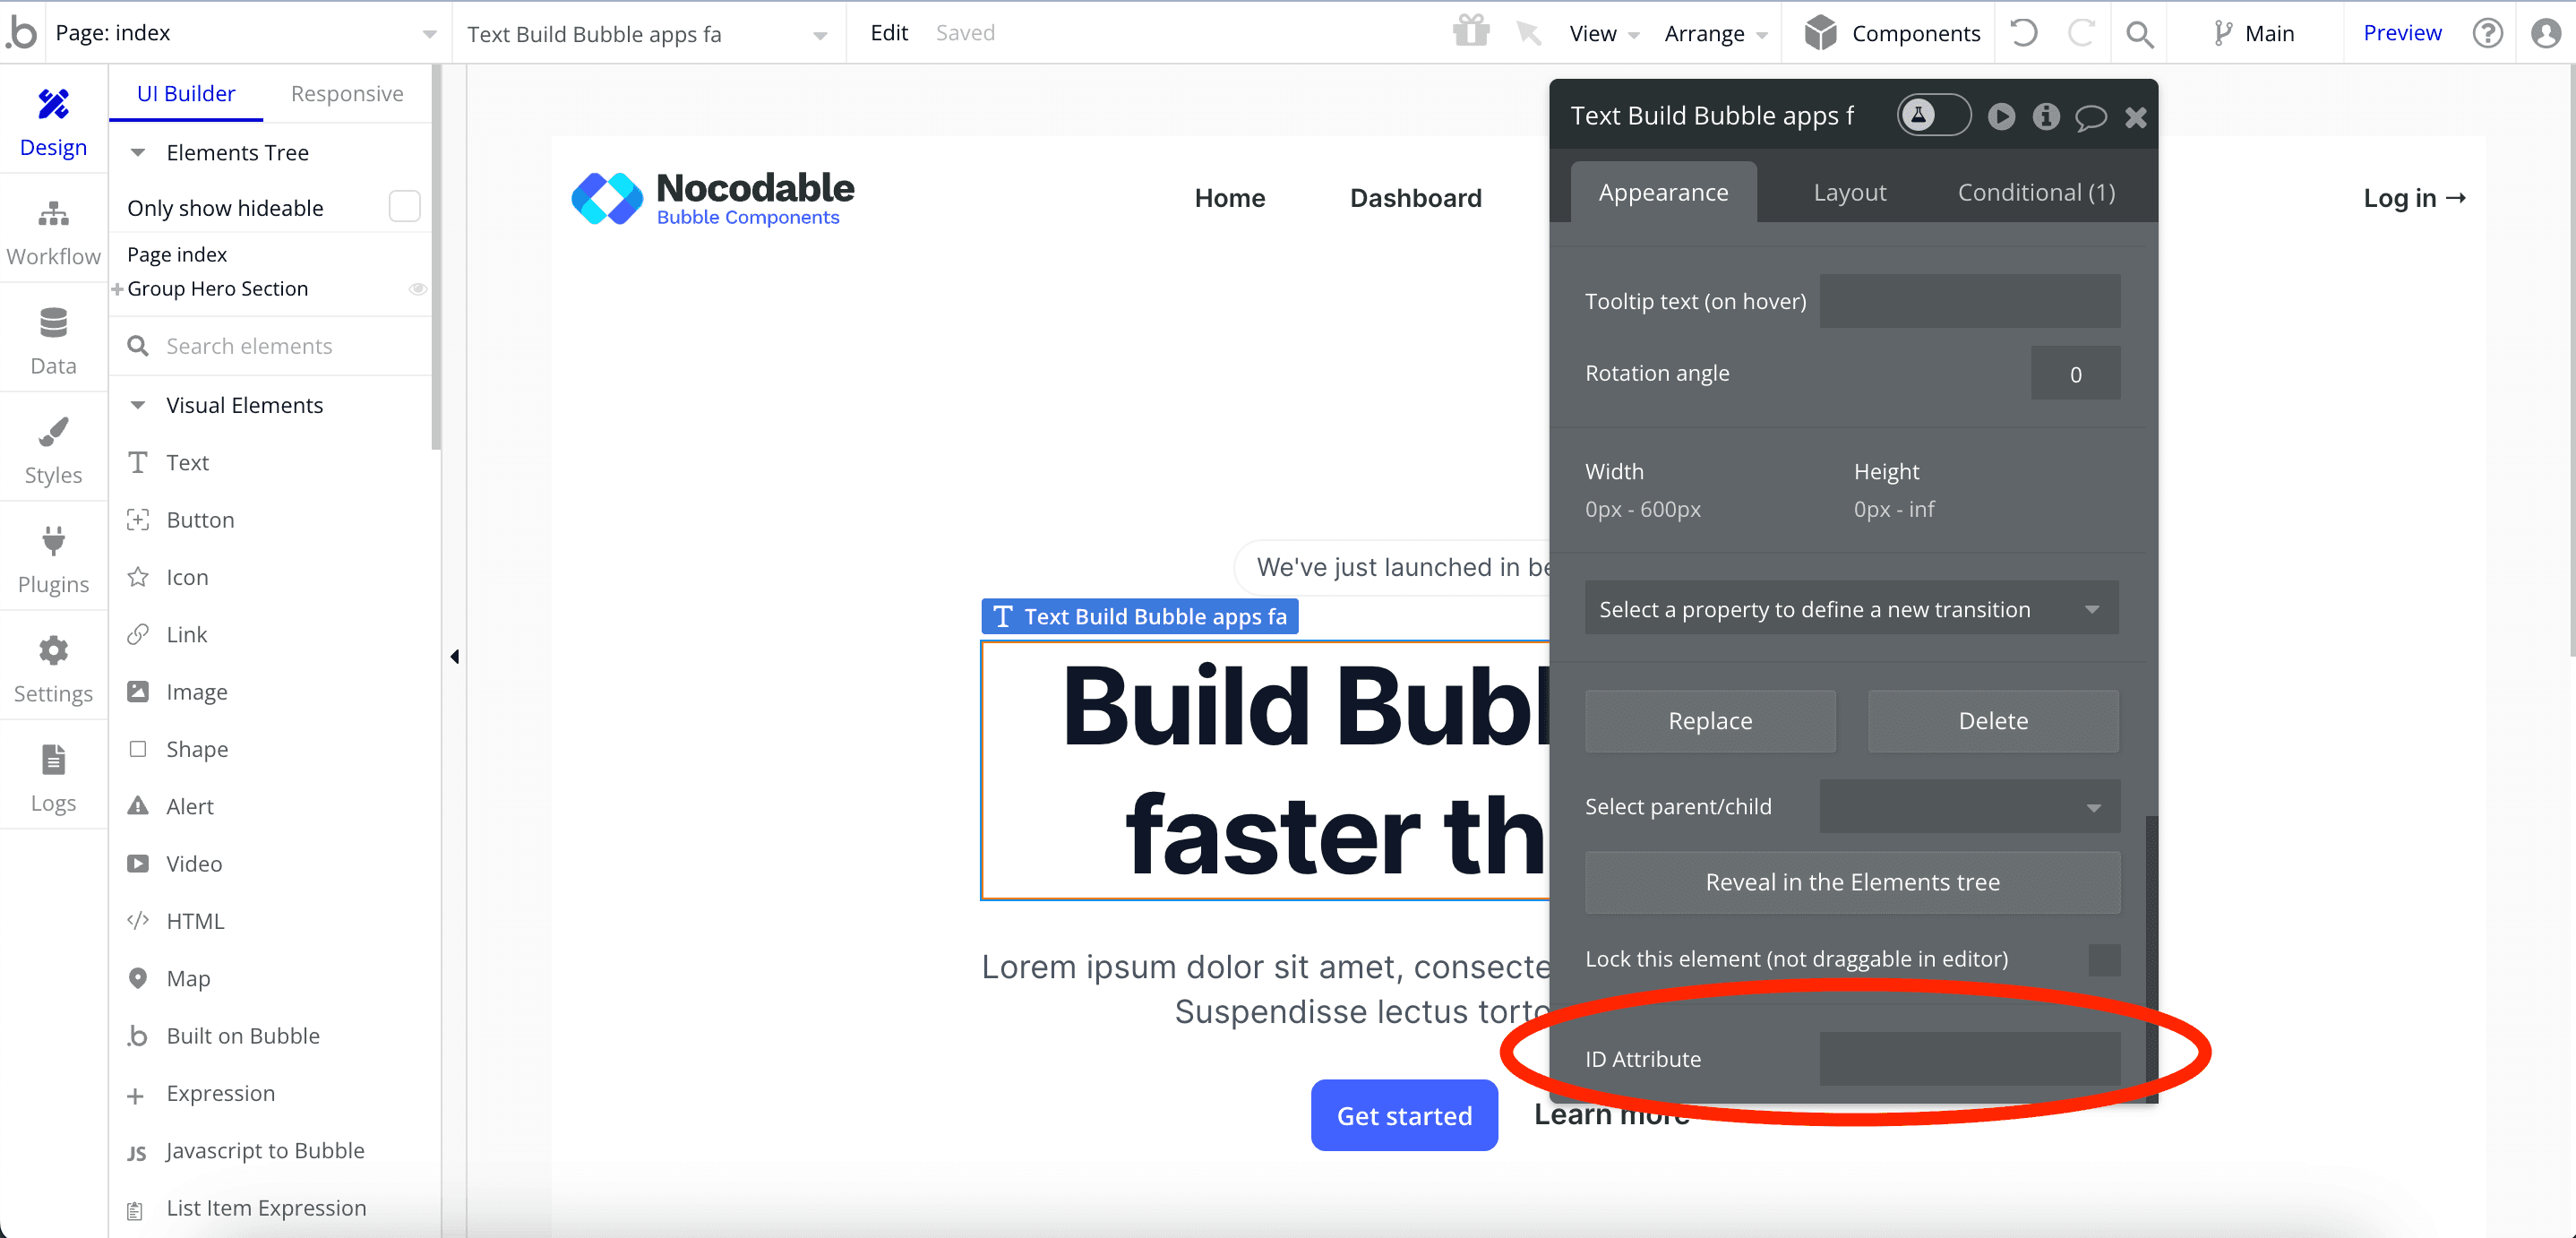
Once you've completed this step, you will see a new input on all your elements properties panel.
Step 3 : How to blur Text elements ?
Okay, so when it comes to blurring elements in Bubble, you probably need to blur two types of elements : Text and Images.
The process is different for each of them. Text elements are pretty straightforward to blur as we only need some HTML.
For images however we are going to need some CSS. But don't worry, I'm here to guide you.
Let's start by blurring our text elements !
Add an ID to the text you want to blur
Let's start by locating all the Text you'd like to blur and modify their ID Attribute. You can set any value you'd like, but in this tutorial I've set it to "blurred".
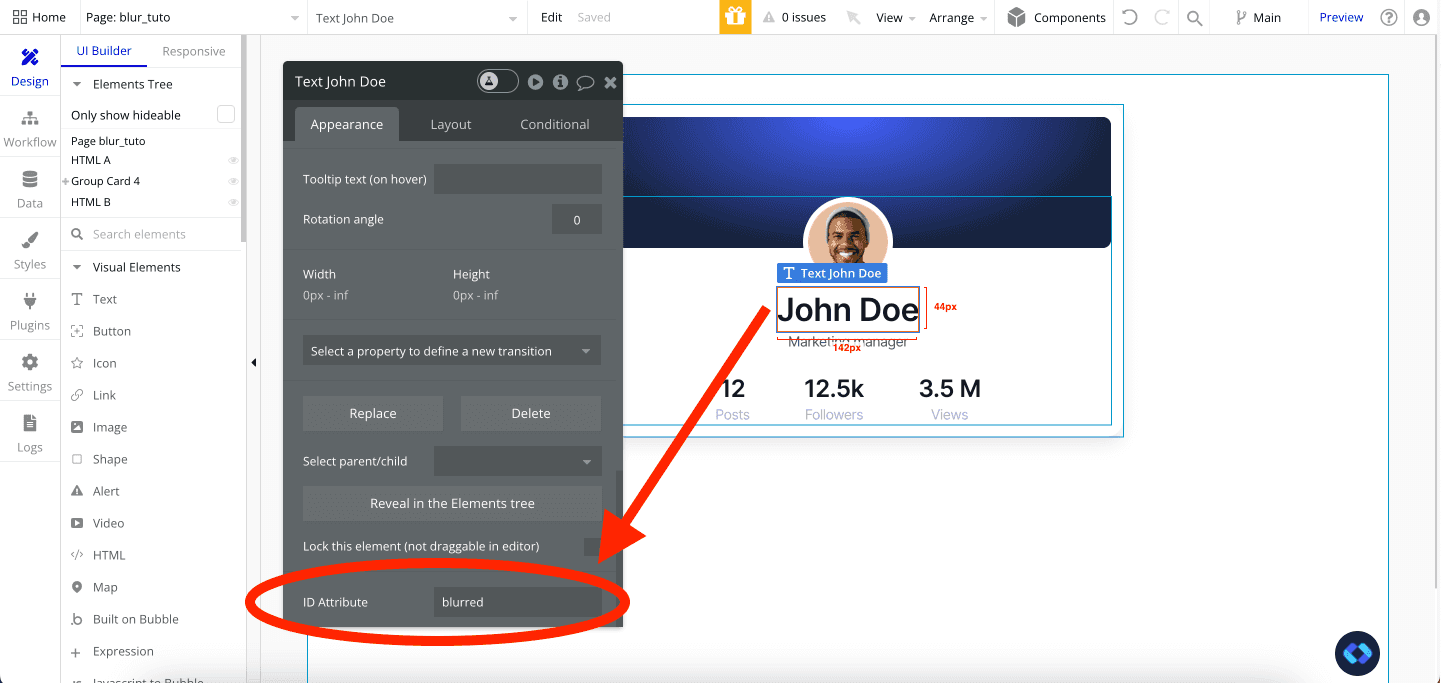
If you need to blur multiple Text, simply set those other text's ID Attributes to the same value and they will all be blurred as well.
Add our HTML Code to blur our texts
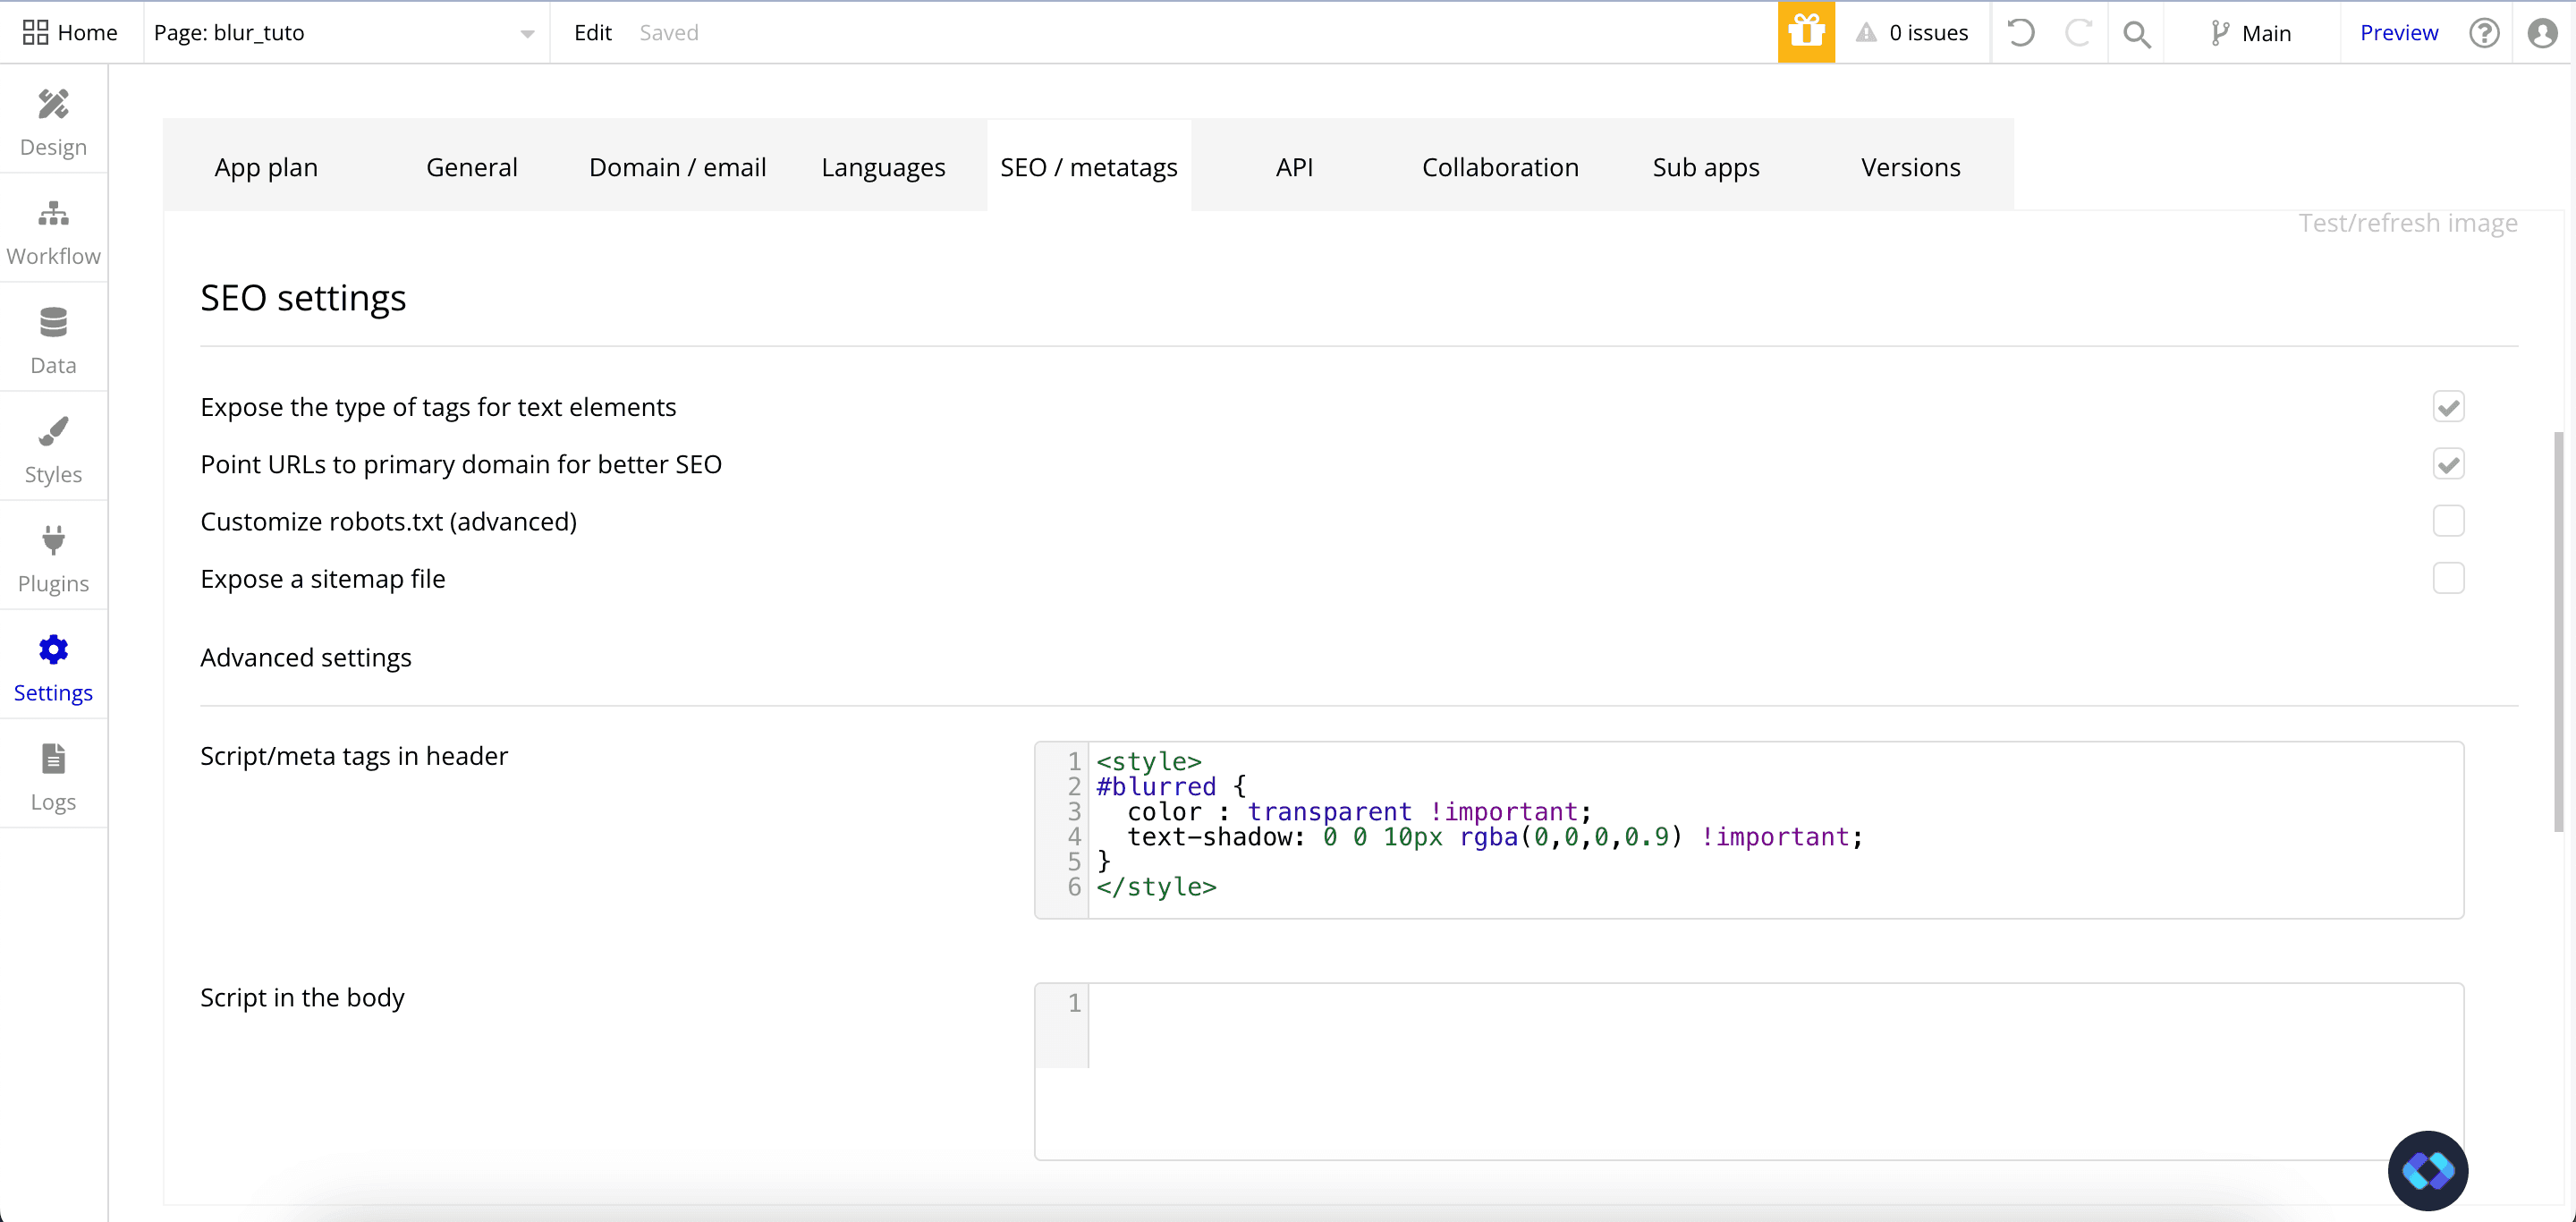
Last step to blur our elements, we need to add this code to our app :
<style>
#YOUR-TEXT-ID {
    color : transparent !important;
    text-shadow: 0 0 10px rgba(0,0,0,0.9) !important;
}
</style>
Important note : Make sure to replace YOUR-TEXT-ID with the actuel value of your element's ID Attributes.
To add this code to your app, you have several options :
Add an HTML Element to your page and paste this code inside of it.
Add this code to your App Header (Settings --> SEO/Meta tags --> Scripts / Meta tags in header)
Add this page into your Page Header
Those 3 options work the same. However, if you want to blur multiple elements across multiple pages, I recommend you put the code into your App's Header. With this method, you'll only have to paste this code once.
Now you simply have to Hit Preview, and your text is blurred !
Step 4 : How to blur images in Bubble ?
Install the plugin Classify (free)
Okay, now that we learned how to blur Text elements, we need to learn how to blur images !
As I mentioned earlier, the process is not exactly the same than the one for texts. For images, we are going to need to use some CSS.
So our first step here will be to install the plugin Classify.
It's a free plugin that enables us to use custom CSS within our app.
So, if you haven't already installed it, go ahead and install it on your app.
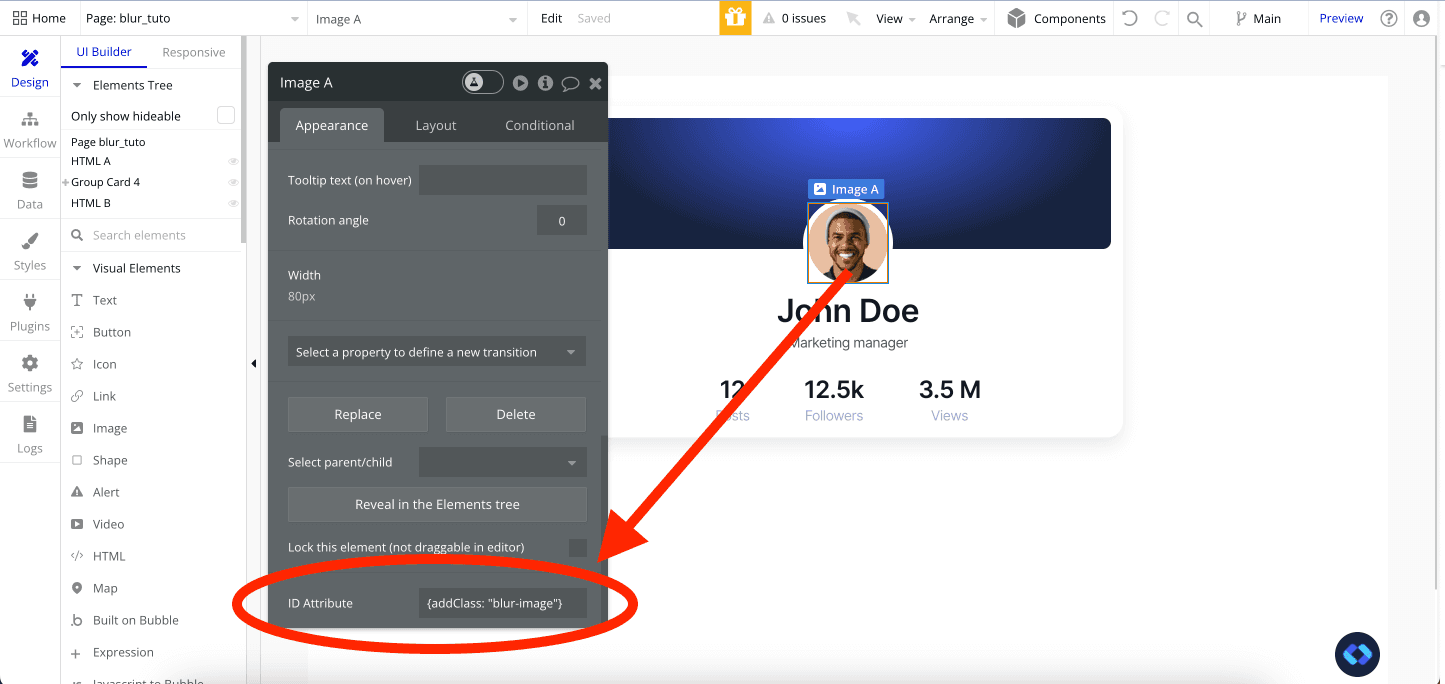
Give your images a CSS Class
Okay, now that you've installed Classify, we are going to give our images a CSS Class.
In short, this is what we'll use to target the element we want to blur.
To do this, simply paste this code within the ID Attribute of the images you want to blur :
{addClass: "YOUR-CLASS"}Of course, replace "YOUR-CLASS" by the actual name of your class (make sure to keep the quote around the name).
Adding our code to our app
Now comes the final step : adding our code to our app !
This is pretty straightforward, as this can be done the exact same way than with the Text Elements.
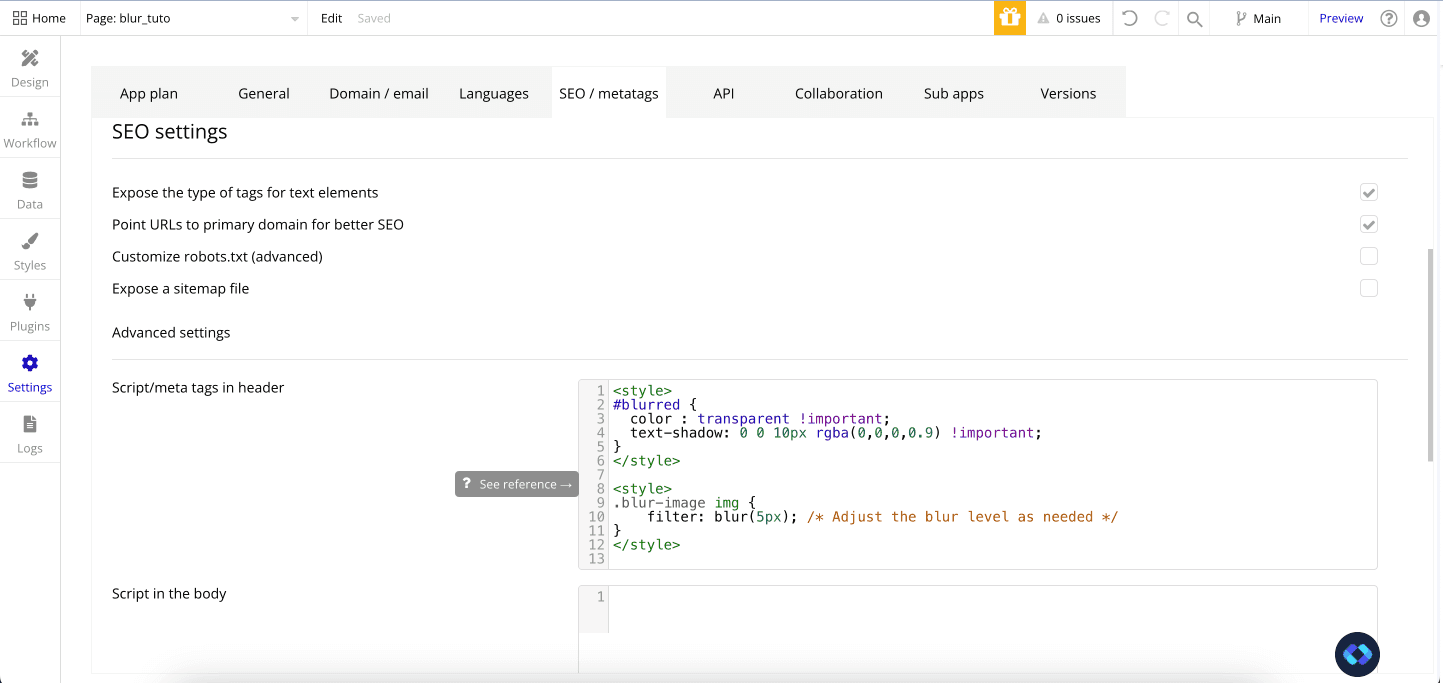
Simply choose where you want to paste the code, and paste the following :
<style>
    .YOUR-CLASS img {
        filter: blur(5px); /* Adjust the blur level as needed */
    }
</style>
Once again, make sure to replace YOUR-CLASS by the actuel name of your class (but without quotes this time).
Hit preview, and there you go, you blurred your images and your texts !
Important security considerations !
When blurring elements on Bubble, you need to keep in mind that THIS IS NOT a secure way to hide informations.
Even when blurred, the information can be accessed simply by Right-Clicking and Inspecting the element.
So, to make sure your information is safe, make sure to display a default placeholder when the information is blurred, and only replace this placeholder with the actuel information when the element needs to be displayed !
If you need some ressources to make your app more secure, you can check out the work of Flusk. They have a free Cheat Sheet you can read !

Thomas Couderq
Founder @ Nocodable
I've been building with Bubble for more than four years now. I've launched several projects (with more or less success). I'm passionate about no code and UI Design, which led me to founding Nocodable Components to help founders and professional Bubble developers build faster on Bubble.
Find me on Linkedin