
Creating engaging and interactive user interfaces in Bubble.io can significantly enhance the user experience on your website.
One common feature is the image zoom effect on hover, which can be particularly useful for blog article cards or any visual content.
In this tutorial, we will focus on adding an image zoom effect to an image within a group element in Bubble.io.
This effect is often used in blog article cards to draw attention to featured images.
By following these steps, you'll enhance the visual appeal of your articles and engage your audience more effectively.
Step 1 - Build your UI
First and foremost, you'll need to build the UI of your component.
In this article I'm going to use a Blog Section component from Nocodable Component's library.
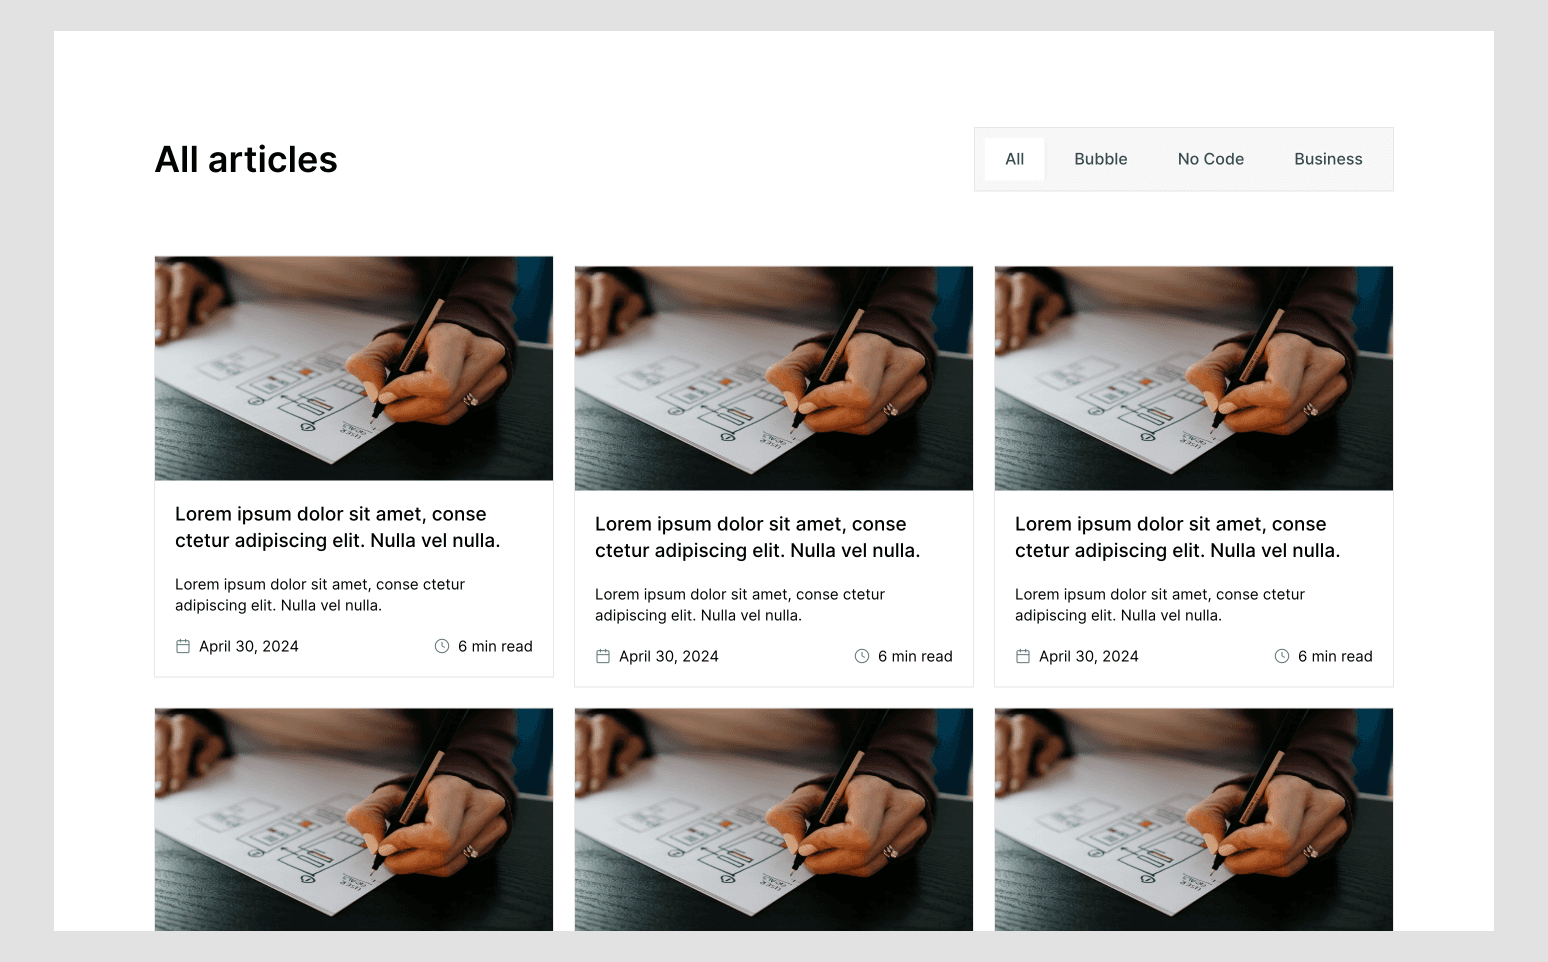
As you can see, it's a simple Blog Card UI, nothing too fancy about it.
Important : Place your image in a group
However, you absolutely need to make sure of one thing : the image you want to add the effect on needs to be in a group, like below :
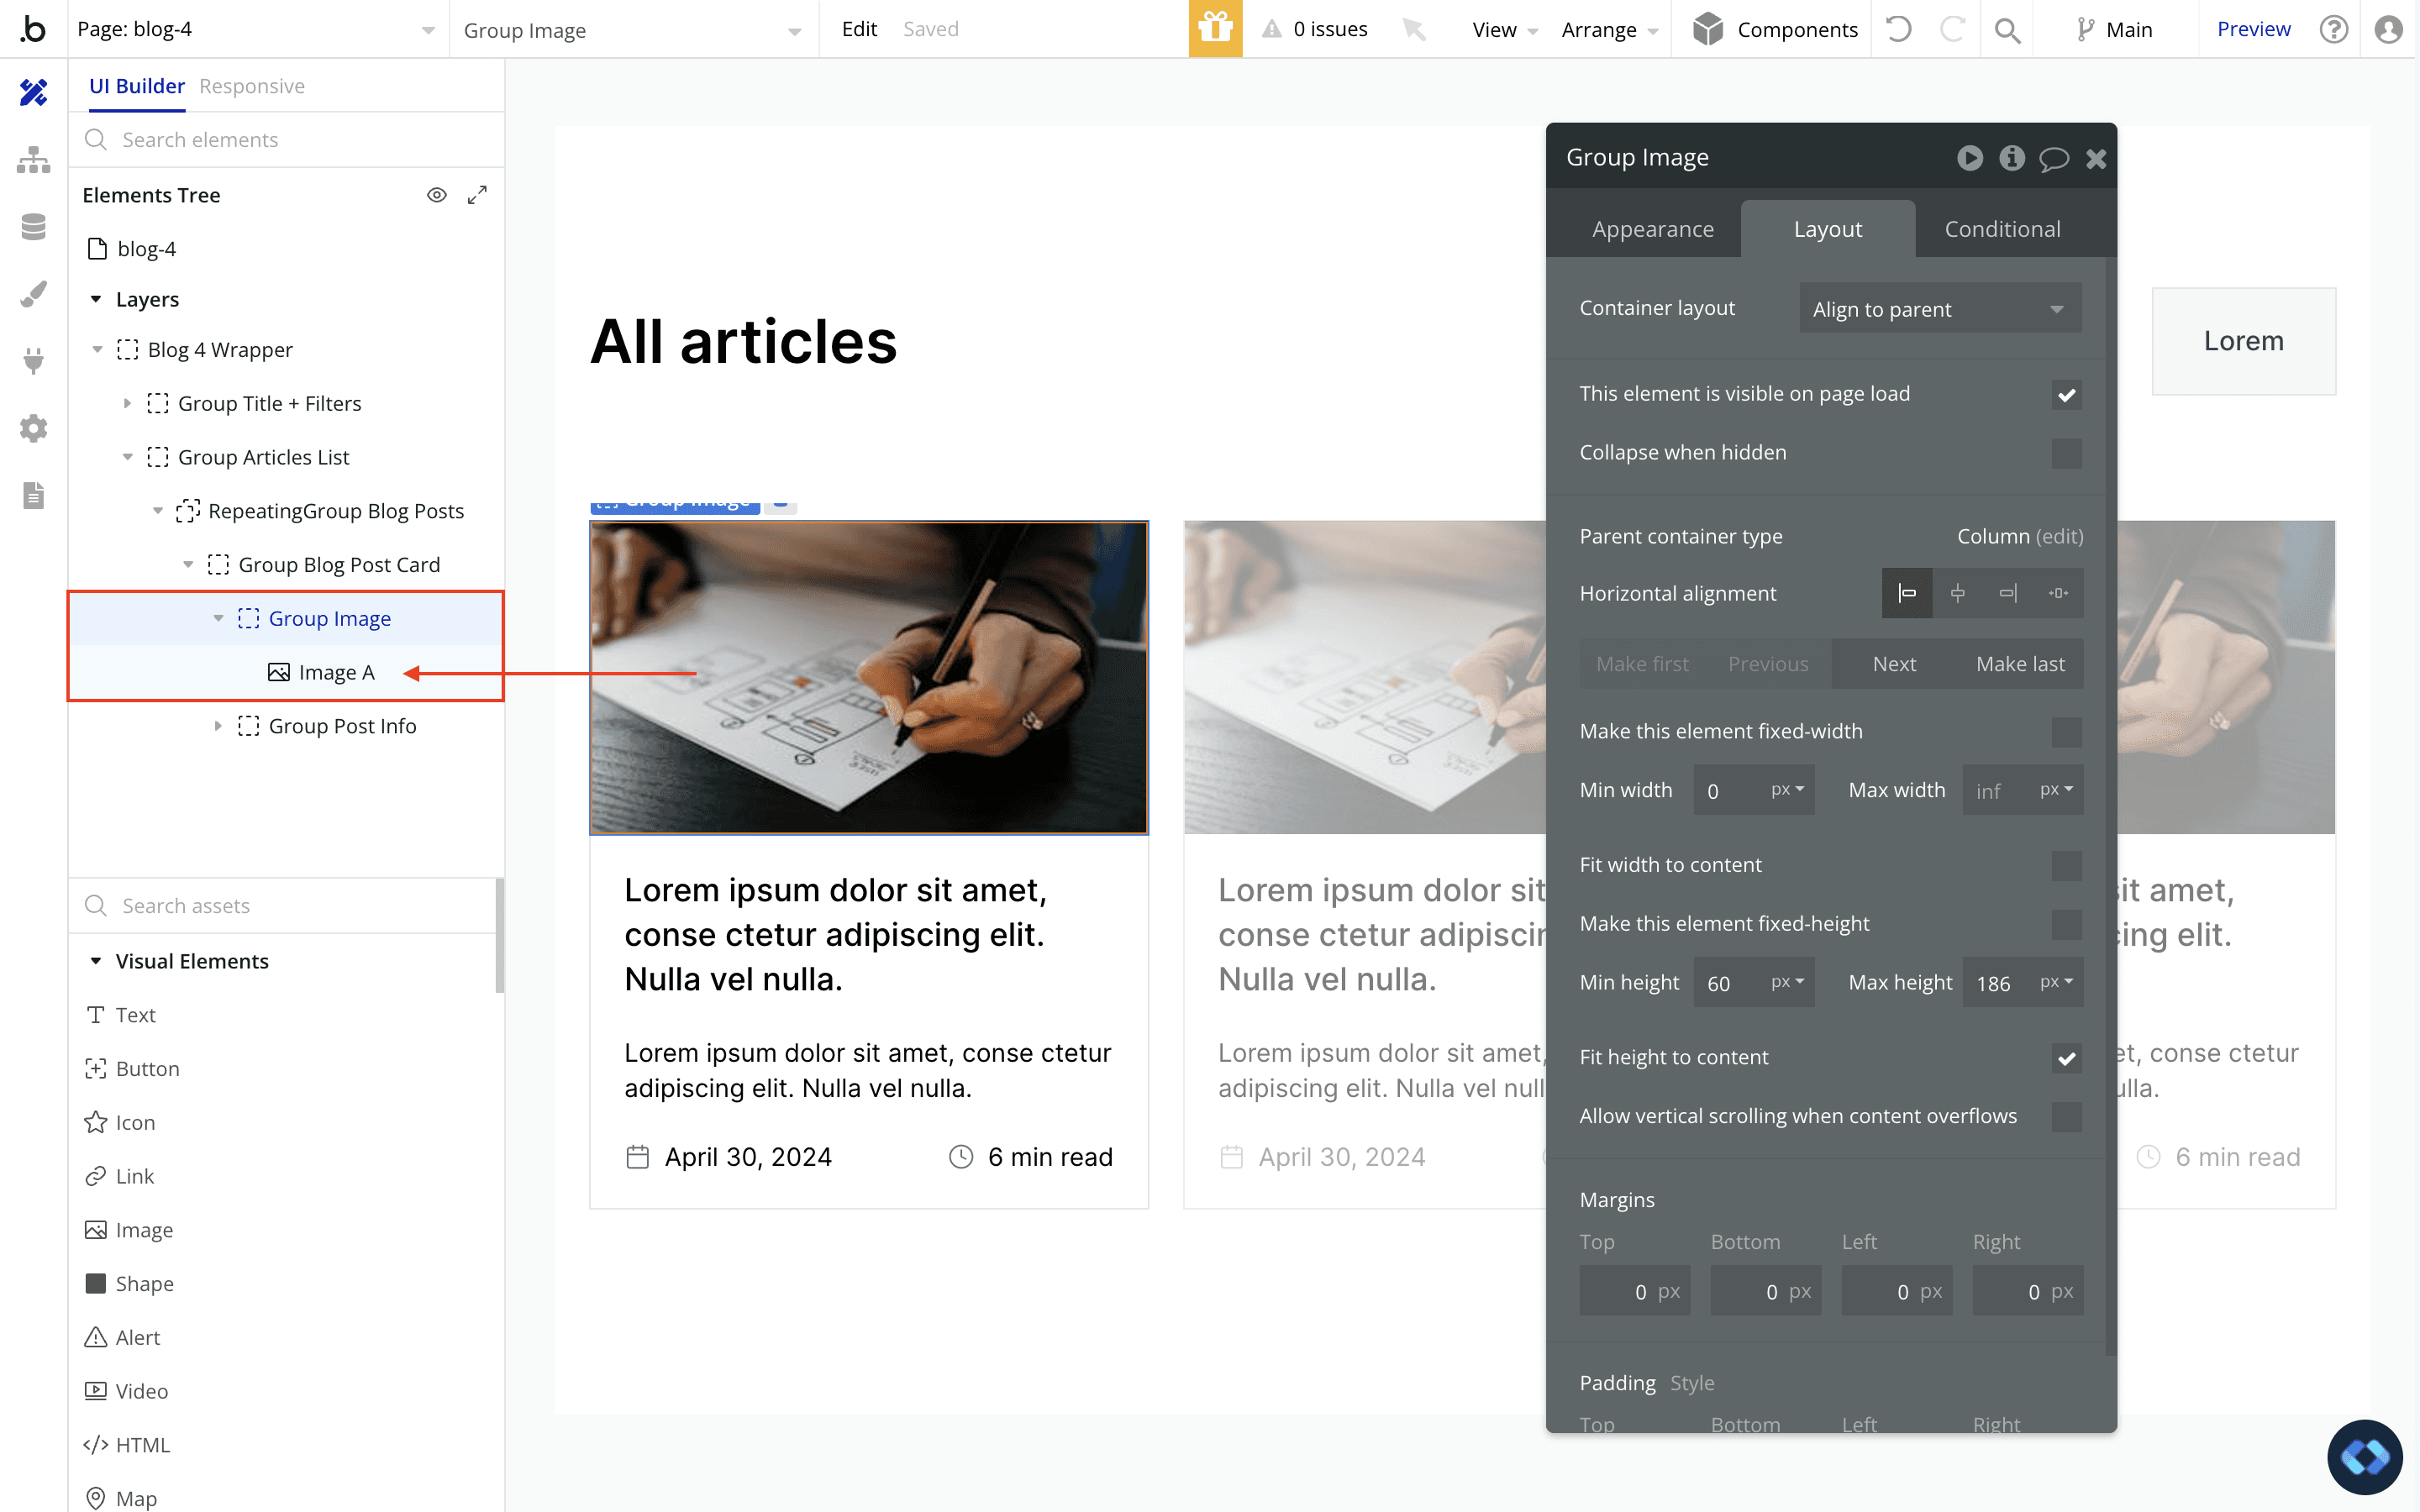
This is crucial for managing the overflow property, which is pivotal in creating the zoom effect.
If the image is not grouped correctly, the zoom effect might extend beyond the desired area, disrupting the layout.
Step 2 - Setting the Overflow Property of the Group Containing the Image
Now comes another crucial step, which is to set the Overflow property of the group that contains the image to "Hidden"
What does it mean ? It means that when an element expands beyond the limit of its Parent Group, the part that is outside the Parent Group will be hidden.
Which is very important in our case.
Unfortunately, Bubble doesn't natively give us the possibility to modify this Overflow Property, so we'll have to use a bit of CSS Code.
So, go to your page settings, and paste the code below into the Page Header :
<style>
#hideOverflow {
overflow: hidden !important;
}
</style>
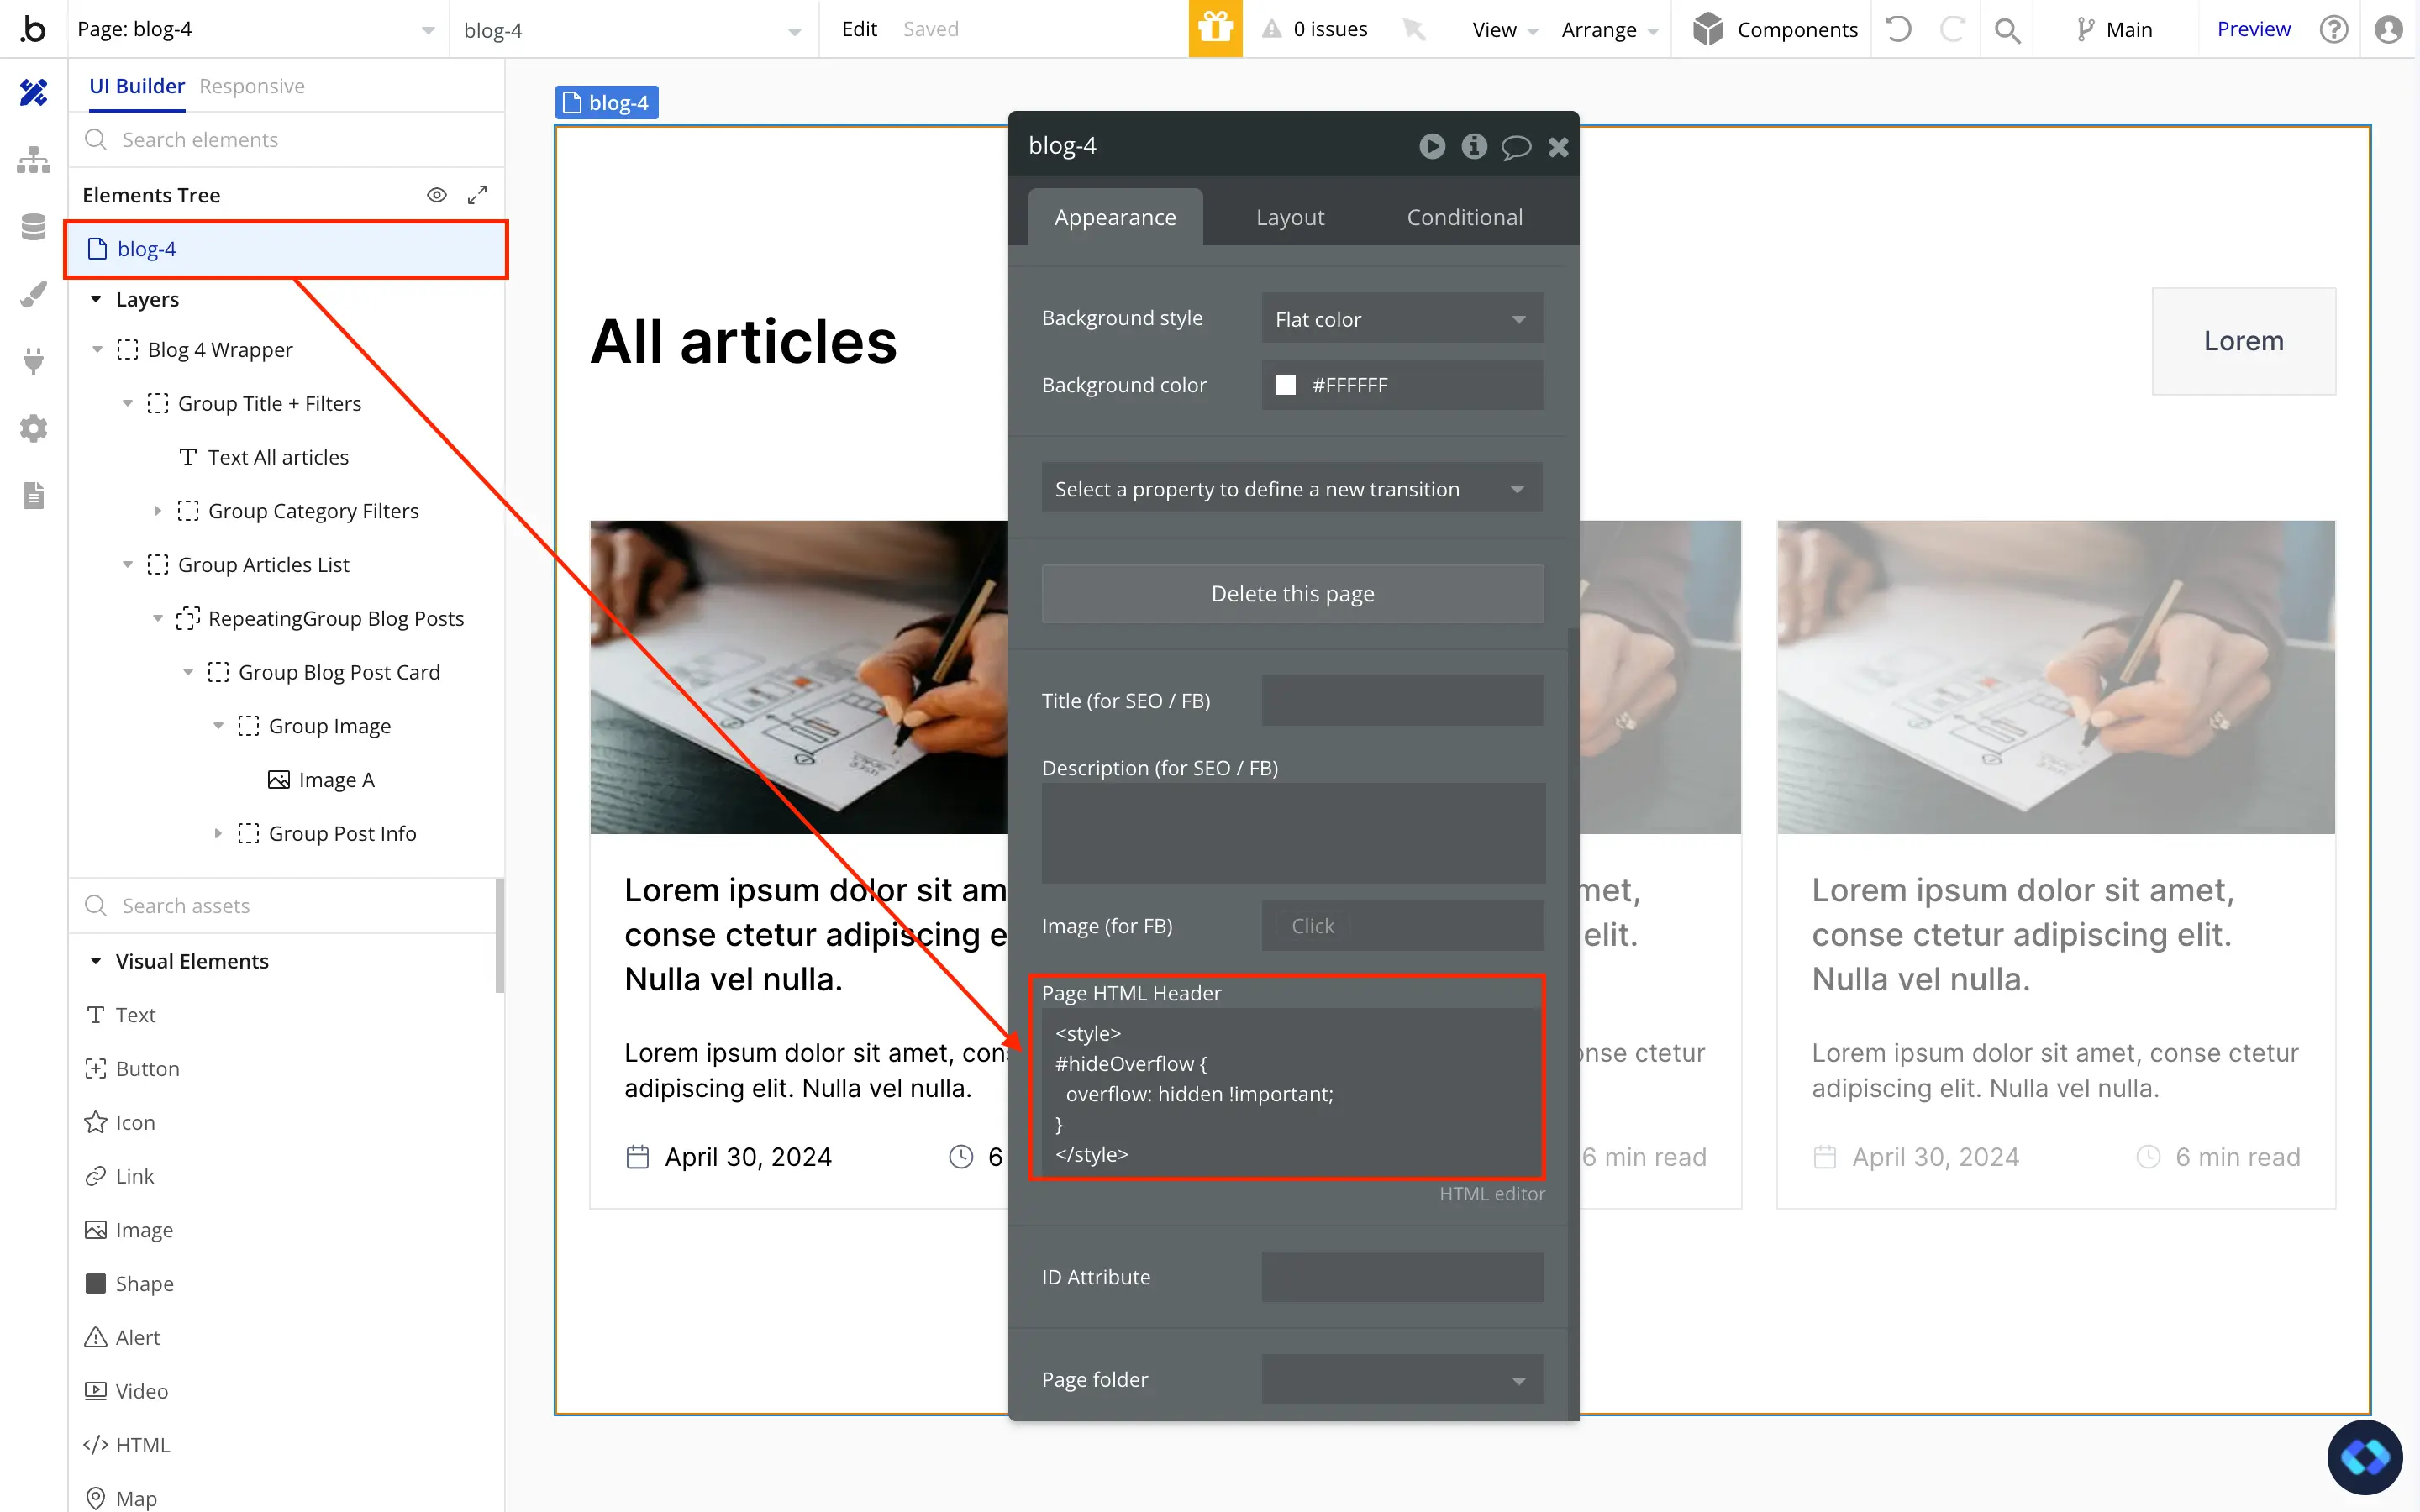
Basically, what this code does is targeting the elements that have the HTML ID "hideOverflow" and set their Overflow to hidden.
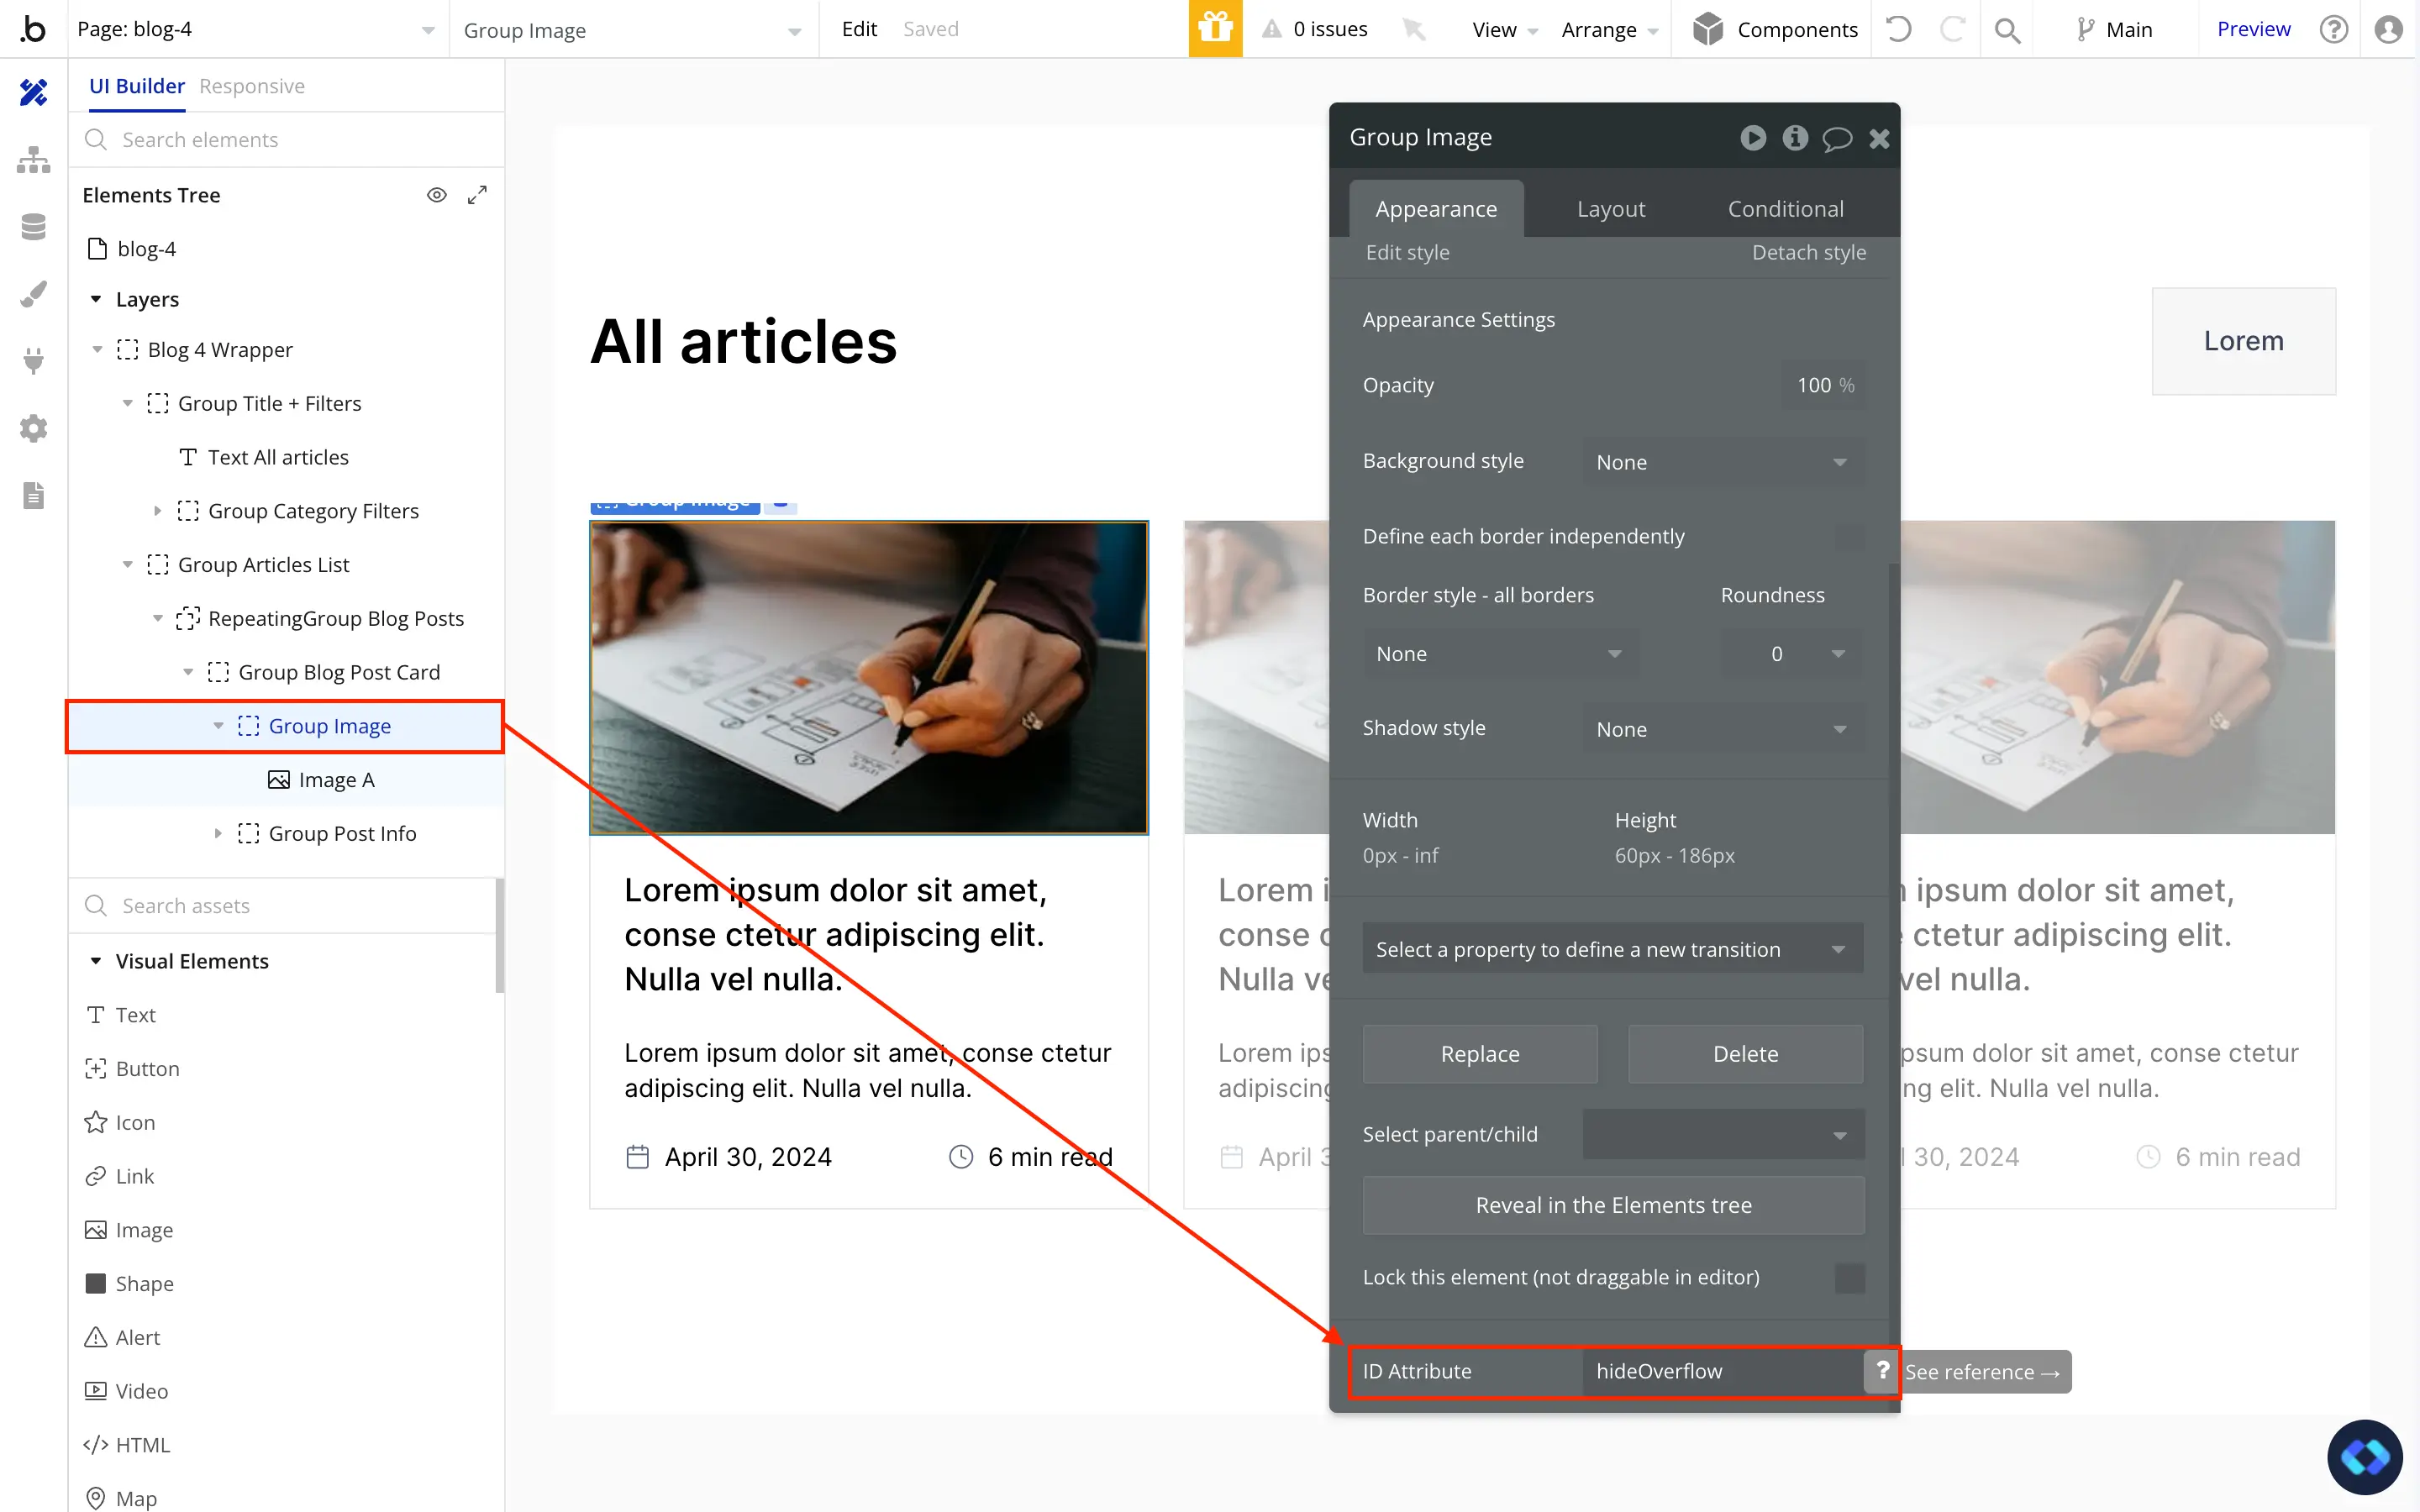
So what we have to do now is to set the HTML ID of the group that contains our image.
To do this you can set the ID Attribute of the group to exactly the same value as in our code (hideOverflow in my case).
If you don't see this input into your property editor, here's how to activate it :
1 - Go to your app's settings
2- Go to the "General" Tab
3 - Scroll to the bottom and check the box "Expose the option to add an ID attribute to HTML elements"
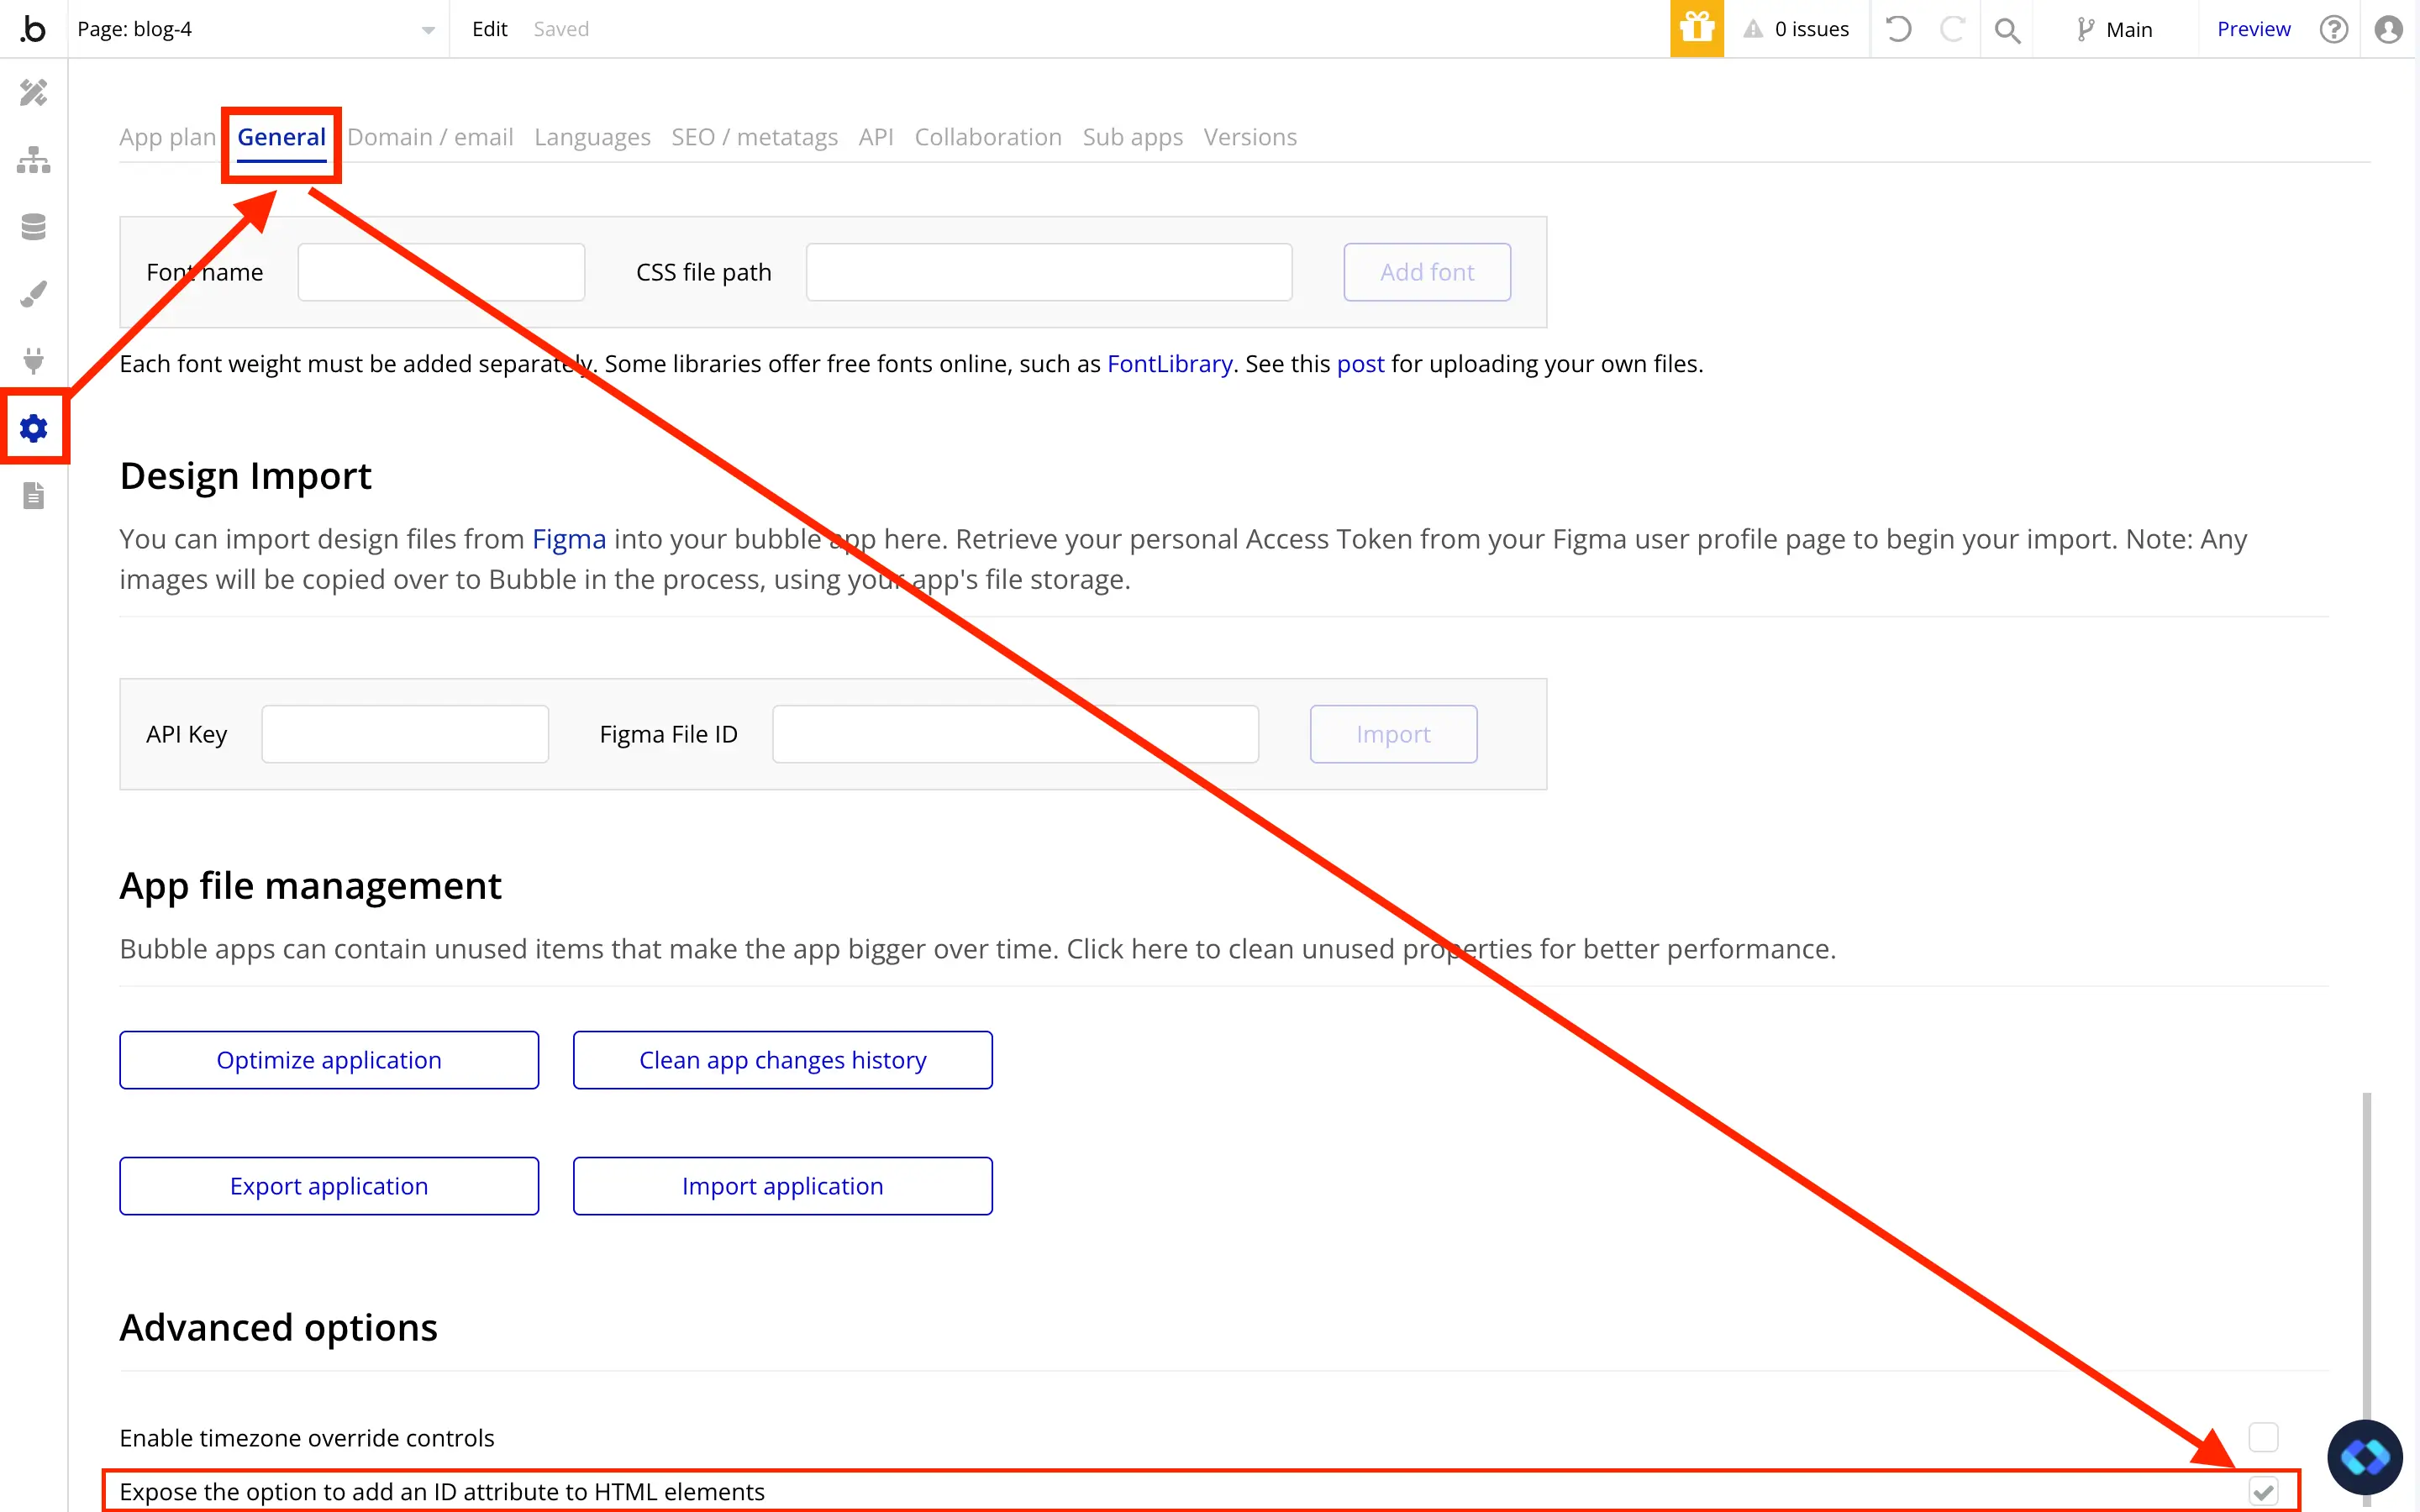
Now you'll the see the ID Attribute input on every Bubble elements.
Alright, now that we've done that, the groups containing our Image will have it's overflow property set to hidden !
Step 3 - Adding Conditionals on Hover
Alright, now let's make our image actually zoom !
In bubble, you don't have a "Zoom" action, se we need to find a workaround.
And this workaround is to basically expand the image. Simple as that.
So, by default, set your Image Width to fixed and set its value to 100%.
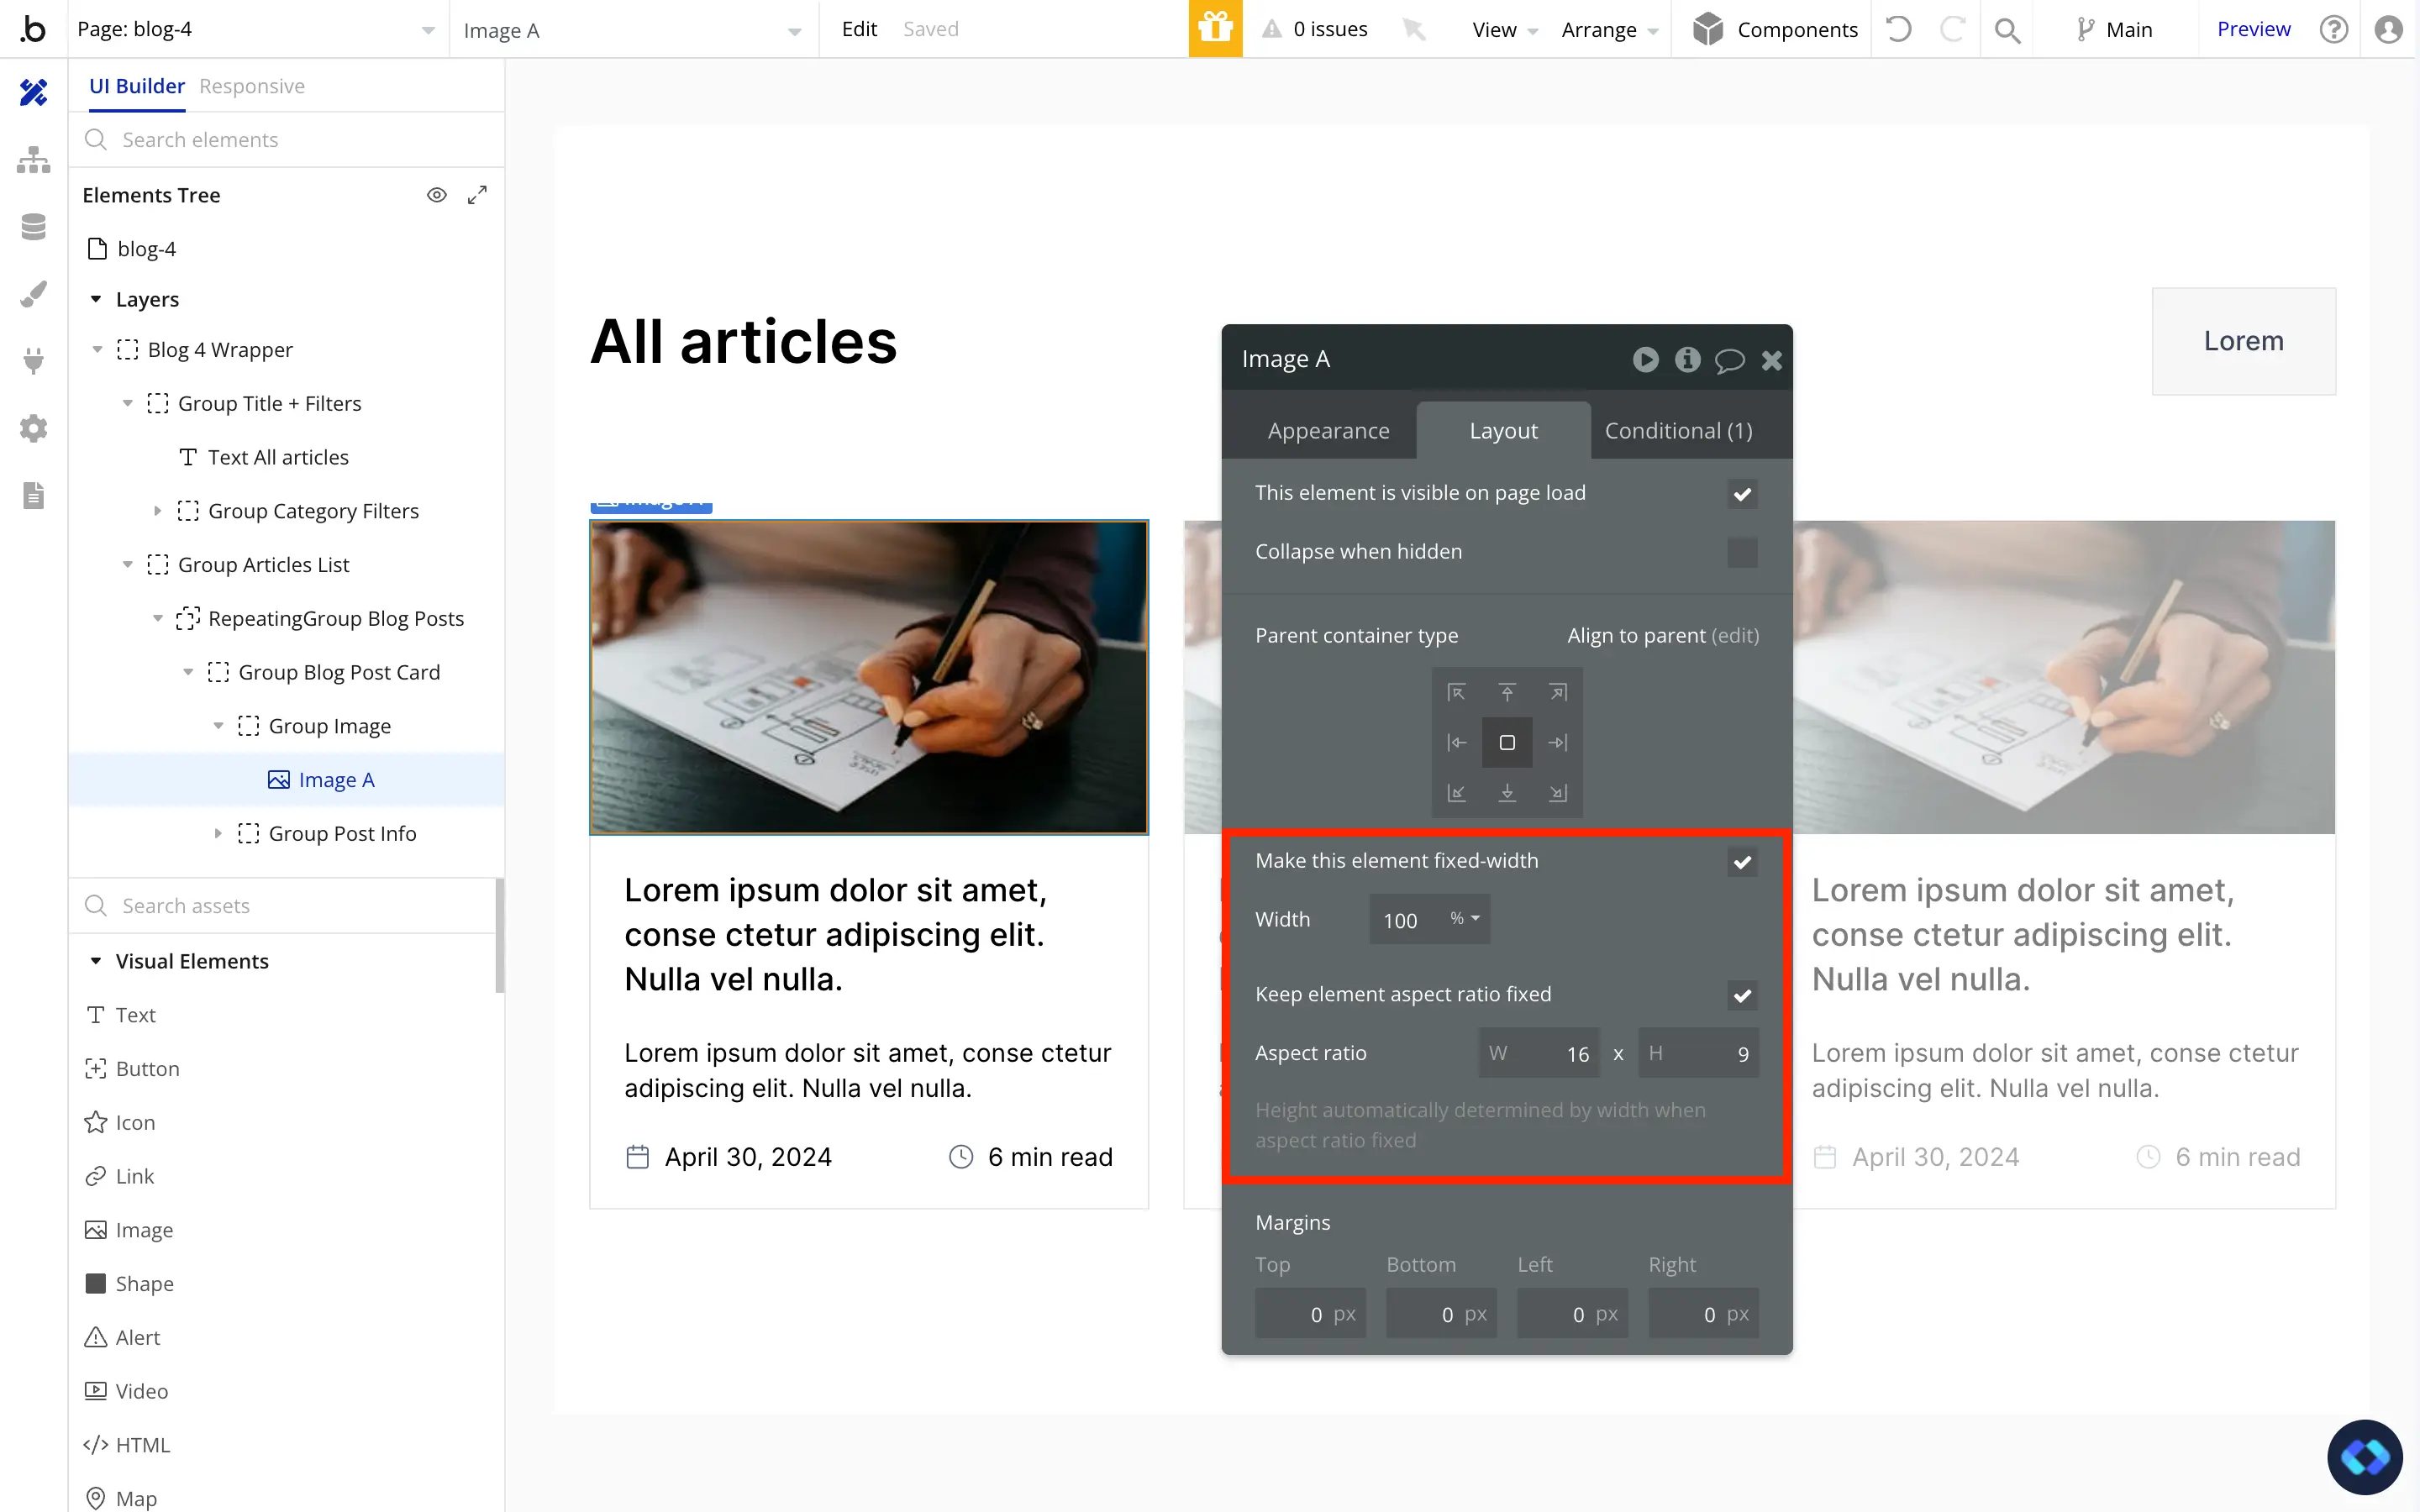
Don't let it expand, because we'll need a fixed width to control CSS Transitions in the next step.
Now that we have our default width, we can go ahead and add our first conditional to expand the image when our Article Card is hovered, here's how it looks :
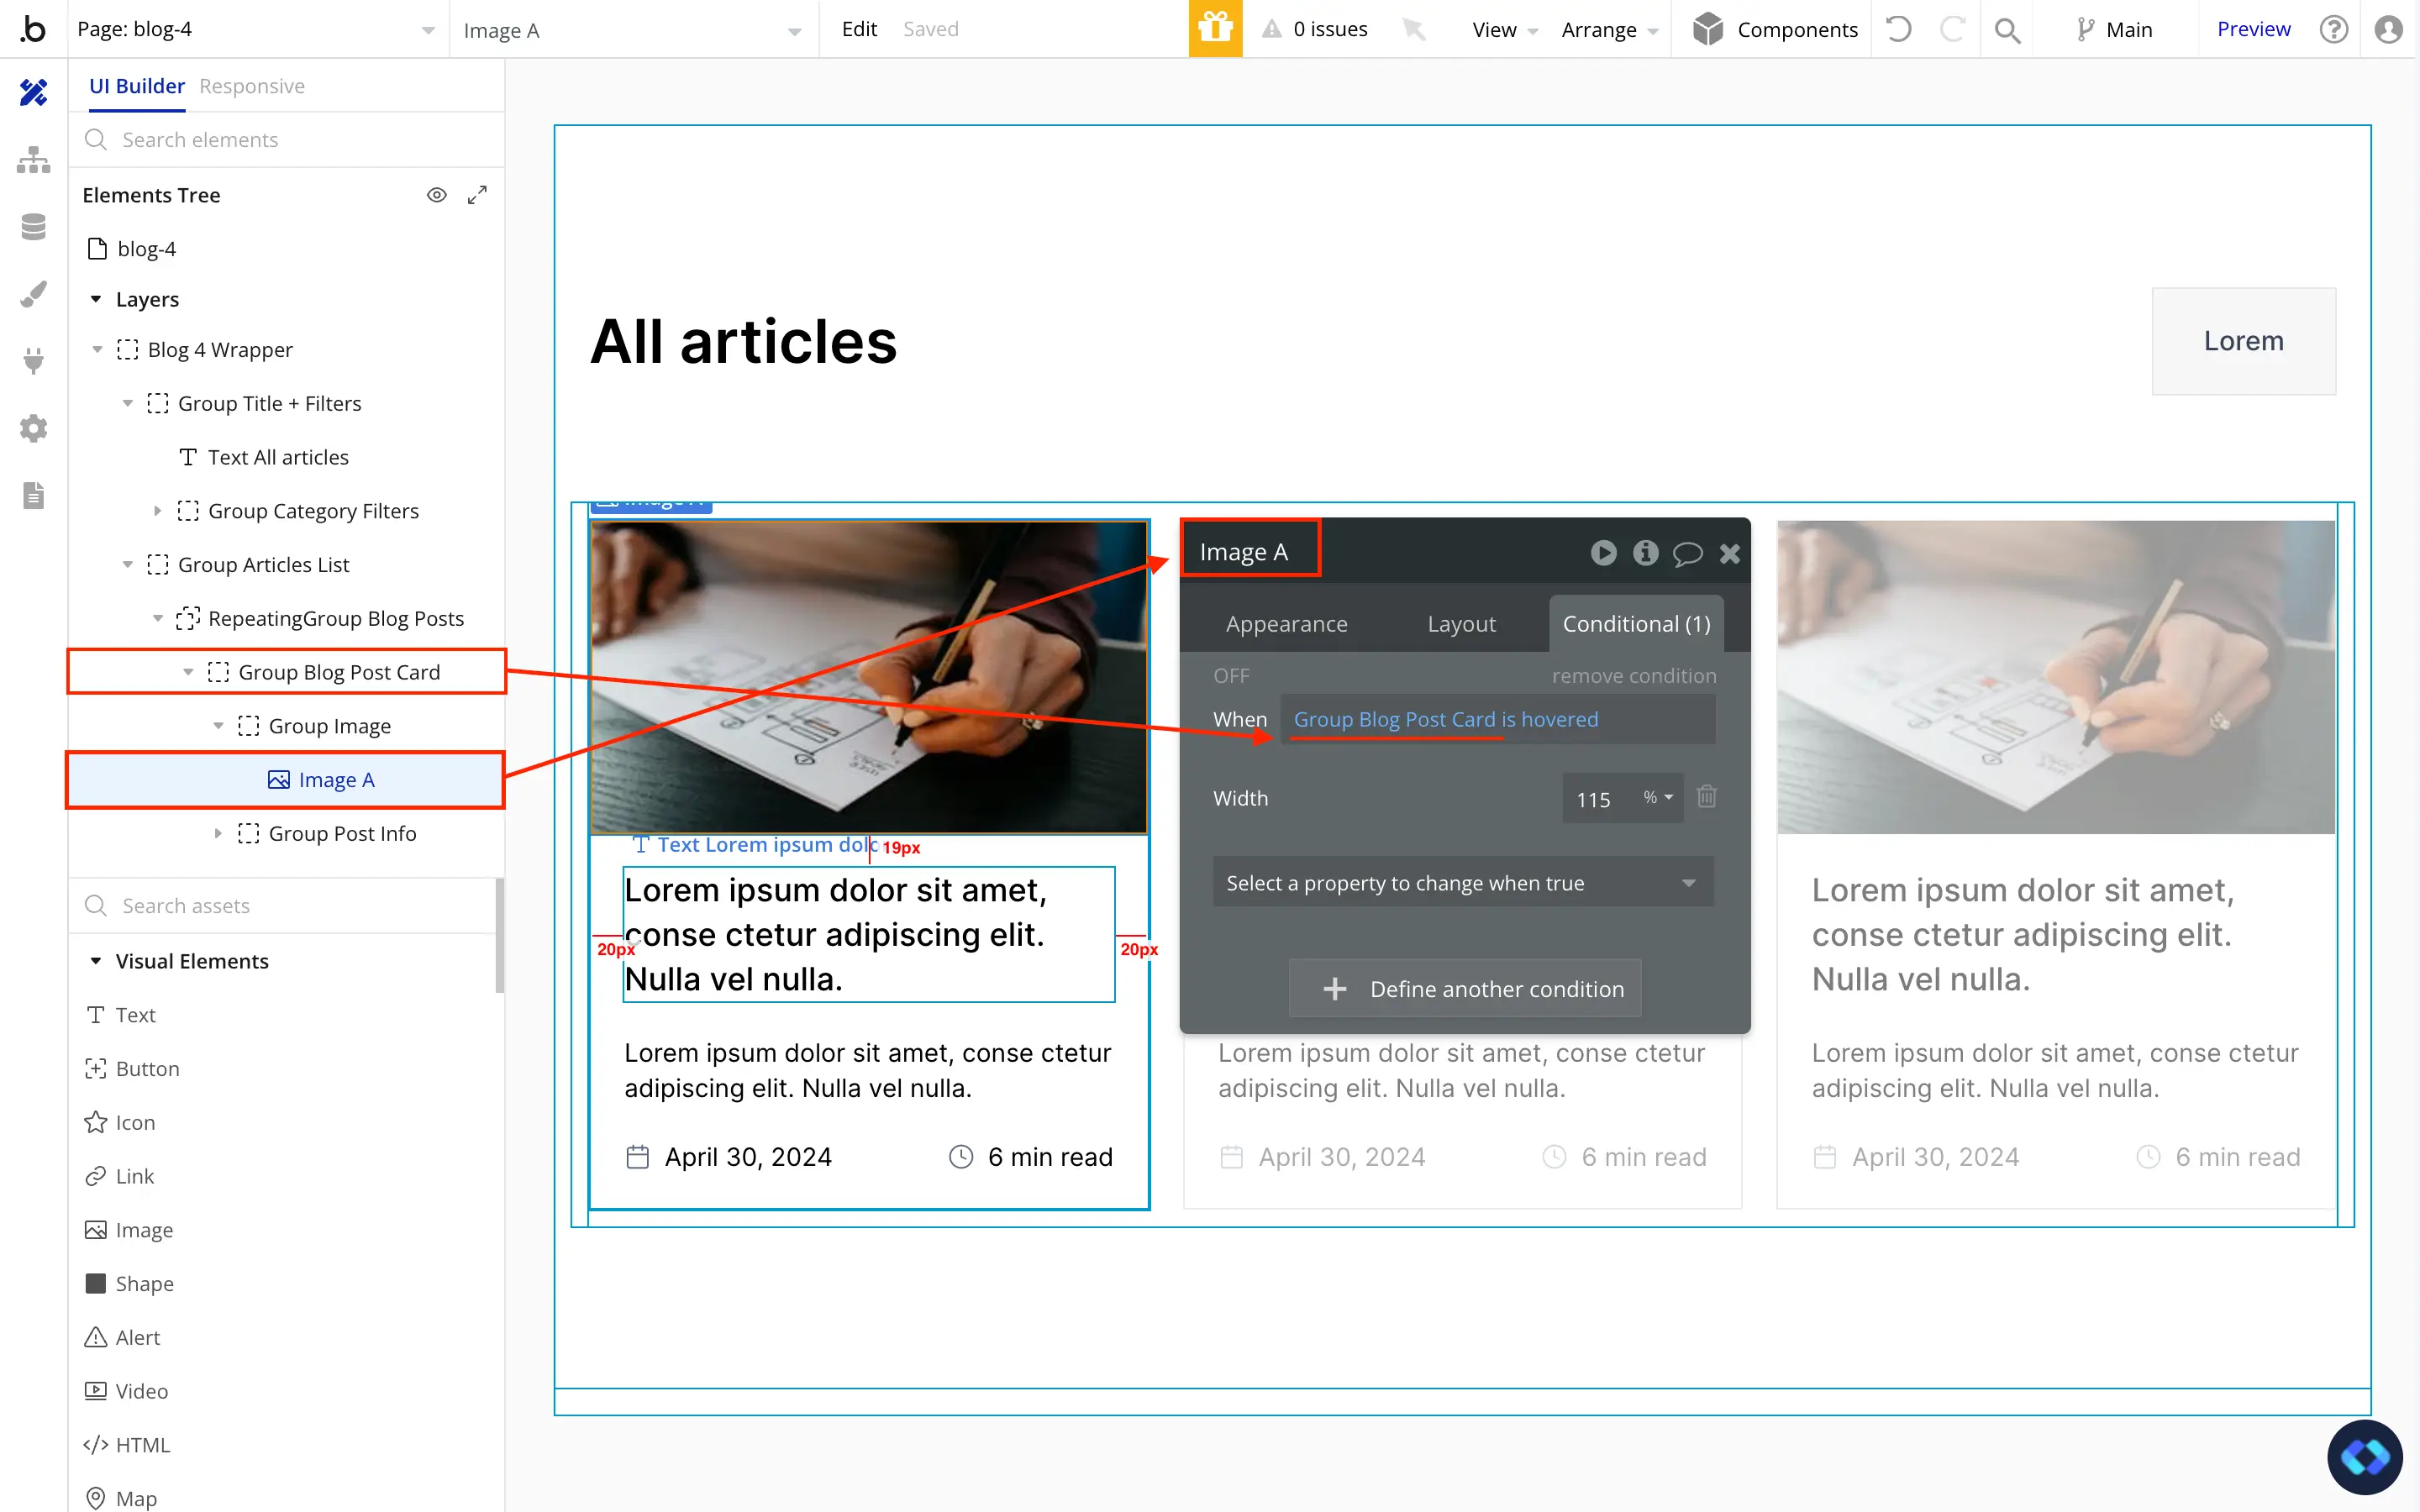
So now when you hover your Article Card, you should see the image expanding !
But it's not smooth yet, so let's go to the next step, where we'll add some transition to smooth everything up.
Step 4: Adding Transitions to Make It Smooth
Now to make our image zoom smoothly, we are going to use Transitions.
It's based on CSS Transitions, which is a way to change a value of an element progressively.
And in our case, we are going to modify smoothly the Width of our image !
So click on your image and go to the bottom of the "Appearance" tab to find this dropdown :
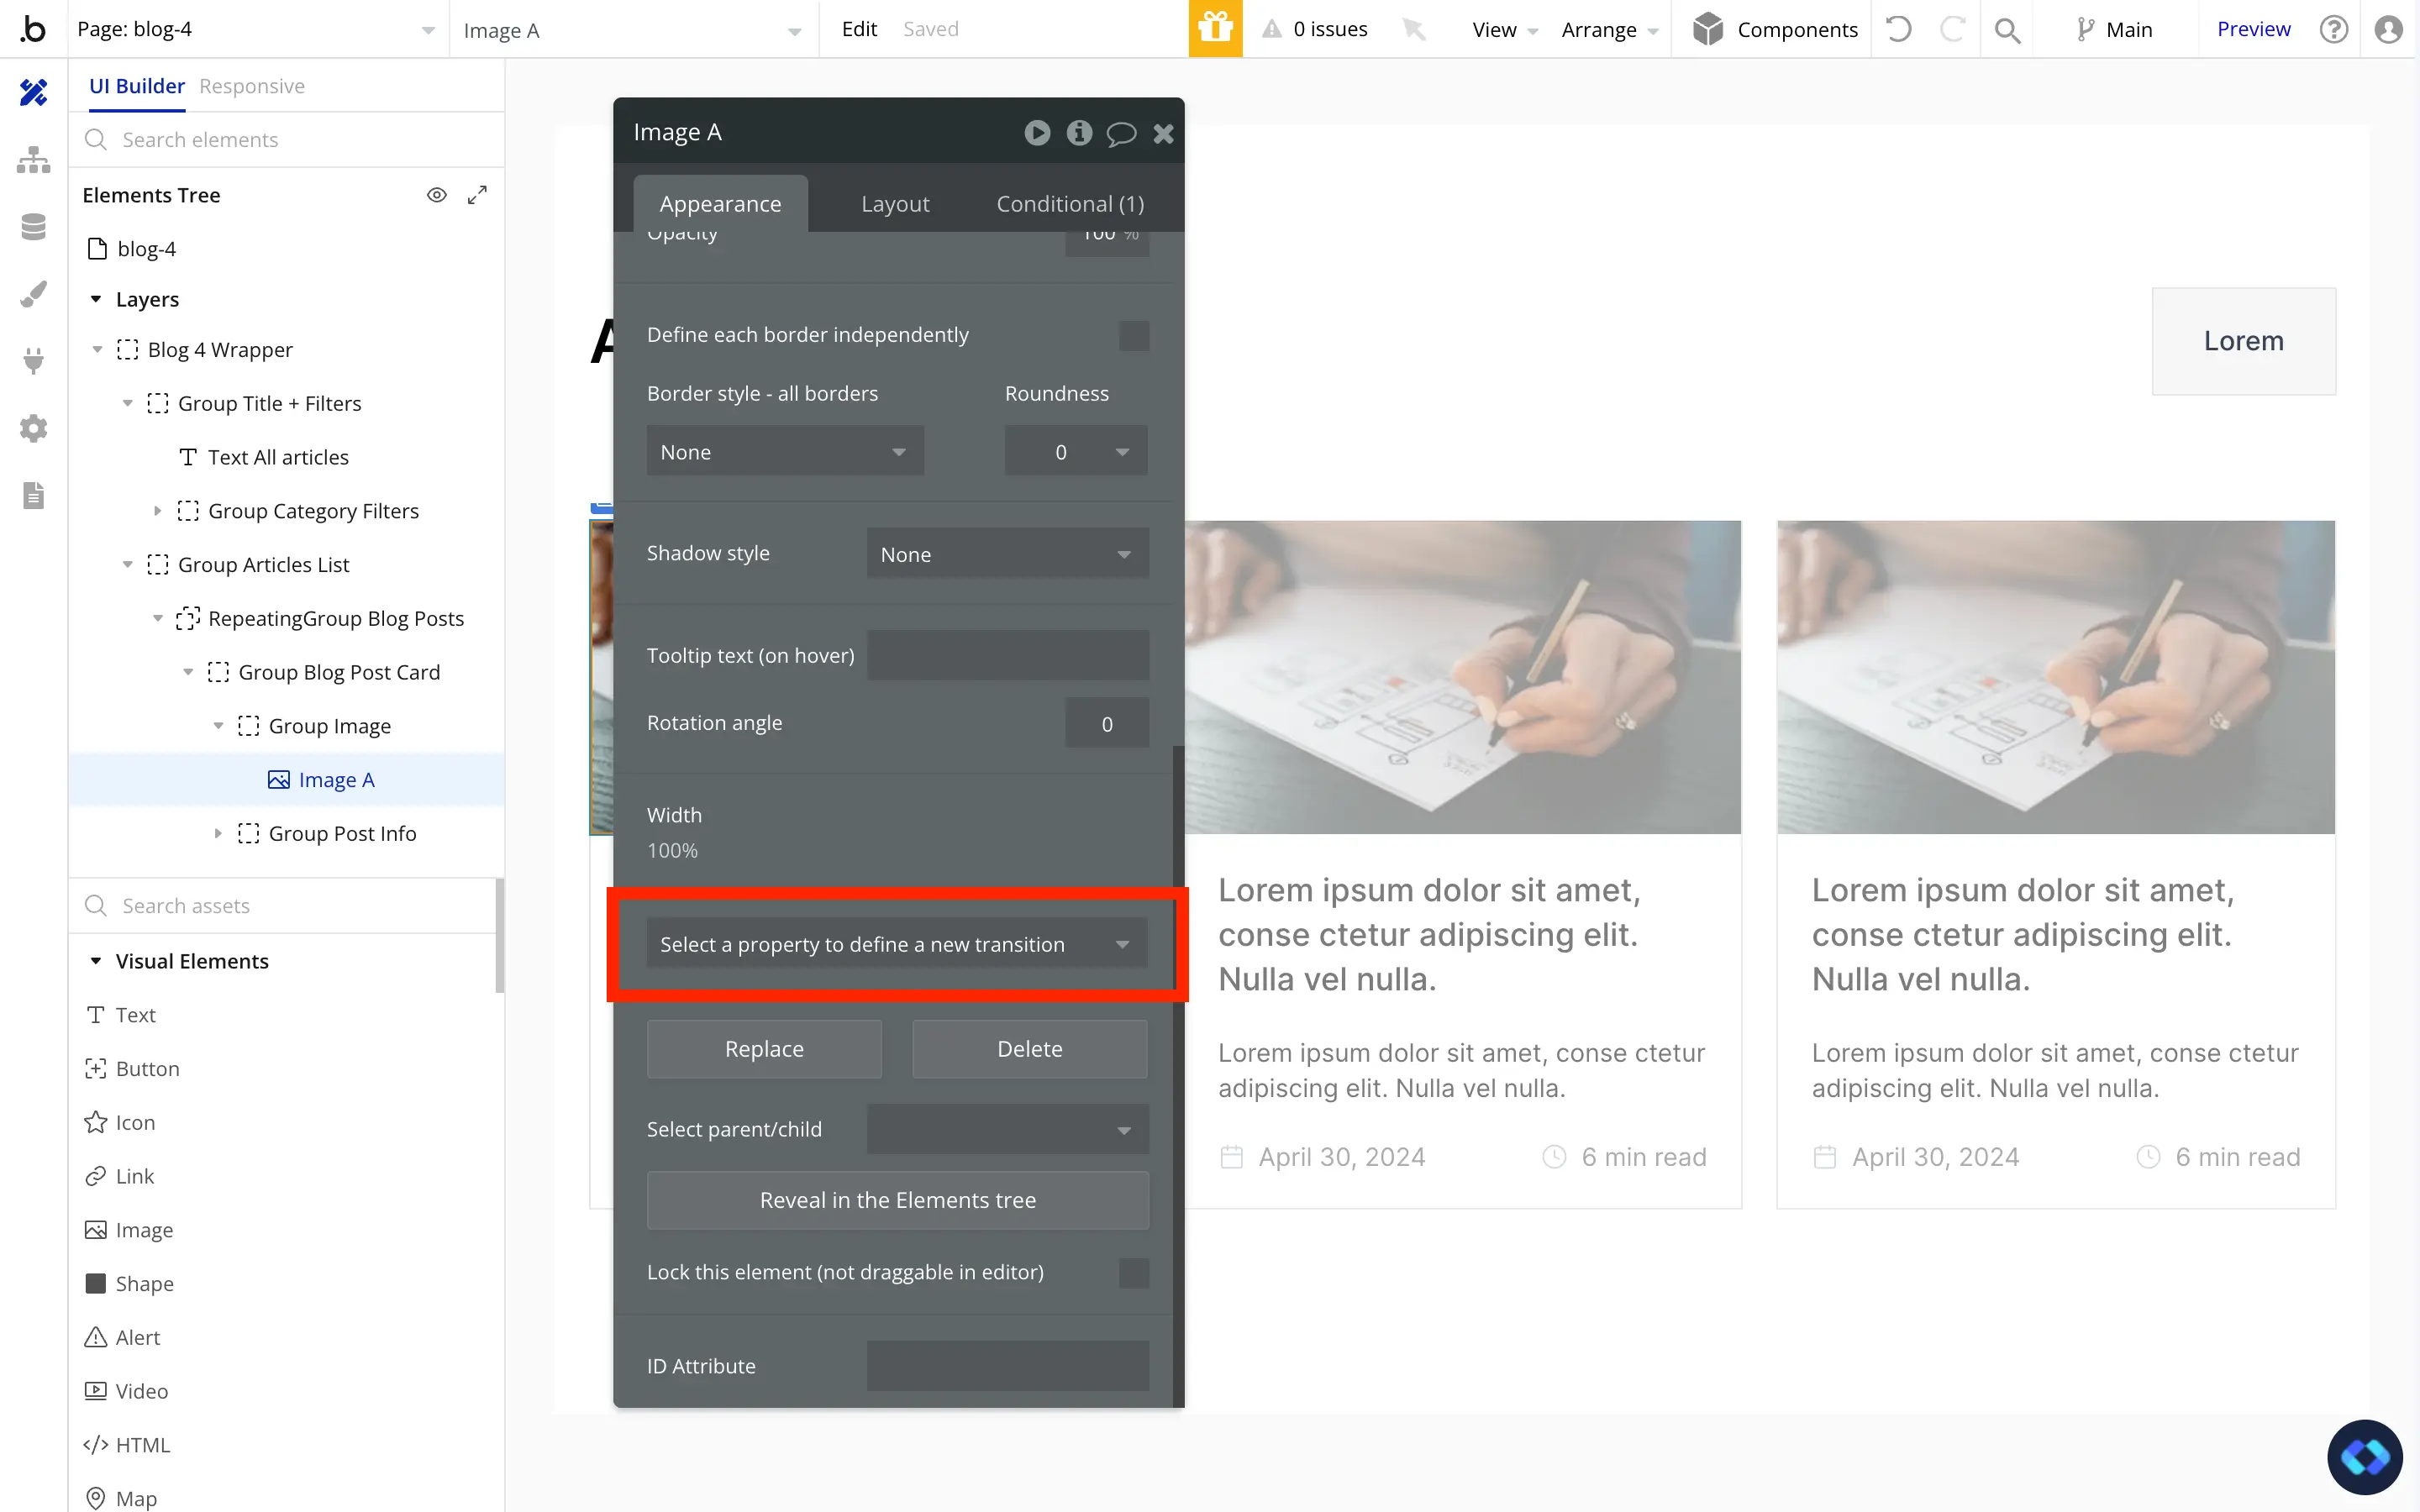
Now select the Width property and you will see two new options, which are the Duration and the Type of Transition.
Feel free to make some testing to find the values you prefer, but in my case I'll set it to "Ease-In-Out" with a 400ms duration.
And there you go !
Your zoom effect on hover is done !

Thomas Couderq
Founder @ Nocodable
I've been building with Bubble for more than four years now. I've launched several projects (with more or less success). I'm passionate about no code and UI Design, which led me to founding Nocodable Components to help founders and professional Bubble developers build faster on Bubble.
Find me on Linkedin