Bubble.io copy to clipboard : easy 2 min guide
Learn the two ways to add a Copy to Clipboard functionality in your Bubble.io application.

Thomas Couderq
16 Jan 2025


Adding the ability to copy something to the clipboard as an easy way to improve your user's experience on your bubble app.
It enables them to realize basic actions like copying an API Key, sharing the link to a page or simply copy a text with a simple click on a button or an icon.
Nothing too fancy, but it's something every Bubble dev must know how to realize.
In this guide, you'll learn how to do just that, in 2 ways.
The first one will be by using some custom Javascript, and the second one will be by using a free plugin.
Let's begin, shall we ?
If you want to keep going further in Bubble, you can also check our article on how to use charts in Bubble.
Approach 1 : Using Javascript to copy to clipboard
Alright, the first approach is the one I like to use most.
Why ? Because in general, I like to avoid using a plugin when I don't really have to.
It helps keep my apps clean, lightweight (as much as possible), don't rely too much on someone else's code, and it's also a good security practice.
Step 1 - Install the Toolbox plugin
The first step for this approach will be to install the Toolbox plugin if it's not already on your app.
This plugin is a must-have for any Bubble app, so go ahead and install it (it's free).

Click here to access the Toolbox plugin
This plugin will enable us to run some custom Javascript inside a workflow we will trigger (amongst many other useful things).
Step 2 - Build our interface
Obviously, you'll need to create your interface.
I created a very basic one with a few elements for the need of this tutorial, so here's how it looks :
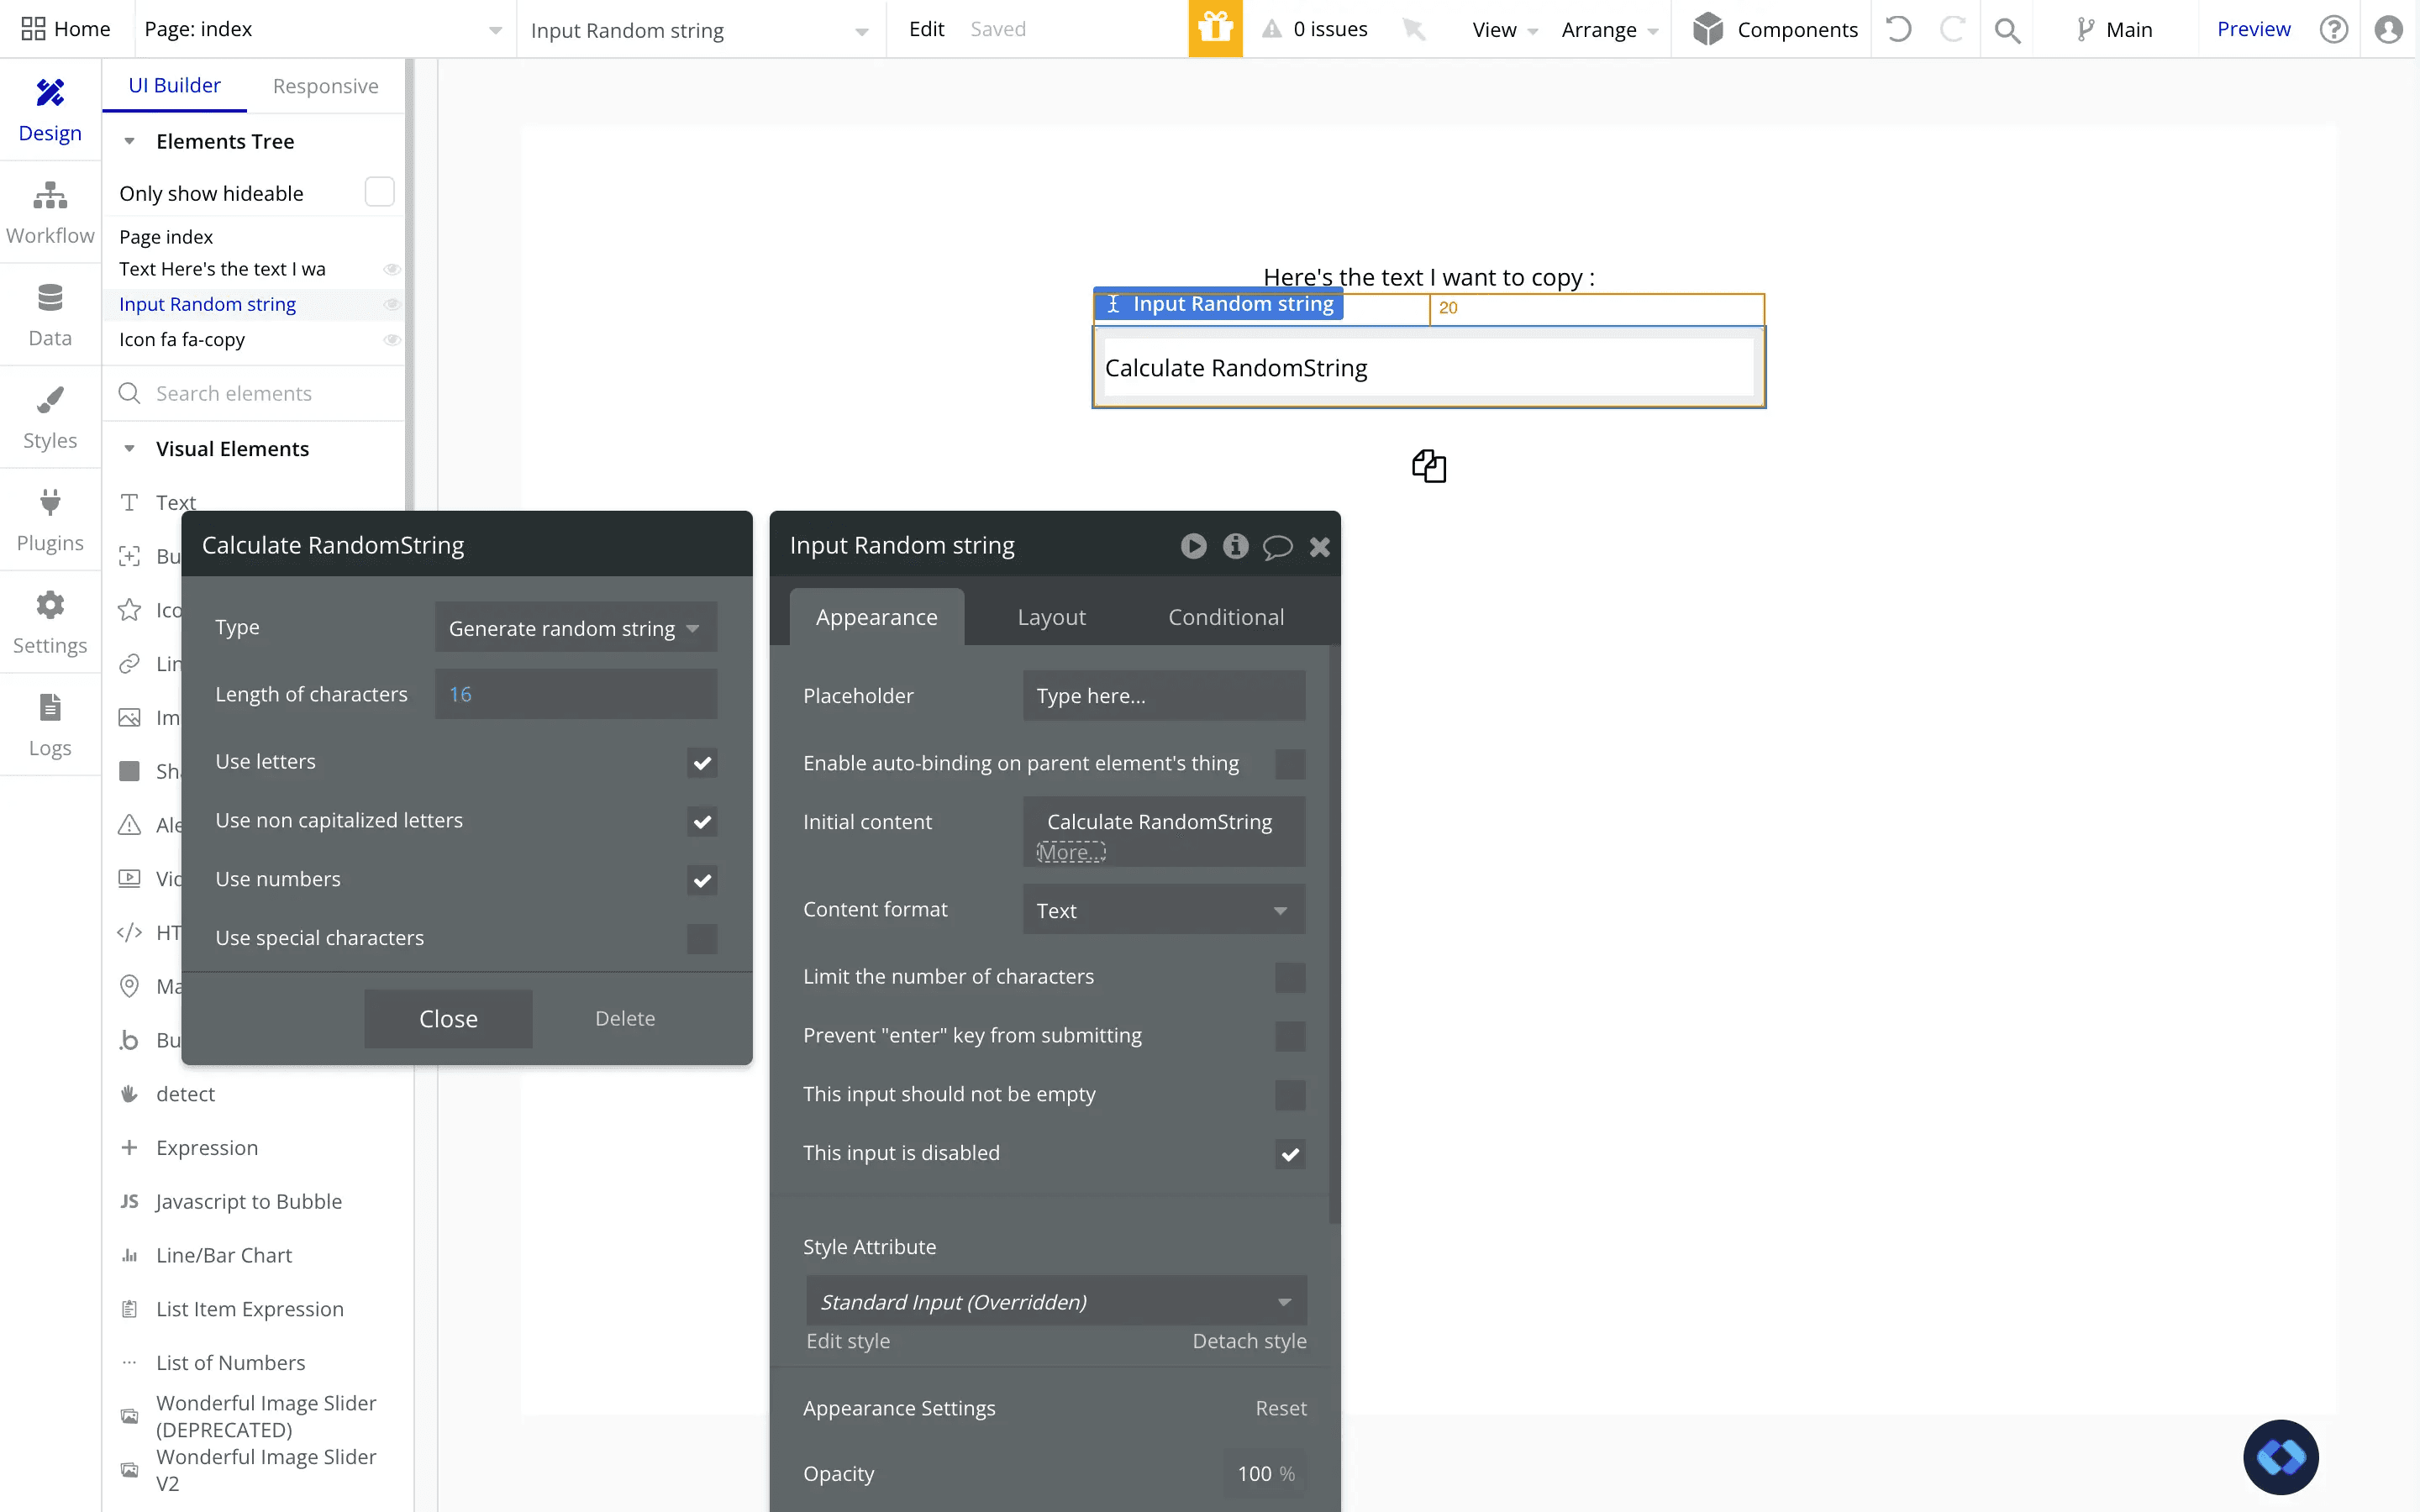
As you can see, I've inserted an input in which I generate a random 16 characters string.
Why an input ? Simply to be able to reference it's value in our Javascript.
Under it, I added an icon that we'll use to trigger our workflow, but you can add anything (button, text, image...).
Step 3 - Building our Copy to Clipboard workflow
Now comes the last step of this approach, which is to actually build the workflow to set the input's text into the user's clipboard.
To do this, we'll simply run some basic Javascript into a workflow.
Let's go ahead and create it :
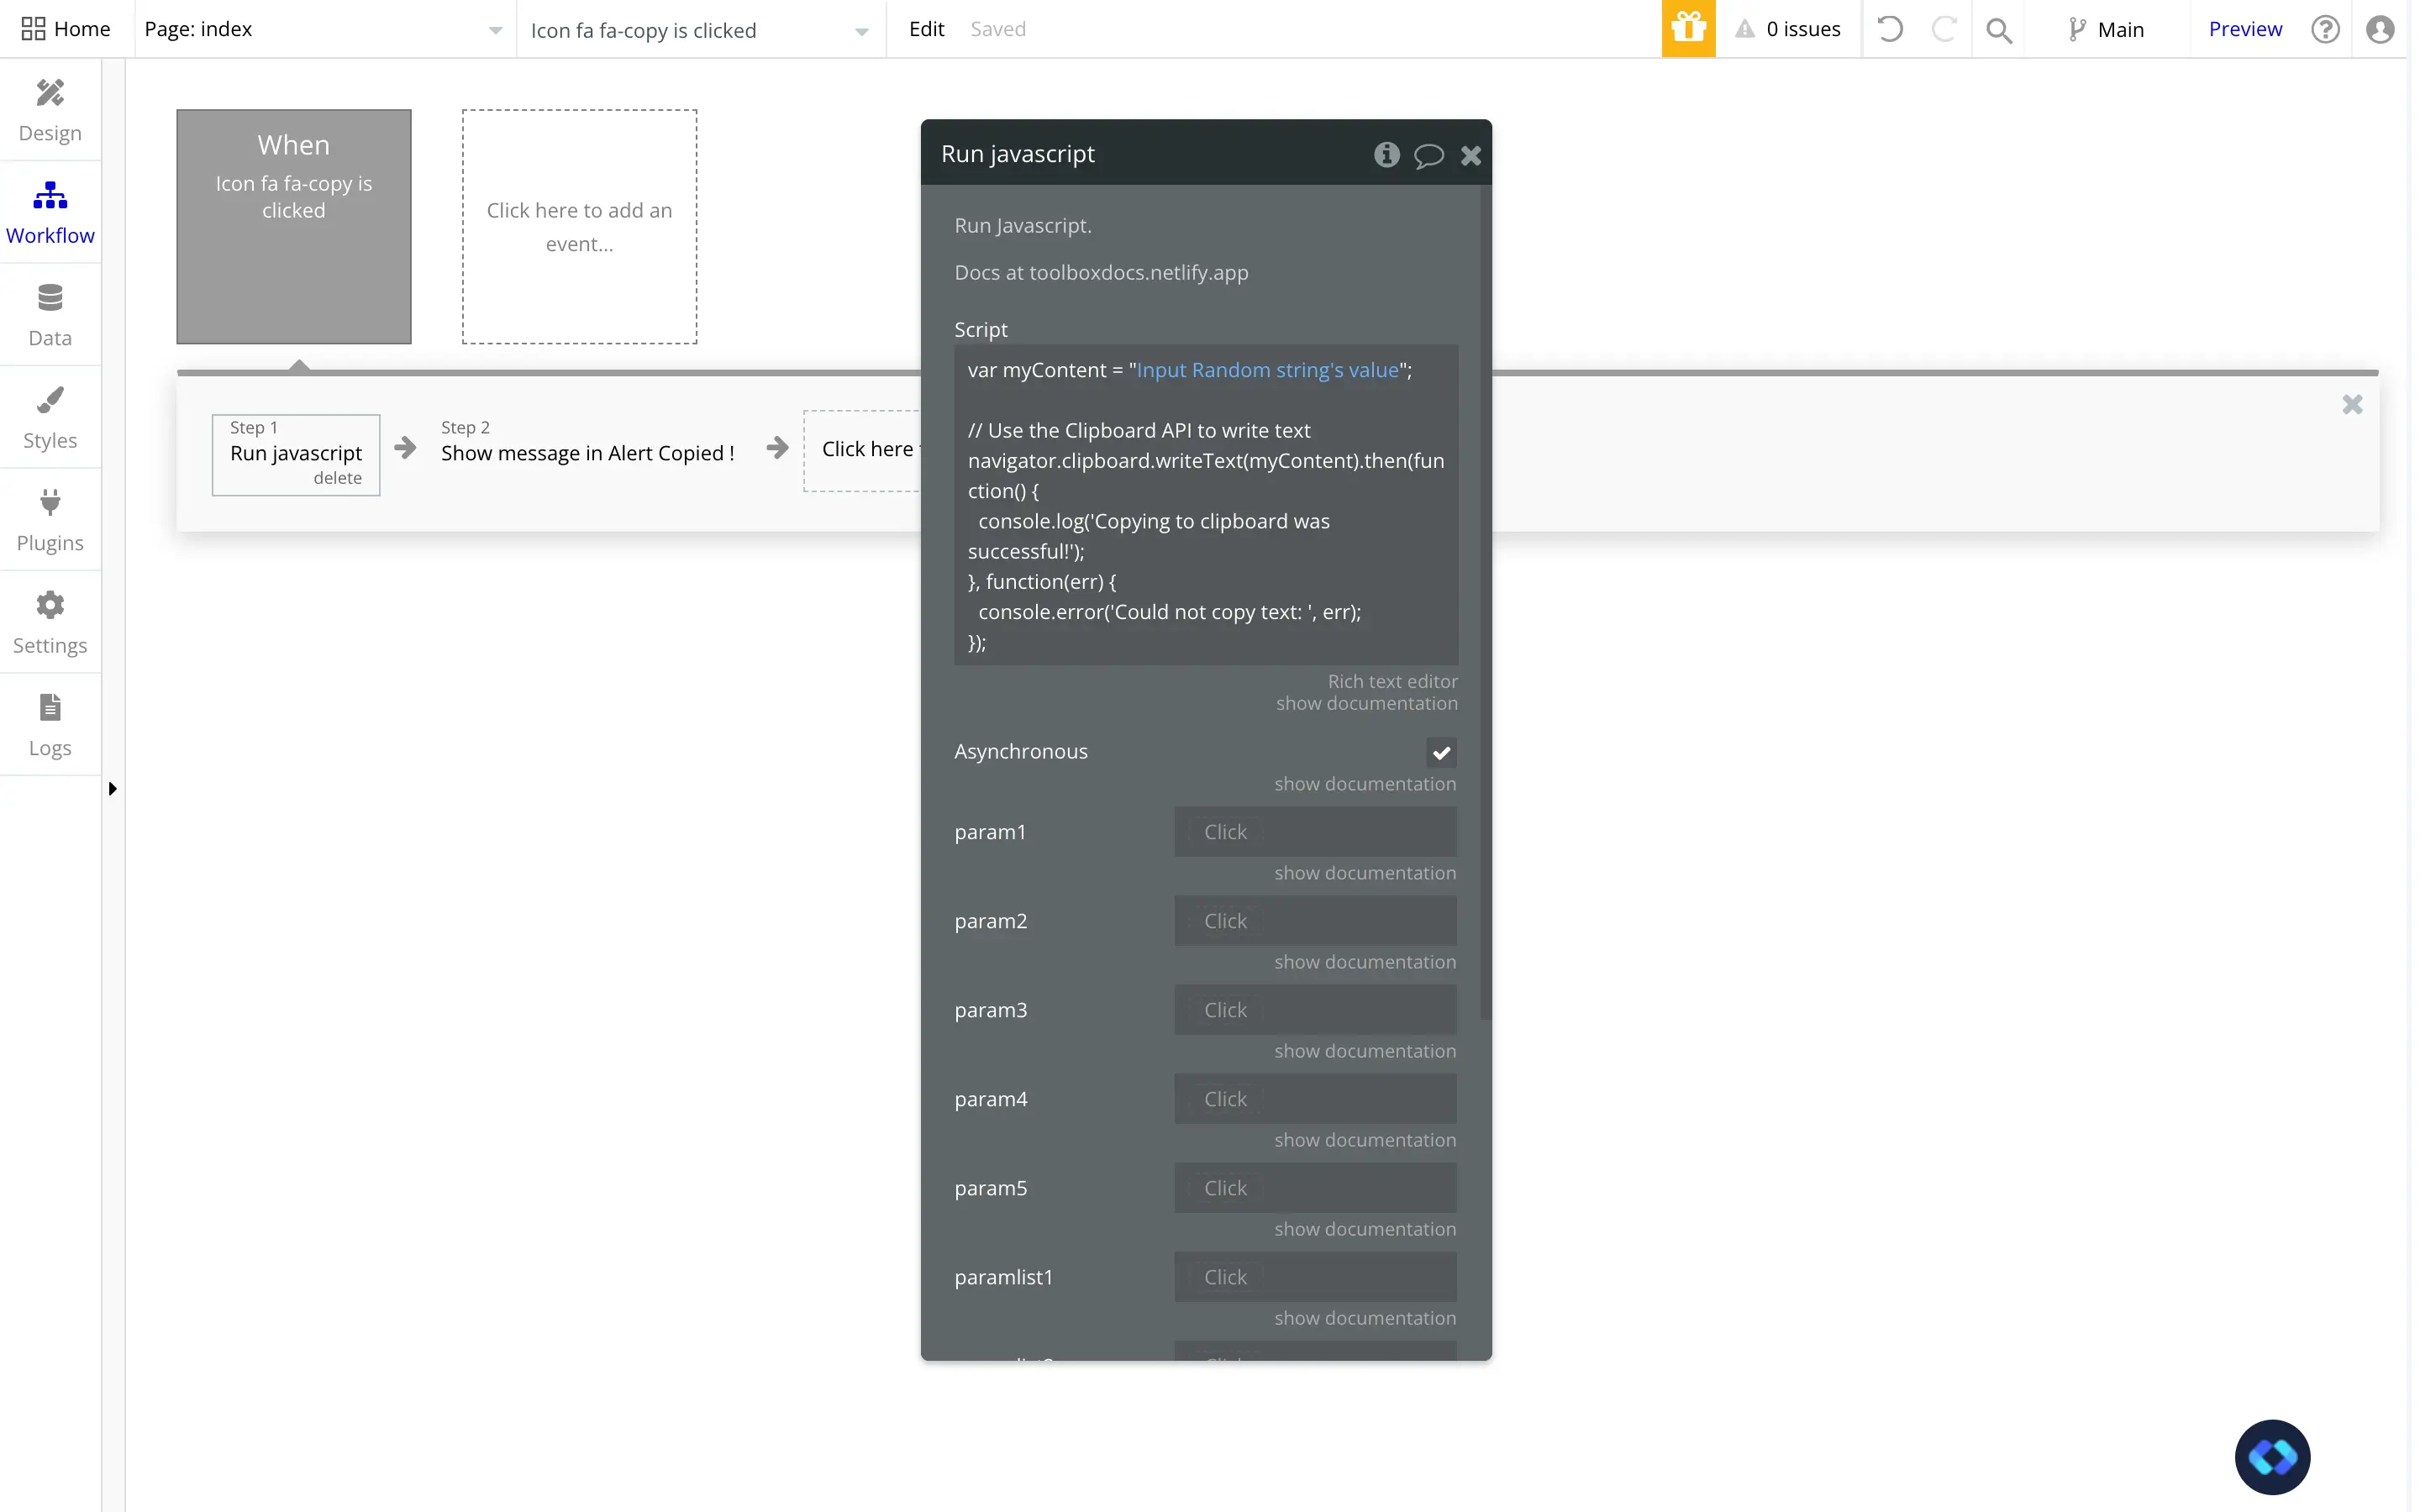
So as you can see I set up a workflow that is triggered by a click on my icon.
The first action of this workflow is a "Run Javascript" action.
As you might have guessed, this action simply executes a given javascript code, which is a good way to interact with your user's browser (and it's clipboard in this case).
Here's the code you need to paste :
Remember to replace yourContentHere by your actual dynamic content (or a static one if you need).
Also, you can uncheck the "Asynchronous" checkbox. This is not mandatory.
When this checkbox is checked, the workflow will not wait for the Javascript code to finish executing to go to the next step.
It can be useful in some cases, but here we want to alert to display only once the content has been effectively copied to the user's clipboard.
So here, unchecking it makes more sense.
Now, make sure to add some sort of feedback for your user.
They need to know that the content has been copied successfully, so you need to add a second step to display an alert, or show a confirmation text or popup.
In my case, I simply added a "Show message in alert box" action to display an alert at the top of the page.
And there you go, the content has been copied to your user's clipboard !
Approach 2 : Using a Plugin to Copy to Clipboard
Alright, for the second approach, we are going to use a plugin.
As I said earlier, I'm not a huge fan of using plugins for such a basic functionality.
But you may have you reasons, so here's how to do it !
Step 1 - Install a copy to clipboard plugin
You have a bunch of copy to clipboard plugin available in Bubble. Most of them are free, so you can pretty much use anyone.
However, I've selected the one below based on it's rating and it's simplicity.
It does the job as intended, and that's pretty much all we ask of this plugin, right?
Click here to access the Copy to Clipboard plugin.

Step 2 - Building our workflow
Basically, this approach is not very different from the first one.
All we'll have to do is set an action into a workflow that the user will trigger when he click on our icon.
Instead of the "Run Javascript" action we used earlier, we will use the plugin's "CopyToClipboard" action.

And there you go. Your workflow is now ready.
Once again, don't forget to add another step to give your user's some sort of feedback once they click the button to copy your content.
Thomas Couderq
Founder @ Nocodable
I've been building with Bubble for more than four years now. I've launched several projects (with more or less success). I'm passionate about no code and UI Design, which led me to founding Nocodable Components to help founders and professional Bubble developers build faster on Bubble.


Blog
Continue reading!
Check out our other tutorials to continue improving your Bubble skills!